My kids ate this for dessert three nights in a row before I even mentioned it was Greek yogurt. THREE NIGHTS. They had no idea.
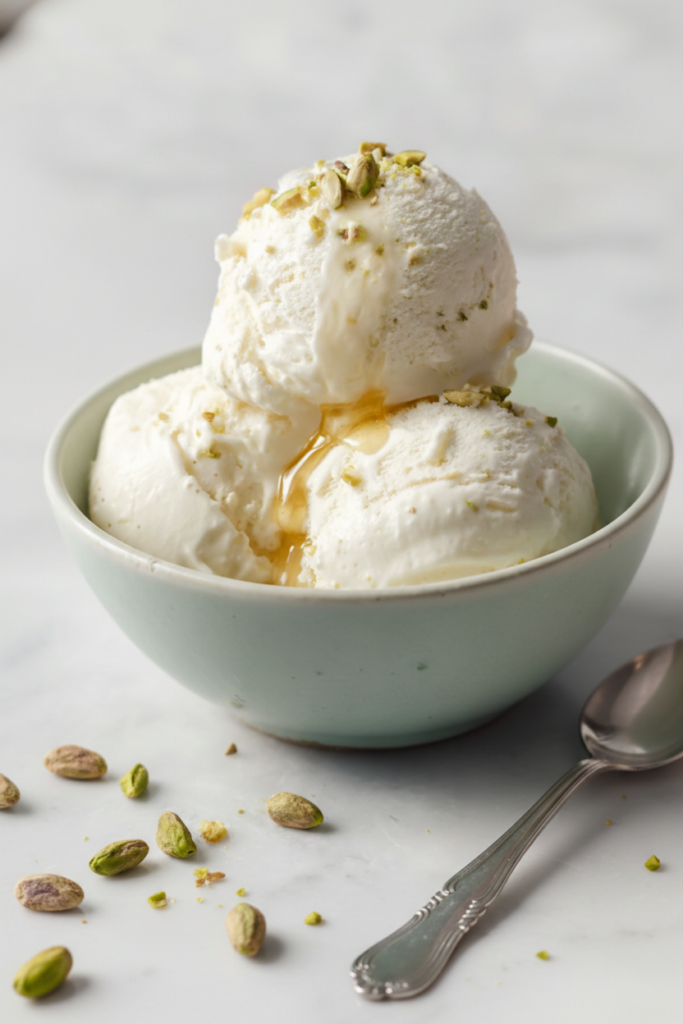
Four ingredients. No eggs, no cream, no custard, no thermometer drama. Just whisk, chill, churn, freeze. Maple syrup and vanilla for sweetness and warmth, a pinch of salt to balance the tang. It comes out genuinely creamy, like ACTUAL ice cream and not a sad frozen yogurt situation.
Why Greek Yogurt Makes Great Ice Cream
Greek yogurt isn’t just a healthier swap for cream…. it’s actually a superior BASE for ice cream. The high PROTEIN content (around 10g per cup) acts as a natural stabilizer, preventing ice crystals from forming and giving you that silky scoopable texture without needing any eggs or cornstarch.
Fat percentage matters here, and this is non-negotiable. Go for 5% (like Fage Total). Anything lower and you’ll get icy, grainy results that nobody wants. The fat delivers richness, while the live cultures’ tanginess cuts through sweetness in a way heavy cream can’t replicate.

No Ice Cream Machine? No Problem
No machine needed…. just patience and a fork.
- Pour the chilled base into a SHALLOW metal pan (a loaf pan works, but metal freezes faster). More surface area = quicker setting.
- Stick it in the coldest part of your freezer, BACK of the bottom shelf.
- Set a timer for every 45 minutes to an hour (yes, more often than 2 hours!) and scrape firmly with a fork, breaking up every icy chunk. You want tiny, fluffy crystals, not one solid block.
- After 3-4 rounds, switch to a whisk for the final two scrapes…. it aerates the mix and gives you that scoopable, creamy body.
- Total time? Roughly 6-8 hours. Plan accordingly!
How to Store Greek Yogurt Ice Cream Properly
Store it in an AIRTIGHT container with plastic wrap pressed directly onto the surface to block ice crystals. Keep it in the BACK of your freezer, not the door.
- Use a shallow, wide container for faster, more even freezing
- Press plastic wrap directly onto the ice cream before sealing the lid
- Park it in the coldest part of your freezer
- Eat within 1-2 weeks for the creamiest texture (after that, ice crystals creep in)
- Thaw 5-10 minutes on the counter before scooping
- NEVER refreeze once thawed (textural and safety issues)
Greek yogurt base freezes HARDER than traditional ice cream, so that counter rest is NON-NEGOTIABLE! Pull it out 10 minutes before you want to serve…. your patience pays off in perfectly scoopable bowls.
FAQ: Your Greek Yogurt Ice Cream Questions
Can I use honey instead of maple syrup?
Honey works fine, just use a little less (it’s sweeter than maple). Agave also does the job.
Can I add mix-ins like berries or chocolate?
Toss them in during the last minute of churning, or layer into the container before the final freeze. My move: mashed raspberries swirled in!
Can I use regular or low-fat yogurt?
Full-fat is the way. Low-fat gets icy and the texture falls flat. Save the 2% for your morning parfait… this isn’t the place to SKIMP.
More Recipes You’ll Enjoy
- Raspberry Frozen Yogurt
- Raspberry Ice Cream
- Watermelon Ice Cream
- Raspberry Frozen Yogurt Bites
- Berry Yogurt Parfait Trifle
- Tangy Raspberry Sorbet
Healthy Greek Yogurt Ice Cream
Ingredients
Method
- In a medium bowl or container, whisk together the Greek yogurt, maple syrup, vanilla extract, and salt until completely smooth and well combined. Cover and refrigerate for at least 30 minutes, or up to 2 hours, before churning (or freeze directly for 8 hours if you don't have a ice cream machine).
- Pour the chilled yogurt mixture from Step 1 into your ice cream machine and churn according to the manufacturer's instructions (typically 20-25 minutes). The mixture should reach a soft-serve consistency when done.
- Transfer the churned ice cream from Step 2 to a freezer-safe container and freeze for at least 4-6 hours, or overnight, until firm enough to scoop. If you don't have an ice cream machine, you can skip Step 2 and freeze the mixture from Step 1 directly for 8 hours, breaking it up with a fork every 2 hours to create a granita-like texture.
- Remove the frozen ice cream from the freezer 5-10 minutes before serving to allow it to soften slightly for easier scooping. Scoop into bowls or cones and add your favorite toppings such as fresh berries, granola, nuts, or additional maple syrup drizzle.