I waited SIX HOURS for my first batch of homemade ice cream to freeze, then stood at the freezer with a spoon. Worth every minute.
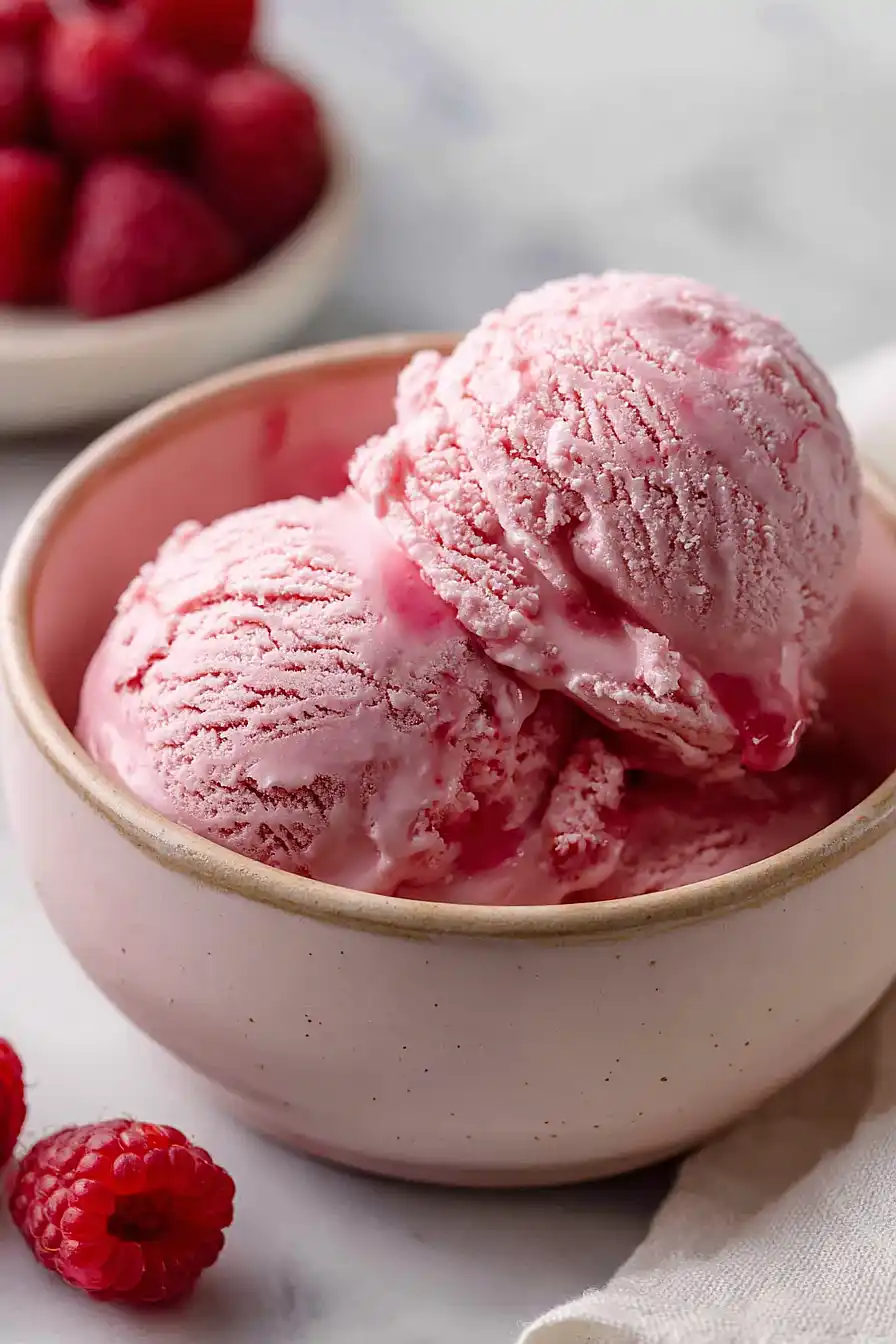
Bright pink, ultra creamy, REAL raspberry flavor in every bite. The custard takes 10 minutes. The puree takes two.
The rest is just waiting (which is the actual hard part).
Why You Need to Chill the Base
- Ice cream machines NEED a cold base to function. Hot custard won’t freeze, period.
- Your mixture must hit 40°F or below before churning. Anything warmer delivers icy, grainy texture instead of smooth.
- Skimp on rest time and the raspberry flavor stays flat. The chill lets vanilla, eggs, and fruit actually MINGLE.
- In a hurry? Nest the bowl in an ice bath and whisk every few minutes. Cuts chilling roughly in half.
- Cold base churns faster… which means LESS ice crystal formation and creamier scoops at the end.
The chill step is doing real work here. Skip it and you’ll taste the difference (and not in a good way).
How to Get a Smooth, Seed-Free Puree
Blend those raspberries until they’re completely smooth, no lumps hanging around. Then pour the mixture through a FINE-MESH strainer into a bowl, pressing with a spatula to push the puree through. Toss the seeds. Done….smooth puree, zero grit.
Storing & Scooping Your Ice Cream
- CONTAINER MATTERS: Use a shallow, airtight, freezer-safe container. (Wide and shallow freezes more evenly than deep tubs)
- WRAP THE SURFACE: Press plastic wrap directly onto the ice cream before sealing. No air contact means no ice crystals…. simple physics!
- FREEZER AT 0°F OR BELOW: Anything warmer and you get grainy, icy disappointment. Check that dial!
- EAT WITHIN 2-3 WEEKS: After that, the texture breaks down even if the flavor hangs on. (Homemade lacks the stabilizers in store-bought)
- THE 5-MINUTE SCOOP RULE: Let it sit at room temp 5-10 minutes, then run your scoop under hot water. Dry it off and dig in… perfect spheres every time!
- NEVER REFREEZE MELTED ICE CREAM: It turns into an icy brick. (Eat the melty stuff straight from the container, no judgment)
Similar Recipes
- Smooth Watermelon Ice Cream
- Elegant Raspberry Pistachio Semifreddo
- Tangy Raspberry Sorbet
- Homemade Raspberry Frozen Yogurt
- Tangy Raspberry Frozen Yogurt Bites
- Healthy Greek Yogurt Ice Cream
Estimated Nutrition
Estimated nutrition for the whole recipe (without optional ingredients):
- Calories: 2000-2150
- Protein: 15-18 g
- Fat: 150-160 g
- Carbohydrates: 170-185 g
Ingredients
For the custard base:
- 4 egg yolks (room temperature, about 70°F)
- 2/3 cup sugar (Domino granulated sugar)
- 1/2 tsp salt
- 2 cups heavy cream (Horizon Organic)
- 1 tsp vanilla extract
For the fruit mix:
- 12 oz raspberries
- 1.5 tbsp lemon juice (freshly squeezed)
Step 1: Strain the Berries
- 12 oz raspberries
- 1.5 tbsp lemon juice
Blend the raspberries until completely smooth, then pass through a fine-mesh strainer into a bowl, pressing gently with a spatula to extract all the puree while leaving the seeds behind.
This step can be done first since it requires no cooking and the puree can rest while you prepare the custard base.
Set aside at room temperature.
Step 2: Thicken the Custard
- 4 egg yolks
- 2/3 cup sugar
- 1/2 tsp salt
- 2 cups heavy cream
Combine the egg yolks, sugar, salt, and heavy cream in a heavy-bottomed pot.
Heat the mixture over medium heat, stirring constantly with a whisk or wooden spoon, until it reaches 165°F on an instant-read thermometer—this pasteurizes the eggs and creates a silky custard base.
The mixture should look slightly thickened and coat the back of a spoon.
I like to use a pot with a light-colored interior so I can monitor the color of the custard as it heats.
Step 3: Blend and Chill
- 1 tsp vanilla extract
- raspberry puree from Step 1
Pour the hot custard from Step 2 into a clean bowl.
Gently fold in the vanilla extract, then fold in the raspberry puree from Step 1 until fully incorporated and the mixture has a beautiful pink color.
Cover the bowl and refrigerate for at least 6-8 hours, or until completely chilled to 40°F or below.
I find that chilling overnight gives you the best texture in the final ice cream—the flavors also meld beautifully during this resting time.
Step 4: Churn Until Firm
- chilled custard mixture from Step 3
Pour the chilled custard from Step 3 into your ice cream machine and churn according to the manufacturer’s instructions, typically 20-25 minutes, until the mixture reaches a soft-serve consistency.
Transfer the churned ice cream to a freezer-safe container and freeze for at least 4-6 hours until firm enough to scoop.
The churning incorporates air and creates that smooth, creamy texture that sets homemade ice cream apart from store-bought versions.
Classic Raspberry Ice Cream
Ingredients
Method
- Blend the raspberries until completely smooth, then pass through a fine-mesh strainer into a bowl, pressing gently with a spatula to extract all the puree while leaving the seeds behind. This step can be done first since it requires no cooking and the puree can rest while you prepare the custard base. Set aside at room temperature.
- Combine the egg yolks, sugar, salt, and heavy cream in a heavy-bottomed pot. Heat the mixture over medium heat, stirring constantly with a whisk or wooden spoon, until it reaches 165°F on an instant-read thermometer—this pasteurizes the eggs and creates a silky custard base. The mixture should look slightly thickened and coat the back of a spoon. I like to use a pot with a light-colored interior so I can monitor the color of the custard as it heats.
- Pour the hot custard from Step 2 into a clean bowl. Gently fold in the vanilla extract, then fold in the raspberry puree from Step 1 until fully incorporated and the mixture has a beautiful pink color. Cover the bowl and refrigerate for at least 6-8 hours, or until completely chilled to 40°F or below. I find that chilling overnight gives you the best texture in the final ice cream—the flavors also meld beautifully during this resting time.
- Pour the chilled custard from Step 3 into your ice cream machine and churn according to the manufacturer's instructions, typically 20-25 minutes, until the mixture reaches a soft-serve consistency. Transfer the churned ice cream to a freezer-safe container and freeze for at least 4-6 hours until firm enough to scoop. The churning incorporates air and creates that smooth, creamy texture that sets homemade ice cream apart from store-bought versions.