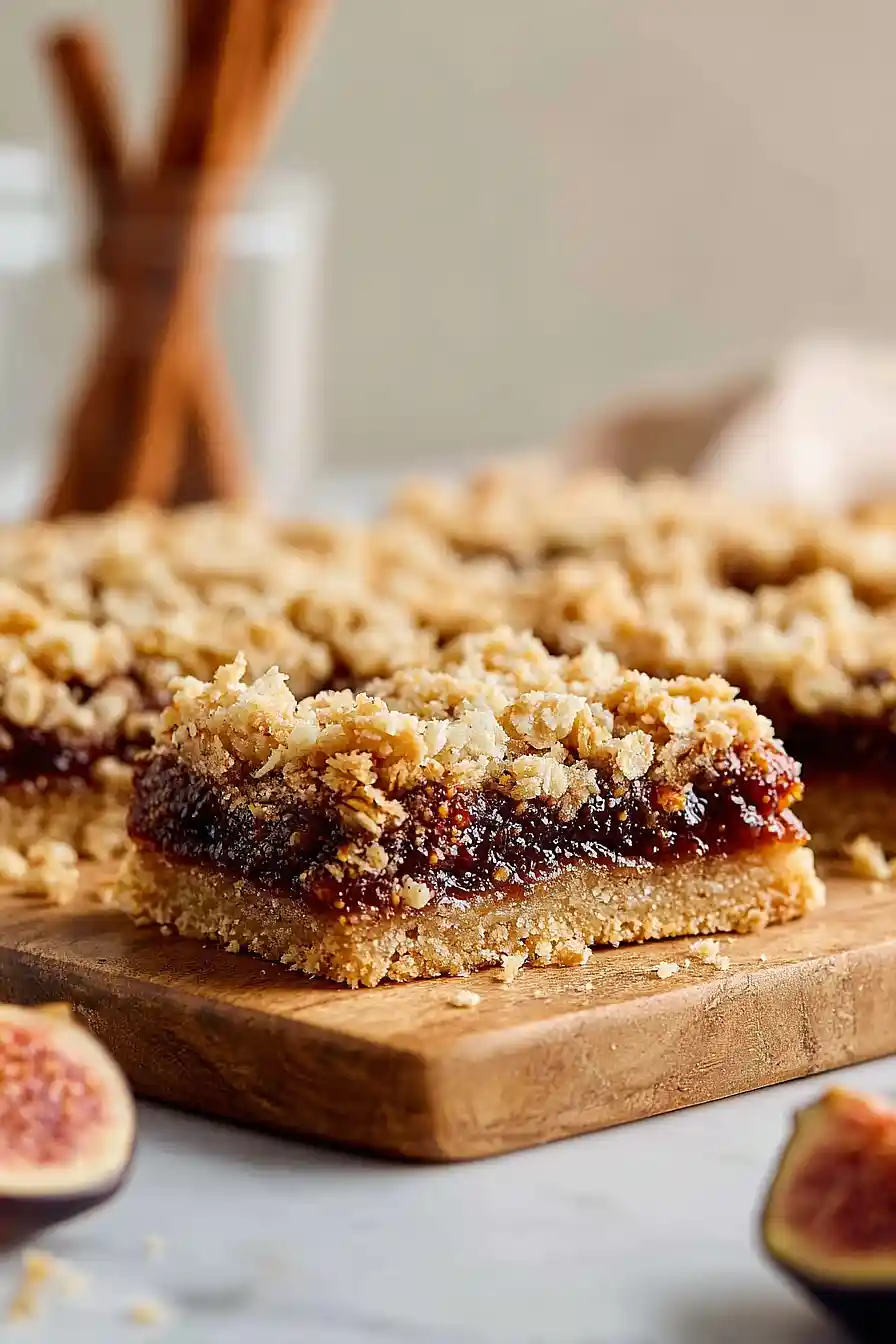
Fig Newtons had a real moment in my lunchbox back in the day. Soft, chewy, kind of forgettable. THIS version? Made with real figs, brown sugar, lemon zest, and a buttery oat crumble situation? Not even the same cookie… err, bar.
It’s like if a Fig Newton grew up, got its life together, and decided to be the MAIN CHARACTER. The filling simmers for 45 minutes until it’s thick and jammy. The crust bakes up golden and crisp around all the edges.
Bake a pan. Try just one. I dare you.
Fresh vs. Dried Figs: Does It Matter?
Fresh figs hit peak season June through October (good luck finding them plump and cheap outside that window). Outside of summer, dried figs are your realistic swap and they actually concentrate the sweetness
- Use about 1 1/2 cups of STEMMED dried figs per 24 fresh figs called for here
- Soak them in warm water for 20 minutes before simmering, and cut back the brown sugar to ROUGHLY 2 tablespoons since dried figs pack way more sugar naturally
- Black Mission, Calimyrna, or Brown Turkey all work…just confirm they’re soft and pliable, not rock-hard
- Skip any that look crystallized or overly dry (they’ll stay chewy no matter how long you cook them
How to Get Clean, Even Cuts
- CHILL the bars for at least an hour before slicing. Cold filling holds its shape instead of dragging across the knife.
- Use a sharp chef’s knife (*not* serrated). Wipe the blade with a damp cloth between EVERY single cut.
- Dip the knife in hot water, dry it off, then press straight down. No sawing… sawing tears the crust and smears fig everywhere.
- Trim the rough outer edges first for bakery-style bars. The scraps (obviously) are yours to devour immediately.
Cold bars, hot blade, steady hands. That is the whole secret.
Tips for a Perfect Crumbly Topping
MELTED butter is what creates those chunky clusters that bake into crispy bits! Mix just until coated…. overworking makes paste, not crumbs.
Squeeze portions in your palm before scattering to form bakery-style clumps with crispy edges. Old fashioned oats are NON-NEGOTIABLE (instant oats turn to mush and kill the texture contrast).
Distribute the topping UNEVENLY, leaving gaps where the jammy filling peeks through. Thicker clusters in some spots, sparse in others, that’s what gives the bars their personality.
RESIST pressing the crumble down! Let it sit loose so heat circulates around every piece.
Pop the reserved crumble in the fridge for 10 minutes while you spread the filling…. cold clumps hold their shape WAY better during baking.
How to Store Fig Bars
- ROOM TEMPERATURE: Airtight container for up to 5 days. Layer with parchment so the filling doesn’t fuse bars together.
- REFRIGERATOR: Sealed container extends life to 2 weeks. The filling firms up nicely when chilled.
- FREEZER: Wrap individually in plastic, then bag and freeze for 3 months. Thaw 20 minutes before eating.
- ALWAYS LAYER: Use parchment between stacked bars (the fig filling is ridiculously sticky!).
Can You Make These Ahead of Time?
These bars HANDLE make-ahead beautifully…. Cook the filling 1-2 days ahead and stash it in the fridge (the flavors actually DEEPEN overnight as the spices bloom).
Fully baked bars keep at room temp for 3 days, or freeze between parchment layers for up to 2 months! Thaw at room temperature before serving….
Recipes Like This One
- Pecan Fig Cookies
- Sweet Raspberry Crumble
- Tasty Blueberry Cream Cheese Bars
- Rich Pumpkin Pie Crumble Bars
- Mouthwatering Fig Cake
- Irresistible Fig Cheesecake
Estimated Nutrition
Estimated nutrition for the whole recipe (without optional ingredients):
- Calories: 4100-4400
- Protein: 35-45 g
- Fat: 160-180 g
- Carbohydrates: 610-650 g
Ingredients
For the filling:
- 24 figs (stems removed and halved)
- 1/3 cup brown sugar
- 1 1/2 tbsp lemon zest
- 1/4 tsp salt
- 1 1/2 tsp vanilla essence
- 1/4 tsp ground cinnamon
For the crust and crumble:
- 1 cup butter, melted
- 2 1/4 cups flour
- 2 cups old fashioned oats
- 1 cup brown sugar
- 3/4 tsp salt
- 3/4 tsp baking powder
- 1 tbsp vanilla essence
Step 1: Simmer the Fig Filling
- 24 figs
- 1/3 cup brown sugar
- 1 1/2 tbsp lemon zest
- 1/4 tsp salt
- 1 1/2 tsp vanilla essence
- 1/4 tsp ground cinnamon
Combine the halved figs, 1/3 cup brown sugar, lemon zest, 1/4 tsp salt, 1 1/2 tsp vanilla essence, and ground cinnamon in a medium pot.
Bring to a boil over medium heat, then reduce heat and simmer for about 45 minutes, stirring occasionally and mashing the figs against the side of the pot until they break down into a chunky paste.
Once the mixture is thick and deeply jammy, remove from heat and let cool for 10 minutes.
Blend the cooled fig mixture until completely smooth using an immersion blender or food processor—I find a smooth filling spreads more evenly and creates a better texture contrast with the crumbly oat crust.
Set aside to cool completely while you prepare the base.
Step 2: Mix the Oat Crust
- 1 cup butter, melted
- 2 1/4 cups flour
- 2 cups old fashioned oats
- 1 cup brown sugar
- 3/4 tsp salt
- 3/4 tsp baking powder
- 1 tbsp vanilla essence
Preheat your oven to 350°F.
While the fig filling cools, prepare your baking pan by lining it with foil and lightly greasing it—this makes it incredibly easy to lift the finished bars out cleanly.
In a large bowl, combine the melted butter with the flour, old fashioned oats, 1 cup brown sugar, 3/4 tsp salt, baking powder, and 1 tbsp vanilla essence.
Mix until the ingredients are evenly distributed and the mixture resembles coarse breadcrumbs with some slightly larger oat clusters remaining.
Step 3: Layer Crust and Fruit
- oat crust mixture from Step 2
- fig filling from Step 1
Press all but 1 1/2 cups of the oat mixture from Step 2 firmly into the bottom of your prepared pan, creating an even layer.
Spread the cooled fig filling from Step 1 evenly over the base layer, leaving about 1/4 inch from the edges.
I like to use an offset spatula for this so the filling stays uniform without creating holes in the crust below.
Crumble the reserved 1 1/2 cups of oat mixture over the top, distributing it unevenly for a rustic appearance and ensuring some spots have thicker clusters for textural contrast.
Step 4: Bake, Cool, and Slice
Bake at 350°F for 30-35 minutes, until the top crust is light golden brown and the filling is set but still slightly soft when gently pressed.
Let the bars cool completely in the pan for at least 30 minutes so they set properly.
Lift the entire sheet from the pan using the foil edges, then carefully peel back the foil and transfer to a cutting board.
Slice into even bars with a sharp knife, wiping the blade between cuts for clean edges.
Ingredients
Method
- Combine the halved figs, 1/3 cup brown sugar, lemon zest, 1/4 tsp salt, 1 1/2 tsp vanilla essence, and ground cinnamon in a medium pot. Bring to a boil over medium heat, then reduce heat and simmer for about 45 minutes, stirring occasionally and mashing the figs against the side of the pot until they break down into a chunky paste. Once the mixture is thick and deeply jammy, remove from heat and let cool for 10 minutes. Blend the cooled fig mixture until completely smooth using an immersion blender or food processor—I find a smooth filling spreads more evenly and creates a better texture contrast with the crumbly oat crust. Set aside to cool completely while you prepare the base.
- Preheat your oven to 350°F. While the fig filling cools, prepare your baking pan by lining it with foil and lightly greasing it—this makes it incredibly easy to lift the finished bars out cleanly. In a large bowl, combine the melted butter with the flour, old fashioned oats, 1 cup brown sugar, 3/4 tsp salt, baking powder, and 1 tbsp vanilla essence. Mix until the ingredients are evenly distributed and the mixture resembles coarse breadcrumbs with some slightly larger oat clusters remaining.
- Press all but 1 1/2 cups of the oat mixture from Step 2 firmly into the bottom of your prepared pan, creating an even layer. Spread the cooled fig filling from Step 1 evenly over the base layer, leaving about 1/4 inch from the edges. I like to use an offset spatula for this so the filling stays uniform without creating holes in the crust below. Crumble the reserved 1 1/2 cups of oat mixture over the top, distributing it unevenly for a rustic appearance and ensuring some spots have thicker clusters for textural contrast.
- Bake at 350°F for 30-35 minutes, until the top crust is light golden brown and the filling is set but still slightly soft when gently pressed. Let the bars cool completely in the pan for at least 30 minutes so they set properly. Lift the entire sheet from the pan using the foil edges, then carefully peel back the foil and transfer to a cutting board. Slice into even bars with a sharp knife, wiping the blade between cuts for clean edges.