Every party has that one dish. The one people hover around, the one that empties out first while everything else just sits there being polite. THIS is that dish.
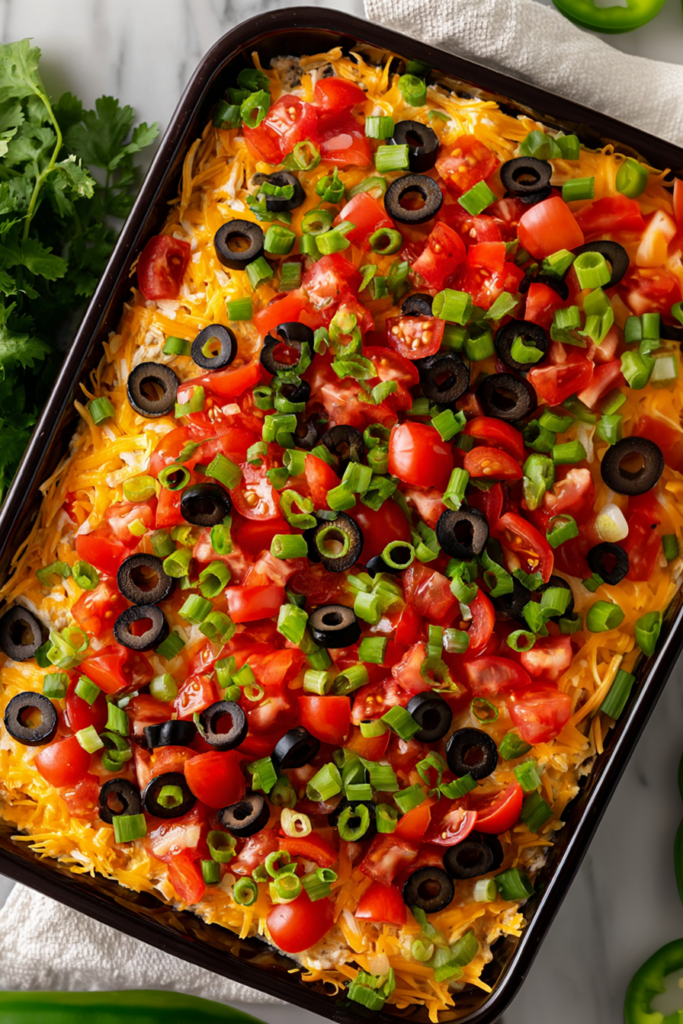
Layer after layer after layer of refried beans, guacamole, sour cream, cheese, olives, tomatoes, scallions. It LOOKS like a project, but here’s the secret: it’s basically just opening things and spreading them into a pan. The hardest part is resisting the guacamole with a spoon before it makes it onto the dish.
Make it a few hours ahead, or honestly just throw it together 30 minutes before people arrive and pop it in the fridge. Works every single time. Chips are mandatory. Napkins are encouraged.
How to Layer It for the Best Scoops
Use a wide, shallow dish (9×13 is your friend) so each scoop grabs multiple layers at once. Press every layer down FIRMLY, especially the bean base, or your dip will slide into chaos!
Pro move: sprinkle cheese right after sour cream so toppings stick without sinking. Cut straight down (not at an angle) to get the full rainbow in every chip.
Keeping the Avocado from Browning
- LIME JUICE is your first line of defense, and 2 tablespoons is the MINIMUM. Go heavy! Citrus slows that dreaded oxidation (the brown stuff nobody wants to see at a party).
- Press PLASTIC WRAP directly onto the avocado layer before adding the sour cream. Air is the enemy, so suffocate that green goodness.
- That sour cream layer? It’s not just for flavor. It creates a SEAL that blocks oxygen from reaching the avocado below. Spread it edge to edge, leaving zero gaps.
- Leave an AVOCADO PIT pressed into the guac if you’re making it ahead. Old trick, but it actually works (science says the enzymes on the pit’s surface help slow browning).
- Refrigerate IMMEDIATELY and keep that dish covered. The dip will hold for 4 to 6 hours max before the avocado starts fighting back.
A little extra lime squeezed across the top right before serving brings back that bright green color and fresh zing.
Make-Ahead & Storage Tips
- Prep the bean layer and guacamole separately up to 24 hours ahead. Store in airtight containers, then assemble right before serving for freshest texture.
- Press plastic wrap DIRECTLY onto the guacamole surface. It blocks air exposure and buys you an extra day before browning kicks in.
- Skip the freezer entirely. Sour cream separates, avocado turns to mush, tomatoes become ice crystals. Just don’t.
- Assembled dip keeps covered in the fridge up to 2 days, though avocado oxidizes even under the sour cream barrier (a natural trade-off).
- Hold cheese, olives, tomatoes, and scallions until assembly day. Pre-shredded cheese clumps weirdly after sitting overnight.
- Stir individual layers gently before re-serving leftovers to refresh textures and redistribute pooled liquid.
Best Chips and Dippers for 7 Layer Dip
- THICK TORTILLA CHIPS (the scoop-shaped ones)… they hold up against seven layers without snapping mid-dip.
- RESTAURANT-STYLE ROUNDS work fine for casual scooping, but skip the thin fragile ones (they crack under pressure).
- FRITOS CORN CHIPS add serious crunch and that salty corn flavor (surprisingly addictive here).
- MINI BELL PEPPERS and sliced cucumbers for the low-carb crowd…. pretty, crisp, sturdy.
- PITA CHIPS if you want something different (thicker than tortilla, holds heavy layers well).
You May Also Like
- Easy BLT Dip
- Cheesy Crockpot Taco Dip
- Spicy Crockpot Corn Dip
- Mediterranean Layered Greek Hummus Dip
- Quick Cold Spinach Artichoke Dip
- Cheesy Buffalo Chicken Dip with Ground Chicken
Estimated Nutrition
Estimated nutrition for the whole recipe (without optional ingredients):
- Calories: 2100-2400
- Protein: 65-80 g
- Fat: 150-170 g
- Carbohydrates: 120-140 g
Ingredients
For the bean layer:
- 16 oz refried beans (I prefer Rosarita Traditional for a smoother texture)
- 10 oz tomatoes with chiles (drained well to prevent a watery dip)
- 2.5 tbsp taco seasoning
For the guacamole layer:
- 3 avocados (pitted and mashed until mostly smooth)
- 2 tbsp lime juice
- 1/4 cup cilantro
- 1 tsp garlic salt
- 1/4 tsp ground cumin
For the assembly:
- 1.5 cups sour cream (I like Daisy for its clean flavor and thickness)
- 2 cups cheddar (shredded from the block for better moisture)
- 1/2 cup black olives (sliced into 1/4-inch rounds)
- 3/4 cup tomatoes
- 1/2 cup scallions (sliced into 1/8-inch pieces)
- 1/2 tsp crushed red pepper flakes (optional for heat)
Step 1: Season and Spread Beans
In a medium bowl, combine the refried beans, drained tomatoes with chiles, and taco seasoning.
Mix thoroughly until well combined and smooth.
Spread this mixture evenly across the bottom of a 9×13 inch baking dish or similar serving dish, creating a compact, even layer.
This bean base is your foundation—make sure it’s pressed down firmly so the subsequent layers won’t sink unevenly.
Step 2: Mash the Avocado Layer
In a separate bowl, combine the pitted avocados, lime juice, cilantro, garlic salt, and ground cumin.
Mash together until mostly smooth—I prefer leaving a few small chunks for texture rather than making it completely uniform.
Gently spread this mixture evenly over the bean layer from Step 1.
The lime juice prevents browning while adding brightness to the guacamole-like layer.
Step 3: Layer the Sour Cream
Dollop the sour cream over the avocado layer and spread it evenly across the top using a spatula or the back of a spoon.
This layer acts as a creamy barrier that keeps the avocado from browning and adds richness to each bite.
Make sure to cover the surface completely but keep it relatively thin—the goal is an even, cohesive layer.
Step 4: Garnish with Colorful Toppings
Sprinkle the shredded cheddar cheese evenly over the sour cream layer, then add the sliced black olives, diced tomatoes, and sliced scallions in decorative layers or scattered across the top.
If you like heat, finish with the crushed red pepper flakes.
The beauty of this dip is in its visual layers—arrange the toppings thoughtfully so each scoop showcases all the components.
I find that shredding cheese fresh from the block rather than using pre-shredded prevents clumping and gives better moisture distribution across the dip.
Step 5: Chill and Serve
Refrigerate the completed dip for at least 30 minutes before serving—this allows the flavors to meld and keeps everything properly chilled.
Serve with tortilla chips or your favorite dippers.
The dip is best enjoyed within a few hours of assembly to maintain the texture of the avocado and toppings.
Ultimate 7 Layer Dip
Ingredients
Method
- In a medium bowl, combine the refried beans, drained tomatoes with chiles, and taco seasoning. Mix thoroughly until well combined and smooth. Spread this mixture evenly across the bottom of a 9×13 inch baking dish or similar serving dish, creating a compact, even layer. This bean base is your foundation—make sure it’s pressed down firmly so the subsequent layers won’t sink unevenly.
- In a separate bowl, combine the pitted avocados, lime juice, cilantro, garlic salt, and ground cumin. Mash together until mostly smooth—I prefer leaving a few small chunks for texture rather than making it completely uniform. Gently spread this mixture evenly over the bean layer from Step 1. The lime juice prevents browning while adding brightness to the guacamole-like layer.
- Dollop the sour cream over the avocado layer and spread it evenly across the top using a spatula or the back of a spoon. This layer acts as a creamy barrier that keeps the avocado from browning and adds richness to each bite. Make sure to cover the surface completely but keep it relatively thin—the goal is an even, cohesive layer.
- Sprinkle the shredded cheddar cheese evenly over the sour cream layer, then add the sliced black olives, diced tomatoes, and sliced scallions in decorative layers or scattered across the top. If you like heat, finish with the crushed red pepper flakes. The beauty of this dip is in its visual layers—arrange the toppings thoughtfully so each scoop showcases all the components. I find that shredding cheese fresh from the block rather than using pre-shredded prevents clumping and gives better moisture distribution across the dip.
- Refrigerate the completed dip for at least 30 minutes before serving—this allows the flavors to meld and keeps everything properly chilled. Serve with tortilla chips or your favorite dippers. The dip is best enjoyed within a few hours of assembly to maintain the texture of the avocado and toppings.