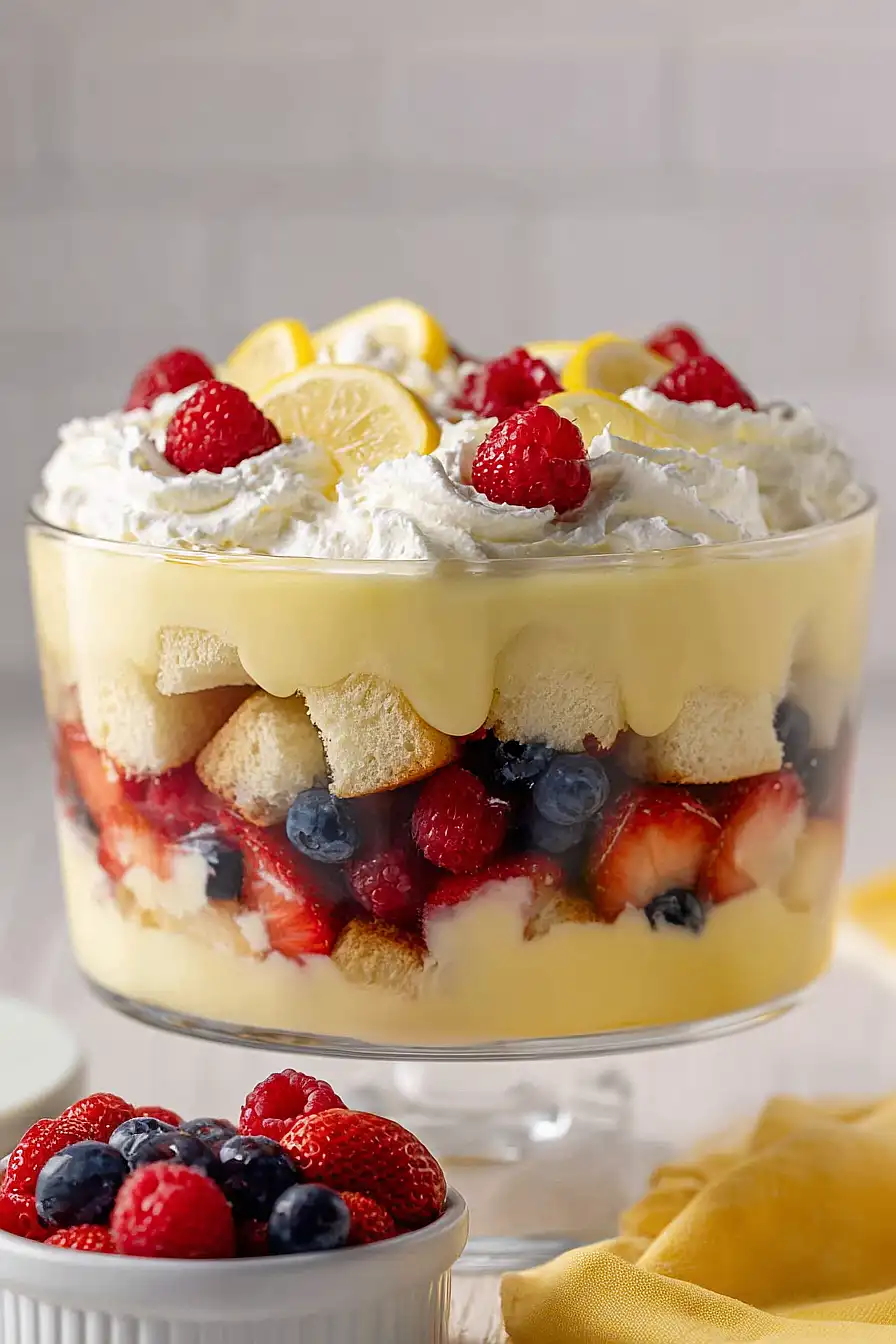
Picture this: a glass bowl, every layer showing through the sides. Bright lemon cake soaked in vanilla pudding, jewel-toned berries scattered throughout, whipped cream piled high on top.
That’s this trifle. And it tastes even better than it looks, which is saying something. Because LOOK at it.
Can You Make This Trifle Ahead?
- ABSOLUTELY yes! This trifle actually IMPROVES when made ahead because the cake needs time to soak up that pudding goodness.
- Bake the cake up to 2 days early and store it wrapped at room temperature (cubed and sealed in the fridge works too).
- Whip the cream no more than 4 hours before serving… it weeps after that and nobody wants a watery trifle.
- The fully assembled trifle holds beautifully in the fridge for up to 24 HOURS. Beyond that, the cake turns to mush and the cream deflates.
- Do NOT freeze it. The pudding and cream will separate into a sad, grainy disaster you can’t fix.
How to Nail the Layers
Start with HALF your cake cubes on the bottom (this is your foundation, don’t skimp!). Pour HALF the pudding over and let it seep into every crevice….
Scatter HALF the berries, then REPEAT the entire sequence. Crown with whipped cream dollops, spread slightly for that showstopping stripe effect. Keep berries WHOLE for maximum impact!
Fresh vs. Frozen Berries
- FRESH berries hold their shape and won’t bleed color into your pudding like frozen ones.
- Going FROZEN? Thaw completely, drain off every drop of liquid, or your trifle becomes soup.
- PAT every berry bone dry, moisture is the enemy of clean layers.
- Keep blueberries and small raspberries whole, quarter only the oversized stuff.
- Frozen works out of season, just expect softer, juicier layers.
How to Store Leftover Trifle
Cover the trifle TIGHTLY with plastic wrap and refrigerate immediately (the whipped cream is not messing around with room temperature). Eat within 2 days for the best texture…. after that, the cake gets soggy and the cream deflates!
Do NOT freeze it. The cream separates, berries turn to mush, and you’ll regret everything. Just make smaller portions next time if leftovers stress you out!
Similar Recipes
- Impressive Berry Meringue Trifle
- Homemade Lemon Blueberry Trifle
- Angel Food Trifle
- Strawberry Icebox Cake
- Best Berry Yogurt Parfait Trifle
- Vegan Berry Trifle
Estimated Nutrition
Estimated nutrition for the whole recipe (without optional ingredients):
- Calories: 2900-3200
- Protein: 60-70 g
- Fat: 90-110 g
- Carbohydrates: 460-500 g
Ingredients
For the cake base:
- 1/3 cup butter (I like Kerrygold unsalted butter for this)
- 1 1/4 cups sugar
- 3 eggs (room temperature, about 70°F)
- 1/2 cup yogurt
- 1/4 cup lemon juice
- 1 1/2 tsp vanilla essence
- 1 1/2 cups flour (I always use King Arthur all-purpose flour)
- 1 tsp baking powder
- 1/4 tsp baking soda
- 1/2 tsp salt
- zest of 2 lemons
For the filling and topping:
- 2 packages vanilla pudding
- 4 cups milk
- zest of 1 lemon
- 4 cups berries (a mix of blueberries and raspberries works best)
- 2 cups cream (chilled thoroughly for better whipping)
- 2 tablespoons powdered sugar (for the cream)
Step 1: Bake the Lemon Cake
- 1/3 cup butter
- 1 1/4 cups sugar
- 3 eggs
- 1/2 cup yogurt
- 1/4 cup lemon juice
- 1 1/2 tsp vanilla essence
- 1 1/2 cups flour
- 1 tsp baking powder
- 1/4 tsp baking soda
- 1/2 tsp salt
- zest of 2 lemons
Preheat your oven to 350°F and grease a 9×13 inch baking dish or similar size.
In a large bowl, cream together the softened butter and sugar until light and fluffy, about 2-3 minutes—this aerates the batter and creates a tender crumb.
Add the room-temperature eggs one at a time, beating well after each addition to fully incorporate.
Stir in the yogurt, lemon juice, and vanilla essence until smooth.
In a separate bowl, whisk together the flour, baking powder, baking soda, salt, and lemon zest.
Gently fold the dry mixture into the wet ingredients until just combined—don’t overmix, as this keeps the cake tender.
Pour the batter into your prepared pan and bake for 20-30 minutes, until a toothpick inserted in the center comes out clean.
Step 2: Slice Into Uniform Cubes
- baked lemon cake from Step 1
Remove the cake from the oven and let it cool completely at room temperature—this prevents the cake from crumbling when cubed and prevents the pudding from breaking when you layer it.
Once cooled, cut the cake into bite-sized cubes.
I find that using a serrated knife and wiping it between cuts prevents the cake from tearing and keeps your cubes uniform.
Step 3: Whisk the Vanilla Pudding
- 2 packages vanilla pudding
- 4 cups milk
While the cake cools, prepare the vanilla pudding according to package directions using the 4 cups of milk.
The pudding should be smooth and pourable—whisk it thoroughly to prevent lumps.
Set aside at room temperature until you’re ready to assemble the trifle.
Step 4: Whip Cream and Prep Fruit
- 2 cups cream
- 2 tablespoons powdered sugar
- 4 cups berries
In a chilled bowl, whip the cold cream with powdered sugar until stiff peaks form—the chilled cream whips faster and holds its shape better in the trifle.
Gently rinse and pat dry the berries to remove excess moisture, which can make the trifle watery.
If using larger berries like raspberries, you can leave them whole; quarter any very large pieces for even distribution throughout the layers.
Step 5: Build the Colorful Layers
- cake cubes from Step 2
- vanilla pudding from Step 3
- berries from Step 4
- whipped cream from Step 4
In a large trifle dish or glass serving bowl, create layers starting with half of the cake cubes on the bottom—this creates an attractive striped effect when viewed from the side.
Pour half of the prepared pudding over the cake layer, allowing it to seep into the crevices and soak the cake.
Scatter half of the mixed berries over the pudding layer.
Repeat with the remaining cake cubes, pudding, and berries.
Top the final layer of berries with generous dollops of whipped cream, spreading it slightly to create visual appeal.
Step 6: Refrigerate and Garnish
- assembled trifle from Step 5
- zest of 1 lemon
Cover the trifle and refrigerate for at least 1-2 hours before serving—this allows the flavors to meld, the cake to fully absorb the pudding, and the cream to set.
Just before serving, you can garnish with additional whipped cream and a sprinkle of lemon zest for extra brightness and visual appeal.
Simple Lemon Curd Berry Trifle
Ingredients
Method
- Preheat your oven to 350°F and grease a 9x13 inch baking dish or similar size. In a large bowl, cream together the softened butter and sugar until light and fluffy, about 2-3 minutes—this aerates the batter and creates a tender crumb. Add the room-temperature eggs one at a time, beating well after each addition to fully incorporate. Stir in the yogurt, lemon juice, and vanilla essence until smooth. In a separate bowl, whisk together the flour, baking powder, baking soda, salt, and lemon zest. Gently fold the dry mixture into the wet ingredients until just combined—don't overmix, as this keeps the cake tender. Pour the batter into your prepared pan and bake for 20-30 minutes, until a toothpick inserted in the center comes out clean.
- Remove the cake from the oven and let it cool completely at room temperature—this prevents the cake from crumbling when cubed and prevents the pudding from breaking when you layer it. Once cooled, cut the cake into bite-sized cubes. I find that using a serrated knife and wiping it between cuts prevents the cake from tearing and keeps your cubes uniform.
- While the cake cools, prepare the vanilla pudding according to package directions using the 4 cups of milk. The pudding should be smooth and pourable—whisk it thoroughly to prevent lumps. Set aside at room temperature until you're ready to assemble the trifle.
- In a chilled bowl, whip the cold cream with powdered sugar until stiff peaks form—the chilled cream whips faster and holds its shape better in the trifle. Gently rinse and pat dry the berries to remove excess moisture, which can make the trifle watery. If using larger berries like raspberries, you can leave them whole; quarter any very large pieces for even distribution throughout the layers.
- In a large trifle dish or glass serving bowl, create layers starting with half of the cake cubes on the bottom—this creates an attractive striped effect when viewed from the side. Pour half of the prepared pudding over the cake layer, allowing it to seep into the crevices and soak the cake. Scatter half of the mixed berries over the pudding layer. Repeat with the remaining cake cubes, pudding, and berries. Top the final layer of berries with generous dollops of whipped cream, spreading it slightly to create visual appeal.
- Cover the trifle and refrigerate for at least 1-2 hours before serving—this allows the flavors to meld, the cake to fully absorb the pudding, and the cream to set. Just before serving, you can garnish with additional whipped cream and a sprinkle of lemon zest for extra brightness and visual appeal.