Wait, a water bath? For CAKE
Yes. I know. But this is the only way you get that pillowy, cloud-like sponge that’s the whole POINT of a Japanese strawberry cake. Not dense. Not heavy. Almost weightless
The strawberries macerate in sugar until they ooze into their own syrup (you brush the cake layers with it). The whipped cream has gelatin in it so it holds its shape on the counter for HOURS without weeping. (This matters because you’re going to want to photograph this cake before you cut into it.)
It’s a project. But oh my goodness, is it worth it
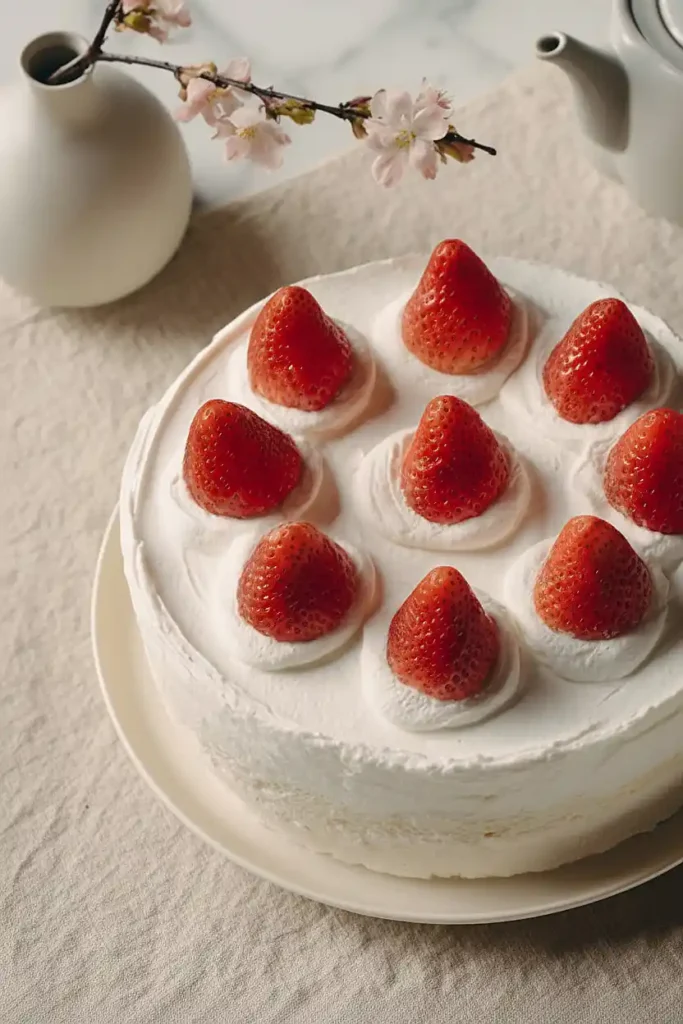
What Makes This Cake Japanese-Style
- WATER BATH baking at 325°F keeps the sponge insanely moist (non-negotiable in Japanese baking, period!)
- Stabilized whipped cream with GELATIN holds its shape for hours, no weeping, no deflating
- MERINGUE folding technique creates a featherweight, springy crumb with serious airiness
- Brushing cut layers with strawberry syrup adds real moisture (not just surface sweetness)
- Light, RUSTIC finish with an offset spatula, skip that thick frosting look entirely
- Scraping away the crispy top skin for a cleaner, more refined surface (classic patisserie move)
- Short, square 8×8 shape with strawberries showcased plainly on top, no fancy piping
Japanese cakes obsess over TEXTURE and restraint, not sugar bombs or frosting mountains. Every single element earns its place in the bite!
How to Nail the Chiffon Sponge
Room temp egg whites (70°F) beaten to stiff, GLOSSY peaks (or your sponge collapses). Fold one-quarter of the meringue into yolks first to lighten the batter, then fold gently with broad strokes…. stop the second no white streaks show!
Water bath baking is non-negotiable, cool completely before slicing, and scrape off that crispy top (Japanese technique for cleaner layers).
Why Stabilized Whipped Cream Matters
Stabilized whipped cream isn’t a suggestion here…. it’s the difference between a bakery-worthy cake and a sad, weeping disaster on your serving plate.
- Regular whipped cream deflates within an hour. Gelatin buys you HOURS of pristine shape at room temp.
- Unstabilized cream releases liquid that turns your delicate sponge into mush. The gelatin locks that moisture IN.
- Clean, sharp layers define Japanese-style cakes. Stabilized cream keeps those lines CRISP during slicing and serving.
- Bloom the gelatin in cold water first, melt it fully, then drizzle it in WHILE whipping. Skipping this step means lumps.
Storage & Serving Tips
Refrigerate IMMEDIATELY in an airtight container… this cake absolutely WILL NOT survive a warm kitchen. The gelatin-stabilized cream holds 3 days, but strawberries start weeping by day two (eat it fast!).
Serve CHILLED from the fridge, or rest 10 minutes for softer cream. Wipe a SHARP knife between cuts… the strawberries drag and smear otherwise.
What to Cook Next
- Strawberry Shortcake Skewers
- Strawberry Chiffon Cake
- Fluffy Blueberry Chiffon Cake
- Angel Food Flag Cake
- Traditional Strawberry Tres Leches
- American Flag Cake Roll
Estimated Nutrition
Estimated nutrition for the whole recipe (without optional ingredients):
- Calories: 1650-1800
- Protein: 30-36 g
- Fat: 100-115 g
- Carbohydrates: 165-185 g
Ingredients
For the sponge cake:
- 3 fl oz milk
- 2 oz unsalted butter (I like Kerrygold for its higher fat content and rich yellow color)
- 2/3 cup cake flour (I always use King Arthur to ensure a delicate crumb structure)
- 4 egg yolks
- 4 egg whites (room temperature, about 70°F, to help create a stable meringue)
- 1/2 cup sugar
For the strawberry layer:
- 1 lb fresh strawberries (hulled and sliced into 1/4-inch thick pieces)
- 3 tsp sugar
For the whipped cream:
- 1.3 cups heavy cream (must be very cold to whip properly and hold its shape)
- 2 tbsp sugar
- 1/2 tsp vanilla extract
- 1 tsp gelatin
- 2 tbsp cold water
For the cake syrup:
- 2 tbsp sugar
- 3 tbsp hot water
Step 1: Prep Oven and Baking Pan
Line a 8×8 inch square baking pan with parchment paper, then wrap the outside completely with foil to prevent water from seeping in during the water bath.
Preheat your oven to 325°F and position a rack in the lower third of the oven.
Fill a larger roasting pan with about 1 inch of hot water and place it in the oven—this water bath will gently cook the delicate cake and keep it moist.
Step 2: Whisk the Batter Base
- 3 fl oz milk
- 2 oz unsalted butter
- 2/3 cup cake flour
- 4 egg yolks
Combine the milk and unsalted butter in a microwave-safe bowl and heat in 30-second intervals, stirring between each, until the butter is fully melted—this should take about 1 minute total.
Whisk in the cake flour until smooth with no lumps, then add the egg yolks one at a time, stirring gently after each addition to create a thick, pale base.
Set this mixture aside while you prepare the meringue.
Step 3: Beat and Fold Meringue
- 4 egg whites
- 1/2 cup sugar
- yolk mixture from Step 2
In a clean, dry bowl, beat the room-temperature egg whites on medium-high speed until foamy, then gradually add the 1/2 cup sugar while continuing to beat.
Once the whites reach stiff, glossy peaks (this indicates a stable meringue that will add lift and structure to the cake), gently fold about 1/4 of this meringue into the yolk mixture to lighten it.
Then carefully fold this yolk mixture back into the remaining meringue using a spatula, making broad strokes from bottom to top to preserve the airiness—I like to fold just until no white streaks remain to maintain maximum volume.
Step 4: Bake in a Water Bath
- batter from Step 3
Pour the batter from Step 3 into the prepared pan and tap it twice on the counter to release any large air bubbles.
Place the pan into the hot water bath in the oven and bake for 1 hour 30 minutes, until the top is lightly golden and a cake tester inserted near the center comes out with just a few moist crumbs.
Let the cake cool in the pan for 15 minutes, then turn it out onto a wire rack to cool completely—this cooling step is crucial before moving to assembly.
Step 5: Slice Berries and Mix Syrup
- 1 lb fresh strawberries
- 3 tsp sugar
- 2 tbsp sugar
- 3 tbsp hot water
- 2 tbsp cold water
While the cake bakes, hull and slice the fresh strawberries into 1/4-inch thick pieces, then toss them with 3 teaspoons of sugar in a bowl.
Let them sit for 1 hour to release their juices—this creates a beautiful syrup for brushing on the cake layers.
In a separate bowl, combine the 2 tablespoons sugar with 3 tablespoons of hot water and stir until dissolved, then add the 2 tablespoons of cold water and the strained liquid from the macerated strawberries.
Set this glazing syrup aside to cool.
Step 6: Whip the Stabilized Frosting
- 1 tsp gelatin
- 2 tbsp cold water
- 1.3 cups heavy cream
- 2 tbsp sugar
- 1/2 tsp vanilla extract
Bloom the gelatin by sprinkling it over 2 tablespoons of cold water and letting it sit for 2 minutes until spongy.
Place the very cold heavy cream in a chilled bowl and begin whipping on medium-high speed until it reaches soft peaks.
Microwave the bloomed gelatin for about 15 seconds until melted and clear, then slowly drizzle it into the whipping cream while continuing to beat.
Add 2 tablespoons of sugar and the vanilla extract, then continue beating until stiff peaks form—I find that adding gelatin stabilizes the cream so it holds its shape beautifully for hours without weeping.
Step 7: Layer, Frost, and Decorate
- cooled cake from Step 4
- glazing syrup from Step 5
- macerated strawberries from Step 5
- whipped cream from Step 6
Once the cooled cake is completely cool, carefully slice it horizontally into two even layers using a long serrated knife or a cake leveler.
Using a paring knife or vegetable peeler, gently scrape away the thin crispy top skin from each layer (this is a Japanese technique that gives a cleaner appearance).
Brush both cut surfaces generously with the glazing syrup from Step 5 to add moisture and flavor.
Spread a layer of the stabilized whipped cream from Step 6 on the bottom cake layer, arrange some of the macerated strawberries on top, then add another layer of cream.
Place the top cake layer on the stack and spread the remaining cream over the top and sides, using an offset spatula or the back of a spoon for a light, rustic finish.
Arrange whole or halved strawberries artfully on top of the cake for a stunning presentation.

Classic Japanese Strawberry Cake
Ingredients
Method
- Line a 8×8 inch square baking pan with parchment paper, then wrap the outside completely with foil to prevent water from seeping in during the water bath. Preheat your oven to 325°F and position a rack in the lower third of the oven. Fill a larger roasting pan with about 1 inch of hot water and place it in the oven—this water bath will gently cook the delicate cake and keep it moist.
- Combine the milk and unsalted butter in a microwave-safe bowl and heat in 30-second intervals, stirring between each, until the butter is fully melted—this should take about 1 minute total. Whisk in the cake flour until smooth with no lumps, then add the egg yolks one at a time, stirring gently after each addition to create a thick, pale base. Set this mixture aside while you prepare the meringue.
- In a clean, dry bowl, beat the room-temperature egg whites on medium-high speed until foamy, then gradually add the 1/2 cup sugar while continuing to beat. Once the whites reach stiff, glossy peaks (this indicates a stable meringue that will add lift and structure to the cake), gently fold about 1/4 of this meringue into the yolk mixture to lighten it. Then carefully fold this yolk mixture back into the remaining meringue using a spatula, making broad strokes from bottom to top to preserve the airiness—I like to fold just until no white streaks remain to maintain maximum volume.
- Pour the batter from Step 3 into the prepared pan and tap it twice on the counter to release any large air bubbles. Place the pan into the hot water bath in the oven and bake for 1 hour 30 minutes, until the top is lightly golden and a cake tester inserted near the center comes out with just a few moist crumbs. Let the cake cool in the pan for 15 minutes, then turn it out onto a wire rack to cool completely—this cooling step is crucial before moving to assembly.
- While the cake bakes, hull and slice the fresh strawberries into 1/4-inch thick pieces, then toss them with 3 teaspoons of sugar in a bowl. Let them sit for 1 hour to release their juices—this creates a beautiful syrup for brushing on the cake layers. In a separate bowl, combine the 2 tablespoons sugar with 3 tablespoons of hot water and stir until dissolved, then add the 2 tablespoons of cold water and the strained liquid from the macerated strawberries. Set this glazing syrup aside to cool.
- Bloom the gelatin by sprinkling it over 2 tablespoons of cold water and letting it sit for 2 minutes until spongy. Place the very cold heavy cream in a chilled bowl and begin whipping on medium-high speed until it reaches soft peaks. Microwave the bloomed gelatin for about 15 seconds until melted and clear, then slowly drizzle it into the whipping cream while continuing to beat. Add 2 tablespoons of sugar and the vanilla extract, then continue beating until stiff peaks form—I find that adding gelatin stabilizes the cream so it holds its shape beautifully for hours without weeping.
- Once the cooled cake is completely cool, carefully slice it horizontally into two even layers using a long serrated knife or a cake leveler. Using a paring knife or vegetable peeler, gently scrape away the thin crispy top skin from each layer (this is a Japanese technique that gives a cleaner appearance). Brush both cut surfaces generously with the glazing syrup from Step 5 to add moisture and flavor. Spread a layer of the stabilized whipped cream from Step 6 on the bottom cake layer, arrange some of the macerated strawberries on top, then add another layer of cream. Place the top cake layer on the stack and spread the remaining cream over the top and sides, using an offset spatula or the back of a spoon for a light, rustic finish. Arrange whole or halved strawberries artfully on top of the cake for a stunning presentation.