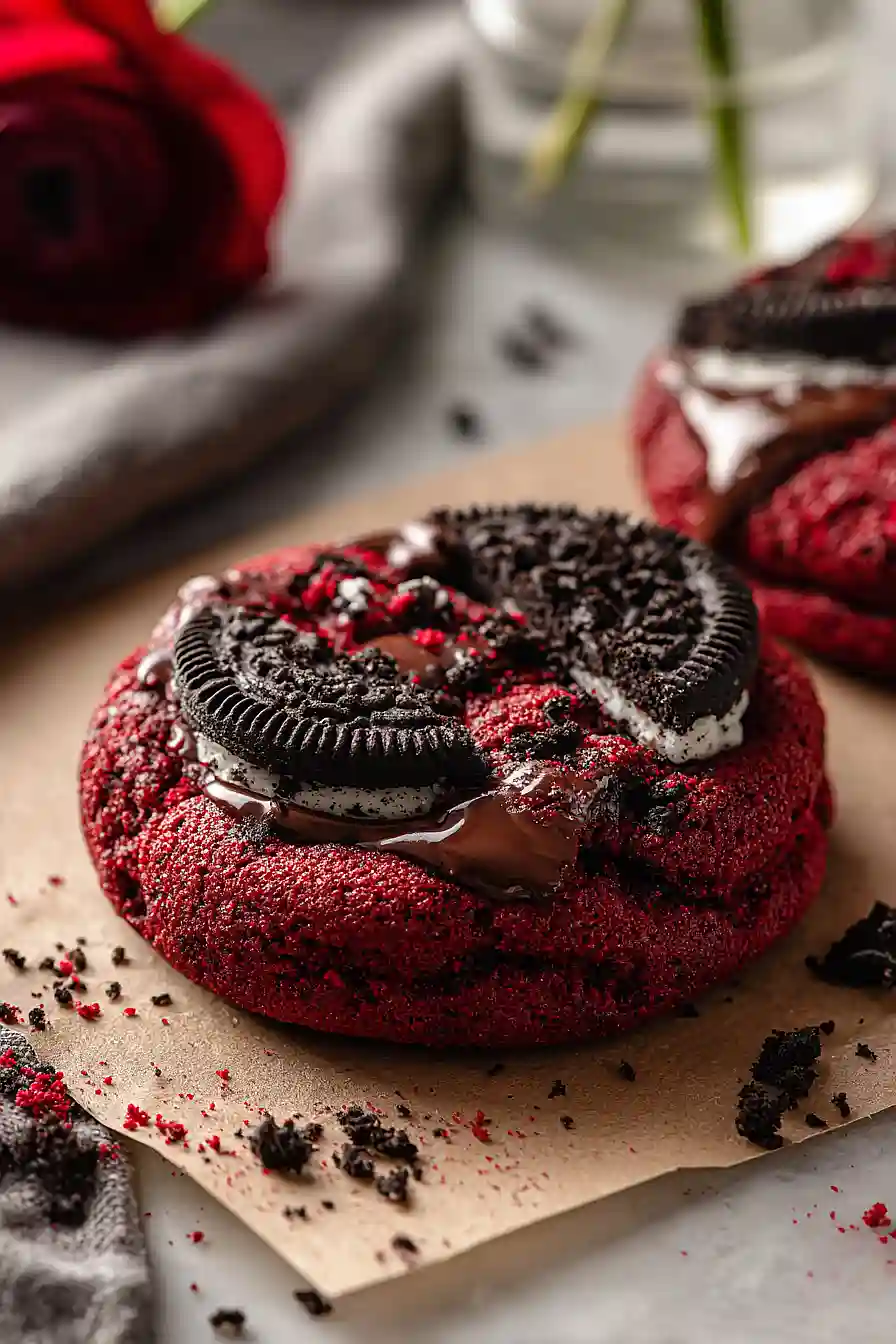
I came for the red velvet, stayed for the Oreos pressed on top, and ate three before they even cooled.
These are fudgy, chocolatey, and somehow fully gluten free without anyone noticing. Red food coloring all over my hands? Tiny price to pay.
Why Chill Time Matters Here
- GF flour needs those 2.5 HOURS to fully hydrate. Without gluten doing the structure work, the resting period is what gives these cookies their backbone.
- Cold dough spreads LESS in the oven, keeping cookies thick instead of turning into sad flat puddles.
- Flavor melding happens here! Cocoa, molasses, and brown sugar get acquainted during the chill.
- Skip this and you’ll get crumbly, flat, tragic cookies (don’t do it).
The 2.5 hours is non-negotiable…. plan ahead, make the dough in the morning, bake at night, done.
Finding Gluten-Free Oreo Alternatives
- Kinnikinnick K-Toos – the gold standard swap, crumbles and tastes SHOCKINGLY close to real Oreos. (Reliable, widely available, no notes!)
- Trader Joe’s GF Joe-Joe’s – slightly sweeter than Glutino, holds its shape like a CHAMP when pressed on top.
- Schar Chocolate O’s – crisp enough to survive dough mixing without dissolving into sad mush.
- Homemade GF chocolate wafers – cocoa, butter, your favorite flour blend. (Yes, extra work… but you OWN the sweetness!)
Storing & Freezing These Cookies
Store baked cookies in an airtight container at room temperature for up to 4 days…layer them between parchment so the chocolate chip toppings don’t fuse. (You’ll thank me later!)
For longer storage, freeze on a sheet pan in a single layer (2 hours), then transfer to a freezer bag for up to 3 MONTHS. Thaw at room temp and devour!
More Recipes to Try
- Tasty Derby Pie Cookies
- Pecan Fig Cookies
- Strawberry Dump Cake
- Derby Pie Bars
- High Protein Greek Yogurt Brownies
- Classic Gluten Free Shortbread Cookies
Estimated Nutrition
Estimated nutrition for the whole recipe (without optional ingredients):
- Calories: 3700-4000
- Protein: 30-40 g
- Fat: 150-170 g
- Carbohydrates: 540-580 g
Ingredients
For the dough:
- 1 3/4 cups gluten-free flour (King Arthur Measure for Measure)
- 1/3 cup cocoa powder
- 1 tsp baking soda
- 1/2 tsp kosher salt
- 1/8 tsp espresso powder
- 1/2 cup + 1 tbsp unsalted butter (room temperature)
- 1 1/2 cups dark brown sugar
- 1/4 cup whole milk
- 1/8 oz white vinegar
- 2 tbsp cornstarch
- 3 tbsp water
- 1 tbsp unsulphured molasses
- 1 tsp pure vanilla extract
- 1 tbsp red food coloring
- 3/4 cup semi-sweet chocolate chips
- 5 GF chocolate cookies (roughly crushed into 1/2-inch chunks)
For the topping:
- 1/2 cup + 2 tbsp chocolate chips (Ghirardelli 60% Cacao)
- 9 GF chocolate cookies (Glutino brand, for pressing into warm cookies)
Step 1: Mix Dry Ingredients and Buttermilk
- 1/4 cup whole milk
- 1/8 oz white vinegar
- 1 3/4 cups gluten-free flour
- 1/3 cup cocoa powder
- 1 tsp baking soda
- 1/2 tsp kosher salt
- 1/8 tsp espresso powder
Start by combining the milk and vinegar in a small bowl and let it sit for 5-10 minutes to curdle into a buttermilk substitute—this acidic ingredient is crucial for activating the baking soda and creating the signature tangy red velvet flavor.
While the buttermilk develops, whisk together the gluten-free flour, cocoa powder, baking soda, kosher salt, and espresso powder in a separate bowl.
The espresso powder deepens the chocolate notes without adding coffee flavor, so don’t skip it.
Set both mixtures aside until you’re ready to build the dough.
Step 2: Whisk the Cornstarch Slurry
- 2 tbsp cornstarch
- 3 tbsp water
In a small bowl, combine the cornstarch and water to create a slurry, which will help bind the gluten-free dough and give these cookies a better texture.
Set aside.
I find that this simple cornstarch slurry makes a huge difference in preventing the gluten-free cookies from becoming too crumbly or dense, so it’s worth the extra step.
Step 3: Cream Butter and Build Dough
- 1/2 cup + 1 tbsp unsalted butter
- 1 1/2 cups dark brown sugar
- cornstarch slurry from Step 2
- curdled buttermilk from Step 1
- 1 tbsp unsulphured molasses
- 1 tsp pure vanilla extract
- 1 tbsp red food coloring
- dry ingredient mixture from Step 1
- 3/4 cup semi-sweet chocolate chips
- 5 GF chocolate cookies
Beat the room-temperature butter and dark brown sugar together for 2-3 minutes until light and fluffy, which incorporates air for a better cookie texture.
Add the cornstarch slurry from Step 2, the curdled buttermilk from Step 1, molasses, vanilla extract, and red food coloring, mixing until fully combined.
The molasses adds depth and moisture to balance the cocoa, while the red coloring gives you that classic red velvet hue.
Gently fold in the dry ingredient mixture from Step 1 until just combined—don’t overmix, as this can toughen the dough.
Finally, stir in the semi-sweet chocolate chips and the roughly crushed cookie pieces (the 5 GF chocolate cookies), distributing them evenly throughout.
Step 4: Refrigerate the Dough
Transfer the dough to the refrigerator and chill for 2.5 hours.
This resting time allows the flour to fully hydrate, the flavors to meld, and the dough to firm up, which helps the cookies hold their shape during baking and prevents excessive spreading.
Don’t skip this step—it’s essential for gluten-free baking success.
Step 5: Portion and Top Dough Balls
- dough from Step 3
- 1/2 cup + 2 tbsp chocolate chips
Preheat your oven to 325°F.
Once the dough has chilled, scoop it into 12 evenly sized balls (about 2 tablespoons each) and place them on a parchment-lined baking sheet, spacing them about 4 inches apart since they’ll spread during baking.
Press the tops of each dough ball into the Ghirardelli 60% cacao chocolate chips so they adhere to the surface—this creates a professional appearance and ensures each bite has chocolate.
Step 6: Bake and Garnish Warm
- 9 GF chocolate cookies
Bake at 325°F for 13-15 minutes—the cookies should be set around the edges but still slightly soft in the center.
Remove from the oven and immediately press 9 GF chocolate cookies (Glutino brand) into the tops of the warm cookies, pressing gently so they adhere without cracking the cookie.
I like to do this while the cookies are still warm because the residual heat softens the surface just enough for the cookie chunks to stick without sinking too deep.
Let the cookies cool on the baking sheet for 5 minutes to set slightly before transferring to a wire rack to cool completely.
Best Gluten Free Oreo Red Velvet Cookies
Ingredients
Method
- Start by combining the milk and vinegar in a small bowl and let it sit for 5-10 minutes to curdle into a buttermilk substitute—this acidic ingredient is crucial for activating the baking soda and creating the signature tangy red velvet flavor. While the buttermilk develops, whisk together the gluten-free flour, cocoa powder, baking soda, kosher salt, and espresso powder in a separate bowl. The espresso powder deepens the chocolate notes without adding coffee flavor, so don't skip it. Set both mixtures aside until you're ready to build the dough.
- In a small bowl, combine the cornstarch and water to create a slurry, which will help bind the gluten-free dough and give these cookies a better texture. Set aside. I find that this simple cornstarch slurry makes a huge difference in preventing the gluten-free cookies from becoming too crumbly or dense, so it's worth the extra step.
- Beat the room-temperature butter and dark brown sugar together for 2-3 minutes until light and fluffy, which incorporates air for a better cookie texture. Add the cornstarch slurry from Step 2, the curdled buttermilk from Step 1, molasses, vanilla extract, and red food coloring, mixing until fully combined. The molasses adds depth and moisture to balance the cocoa, while the red coloring gives you that classic red velvet hue. Gently fold in the dry ingredient mixture from Step 1 until just combined—don't overmix, as this can toughen the dough. Finally, stir in the semi-sweet chocolate chips and the roughly crushed cookie pieces (the 5 GF chocolate cookies), distributing them evenly throughout.
- Transfer the dough to the refrigerator and chill for 2.5 hours. This resting time allows the flour to fully hydrate, the flavors to meld, and the dough to firm up, which helps the cookies hold their shape during baking and prevents excessive spreading. Don't skip this step—it's essential for gluten-free baking success.
- Preheat your oven to 325°F. Once the dough has chilled, scoop it into 12 evenly sized balls (about 2 tablespoons each) and place them on a parchment-lined baking sheet, spacing them about 4 inches apart since they'll spread during baking. Press the tops of each dough ball into the Ghirardelli 60% cacao chocolate chips so they adhere to the surface—this creates a professional appearance and ensures each bite has chocolate.
- Bake at 325°F for 13-15 minutes—the cookies should be set around the edges but still slightly soft in the center. Remove from the oven and immediately press 9 GF chocolate cookies (Glutino brand) into the tops of the warm cookies, pressing gently so they adhere without cracking the cookie. I like to do this while the cookies are still warm because the residual heat softens the surface just enough for the cookie chunks to stick without sinking too deep. Let the cookies cool on the baking sheet for 5 minutes to set slightly before transferring to a wire rack to cool completely.
These were so good! The texture is the best.