I’m just going to say it: this is the summer dessert. Cold, creamy, bright lemon, jammy blueberries, buttery graham crust. No oven needed for the filling. You mix, you chill, you eat. THE END.
Make it the night before. Slice it into squares. Watch it disappear. (Or eat half a pan alone over the sink at 10pm. Same energy, different crowd. No notes.)
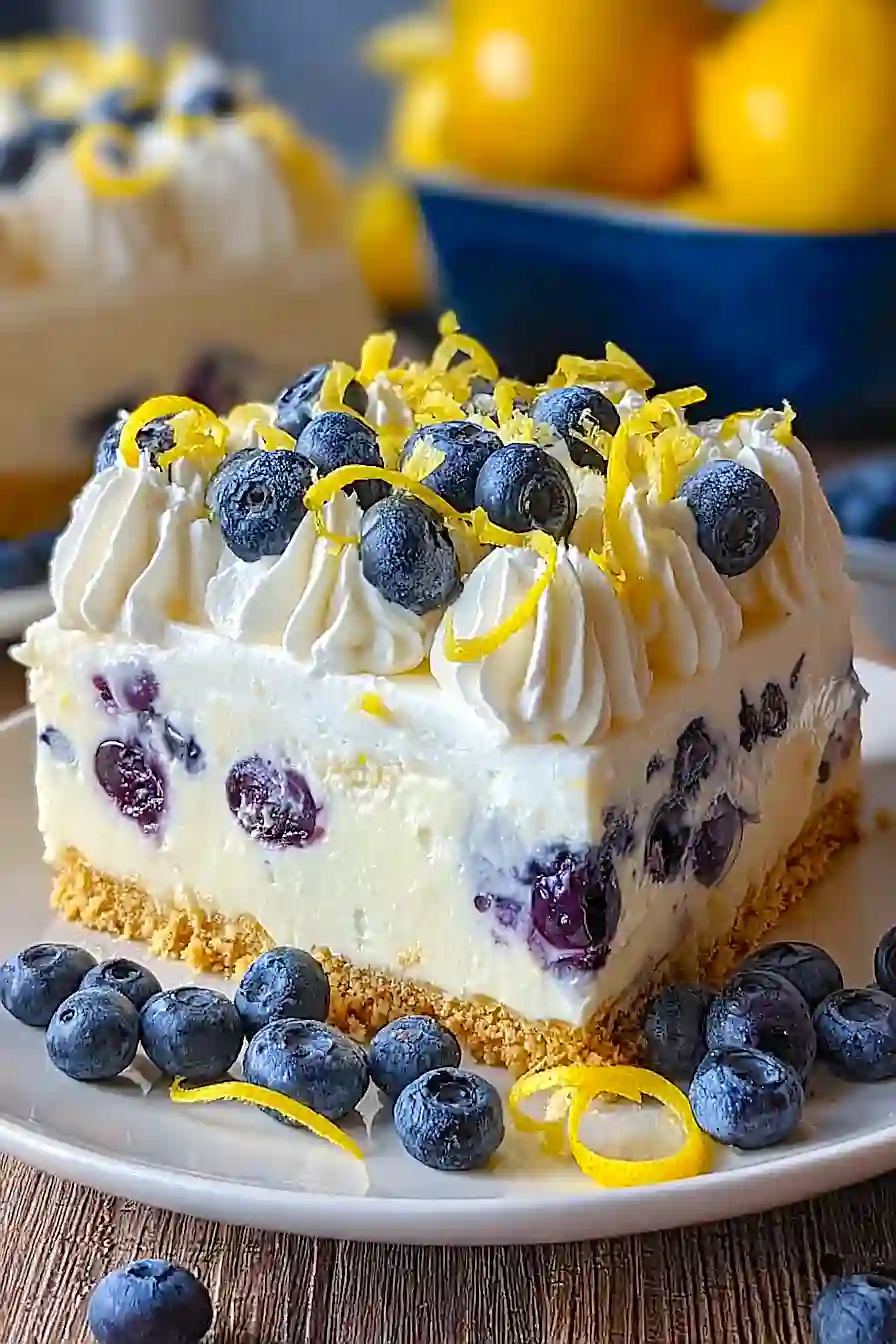
Why This Cake Doesn’t Need an Oven
No oven means NO BAKING stress, no overbaking disasters, no dry edges ruining your day. The graham crust firms up from butter and cold, while whipped cream and cream cheese handle the filling (yes, really!).
Keep everything COLD. Chill the bowl before whipping, use softened (not warm!) cream cheese, and let the assembled cake rest at least 4 hours… overnight wins. Patience pays off!
How to Get Clean, Pretty Slices
- CHILL the cake at least 4 hours (overnight is even better).
- RUN a sharp knife under hot water, then wipe it completely dry.
- CUT with a gentle sawing motion…. no pressing, no dragging!
- WIPE the blade clean between every slice. Yes, every single one.
- SLIP the pan back in the fridge if the filling softens mid-cut.
Clean slices, zero stress!
Fresh vs. Frozen Blueberries
- FRESH BERRIES WIN on presentation. They hold their shape, don’t bleed into the filling, and look gorgeous as a clean top layer.
- FROZEN WORKS IN A PINCH but toss them in a teaspoon of flour first to prevent sinking (and the dreaded purple swirl).
- NEVER THAW frozen berries before layering! They release juice and turn your cream filling purple.
- PAT FRESH BERRIES DRY after washing. Water droplets cause the cream to weep and the crust to soften.
How Far Ahead Can You Make This?
Make it up to TWO DAYS ahead…. overnight chilling actually deepens the lemon flavor (a happy accident!). Keep it tightly covered in the fridge.
Skip the freezer though. Cream cheese fillings turn weepy and weird after thawing. Save the fresh berry garnish for right before serving.
How to Store Leftovers
Refrigerate IMMEDIATELY in an airtight container, no exceptions. This cake contains cream cheese and whipped cream, so leaving it on the counter is a recipe for disaster (and bacteria).
- Container matters: Cover tightly with plastic wrap pressed directly onto the surface, OR transfer slices to a sealed container. This prevents the cake from absorbing fridge odors and stops the top from drying out.
- Shelf life: Eat within 3 days for the BEST texture and flavor. After day 3, the crust gets soggy and the filling loses its fluffy structure.
- Freezer option: Yes, you can freeze it! Wrap individual slices in plastic wrap, then foil, and freeze for up to 2 months. Thaw overnight in the fridge before serving.
- Skip the garnish before freezing: The fresh blueberries and lemon zest on top will get sad and mushy. Add those fresh after thawing…. if you remember.
Honestly? This cake rarely lasts long enough to worry about leftovers. But if you exercise self-control (impressive!), the fridge method keeps things tasting fresh and creamy for days!
If You Liked This, Try These
- Lemon Curd Berry Trifle
- Triple Lemon Jello Poke Cake
- Flag Poke Cake
- Lemon Blueberry Trifle
- Blueberry Chiffon Cake
- Creamy No-Bake Blueberry Cake
Estimated Nutrition
Estimated nutrition for the whole recipe (without optional ingredients):
- Calories: 2100-2300
- Protein: 17-22 g
- Fat: 130-145 g
- Carbohydrates: 230-250 g
Ingredients
For the crust:
- 1 1/2 cups crushed graham crackers
- 1/4 cup butter, melted
For the filling:
- 8 oz softened cream cheese
- 1/2 cup white sugar
- 1 tbsp grated lemon peel
- 2 tbsp lemon juice
- 1 cup heavy cream
For the fruit layer:
- 2 cups fresh blueberries
For garnish:
- Lemon zest
- Extra blueberries
Step 1: Press the Graham Cracker Base
- 1 1/2 cups crushed graham crackers
- 1/4 cup butter, melted
In a mixing bowl, combine the crushed graham crackers with the melted butter.
Stir until the mixture resembles wet sand.
Press the mixture firmly and evenly into the bottom of a 9×9-inch pan to form the crust.
Place the pan in the refrigerator to chill while you continue with the recipe.
Step 2: Beat the Cream Cheese Mixture
- 8 oz softened cream cheese
- 1/2 cup white sugar
- 1 tbsp grated lemon peel
- 2 tbsp lemon juice
In a separate bowl, beat the softened cream cheese with the white sugar using an electric mixer or whisk until the mixture is smooth and creamy.
Add the grated lemon peel and lemon juice, then mix again until everything is well incorporated.
I like to make sure the lemon zest is evenly distributed for a bright, zingy flavor.
Step 3: Whip the Heavy Cream
- 1 cup heavy cream
In a clean, chilled bowl, whip the heavy cream until soft peaks form.
You can use a hand mixer or a whisk for this step—it takes about 3-5 minutes.
Be careful not to overwhip, as you want the cream to remain light and airy.
Step 4: Combine the Two Batters
- whipped cream from Step 3
- cream cheese mixture from Step 2
Gently fold the whipped cream (from Step 3) into the cream cheese mixture (from Step 2).
Use a spatula to carefully combine the two until no streaks remain, preserving as much of the whipped cream’s airiness as possible.
Step 5: Assemble the Cream and Berries
- graham cracker crust from Step 1
- cream filling from Step 4
- 2 cups fresh blueberries
Take the chilled crust from the refrigerator (from Step 1).
Spread half of the cream filling (from Step 4) evenly over the crust.
Arrange the fresh blueberries in a single layer on top of the filling.
Then, spread the remaining filling over the blueberries, smoothing the top with a spatula.
Step 6: Decorate and Refrigerate
- extra blueberries
- lemon zest
Sprinkle extra blueberries and a touch of lemon zest over the top for a beautiful and fresh finish.
Chill the assembled dessert in the refrigerator for at least 4 hours to let it set completely.
Personally, I like to chill it overnight for the best texture and flavor.
Step 7: Cut Into Squares
Once the dessert is well-chilled and set, slice it into bars or squares.
Serve cold and enjoy this luscious lemon blueberry treat!