If you ask me, no-bake desserts are one of life’s best shortcuts.
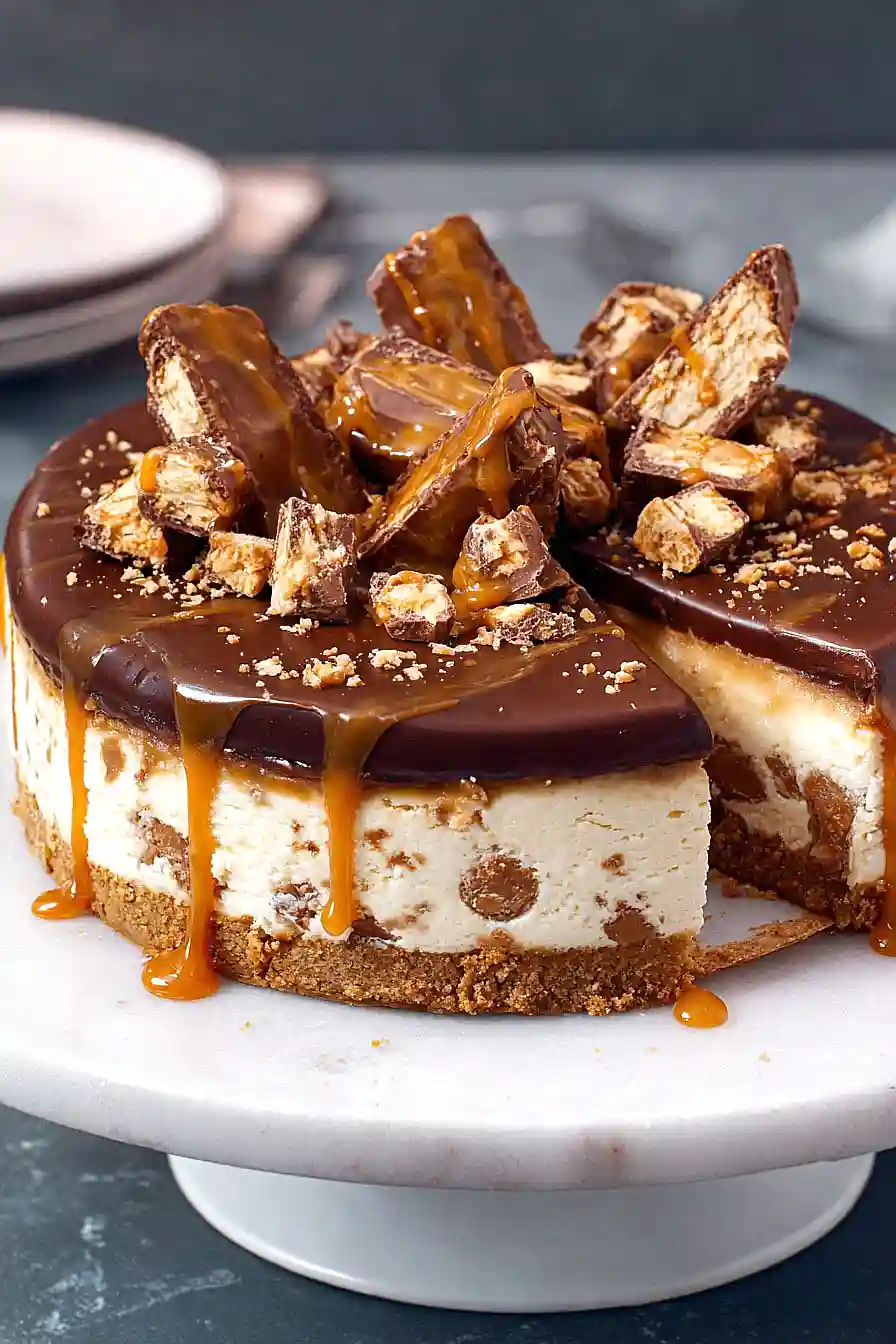
This Twix cheesecake skips the oven entirely and delivers all the flavors you love from the candy bar. A buttery digestive biscuit crust holds a creamy filling that’s loaded with homemade caramel, smooth chocolate ganache, and chopped Twix pieces.
The cheesecake layer is rich and tangy, and it pairs perfectly with the sweet caramel sauce swirled throughout. Everything sets up in the fridge, so there’s no fussing with water baths or worrying about cracks.
It’s a dessert that looks fancy but comes together easier than you’d think, perfect for when you want to impress without turning on the oven.

Why You’ll Love This No Bake Twix Cheesecake
- No oven required – This cheesecake sets in the fridge, so you can make it without heating up your kitchen—perfect for warm weather or when your oven is busy with other dishes.
- Candy bar twist on a classic – If you love Twix bars, you’ll go crazy for this dessert. It has all those flavors—chocolate, caramel, and buttery cookie—in creamy cheesecake form.
- Impressive presentation – The layers of caramel, chocolate ganache, and Twix pieces make this look like it came from a fancy bakery, even though you made it at home.
- Make-ahead friendly – Since it needs time to chill anyway, you can prepare this dessert a day or two before your gathering, taking the stress out of party planning.
- Crowd-pleaser – This rich, indulgent cheesecake is always a hit at potlucks, birthday parties, or holiday dinners—expect everyone to ask for the recipe.
What Kind of Cream Cheese Should I Use?
For this no-bake cheesecake, you’ll want to use full-fat brick-style cream cheese, not the spreadable kind that comes in a tub. The brick cream cheese has a firmer texture that holds up better in no-bake recipes and gives you that classic cheesecake consistency. Make sure your cream cheese is at room temperature before you start – this is really important because cold cream cheese will leave you with lumps no matter how much you mix it. Just leave it out on the counter for about an hour before you begin, and it should be soft enough to blend smoothly with the other ingredients. If you’re in a pinch, you can also use the microwave on low power for 10-15 seconds at a time, but be careful not to melt it.
Options for Substitutions
This no-bake cheesecake is pretty forgiving when it comes to swaps, so here are some options if you need them:
- Digestive biscuits or graham crackers: You can use any plain cookie or cracker for the crust – vanilla wafers, shortbread cookies, or even Oreos (with the filling) work great. Just crush them up the same way.
- Cream cheese: Make sure your cream cheese is full-fat and at room temperature – this is one ingredient you don’t want to substitute, as it’s what makes the cheesecake texture work. Low-fat versions won’t set properly.
- Whipping cream: Heavy cream (35-40% fat) is what you need here. Half-and-half or light cream won’t whip up properly, so stick with the real deal for best results.
- Twix bars: If you can’t find Twix, try using other caramel-chocolate candy bars like Milky Way, Snickers (without peanuts if allergies are a concern), or even Rolos. The key is having that caramel-chocolate combo.
- Semisweet chocolate: Milk chocolate or dark chocolate both work fine for the ganache topping. Just keep in mind milk chocolate will be sweeter, while dark chocolate will give you a more grown-up flavor.
- Salted caramel sauce: Regular caramel sauce works too – just add a small pinch of sea salt to it if you want that salted caramel taste.
Watch Out for These Mistakes While Making
The biggest mistake when making no-bake cheesecake is using cold cream cheese, which creates lumps that are nearly impossible to smooth out – make sure your cream cheese sits at room temperature for at least an hour before mixing.
Another common error is over-whipping your cream, which can turn it grainy and butter-like instead of light and fluffy, so stop beating as soon as you see stiff peaks form.
When making the caramel layer, resist the urge to stir the sugar while it’s melting, as this can cause crystallization and turn your smooth caramel into a grainy disaster – just swirl the pan gently instead.
Finally, don’t skip chilling the cheesecake for the full recommended time (at least 4-6 hours), because cutting into it too early will result in a runny, messy slice that won’t hold its shape.

What to Serve With No Bake Twix Cheesecake?
This cheesecake is pretty rich and indulgent on its own, so I like to keep things simple when serving it. A hot cup of coffee or espresso is perfect alongside a slice since the bitter notes balance out all that caramel and chocolate sweetness. If you’re serving this at a party, consider putting out some fresh berries like strawberries or raspberries – they add a nice pop of freshness that cuts through the creaminess. For a fun dessert spread, you could also serve it with vanilla ice cream on the side, though honestly, this cheesecake is so decadent that most people will be happy with just a generous slice and their favorite hot beverage.
Storage Instructions
Refrigerate: This no bake Twix cheesecake needs to stay chilled in the fridge at all times. Cover it loosely with plastic wrap or keep it in an airtight container, and it’ll stay fresh for up to 5 days. The caramel and chocolate layers hold up really well, so it’s perfect for making a day or two ahead of a party.
Freeze: You can freeze this cheesecake for up to 2 months if you want to make it way ahead. Wrap it tightly in plastic wrap and then in aluminum foil to prevent freezer burn. When you’re ready to serve, move it to the fridge and let it thaw overnight for the best texture.
Serve: Take the cheesecake out of the fridge about 10-15 minutes before serving so it’s easier to slice. Use a sharp knife dipped in hot water and wiped clean between each cut for those perfect, clean slices that show off all the pretty layers.
| Preparation Time | 30-45 minutes |
| Cooking Time | 0 minutes |
| Total Time | 180-240 minutes |
| Level of Difficulty | Medium |
Estimated Nutrition
Estimated nutrition for the whole recipe (without optional ingredients):
- Calories: 5400-5800
- Protein: 55-70 g
- Fat: 370-410 g
- Carbohydrates: 520-570 g
Ingredients
For the crust:
- 1/2 cup melted butter (I use Kerrygold unsalted butter)
- 9 oz digestive biscuits (about 18-20 biscuits, crushed into fine crumbs)
For the caramel sauce:
- 1/4 cup water
- 3/4 cup whipping cream (room temperature for smooth caramel)
- 1.5 tsp salt (sea salt preferred)
- 1.5 cups sugar
- 3 tbsp unsalted butter
- 1.5 tsp vanilla extract (pure extract for best flavor)
For the filling:
- 1 cup whipping cream (cold, for whipping)
- 2 tsp vanilla extract
- 2 Twix bars (chopped into small pieces, about 1/4-inch chunks)
- 1/2 cup salted caramel sauce (cooled slightly)
- 1/4 cup powdered sugar (sifted to remove lumps)
- 21 oz cream cheese (softened to room temperature, about 70°F)
For the chocolate ganache:
- 4 oz whipping cream (heated until steaming)
- 4 oz semisweet chocolate (chopped finely for even melting)
For the caramel layer:
- 1/2 cup salted caramel sauce
For toppings (optional):
- Twix bars (optional, for garnish and extra texture)
- caramel shards (optional but recommended for elegant presentation)
- crushed biscuits (optional, adds nice crunch)
Step 1: Prepare the Digestive Biscuit Crust
- 9 oz digestive biscuits
- 1/2 cup melted butter
Crush the digestive biscuits into fine crumbs—you want them resembling coarse sand rather than large chunks.
Mix the crushed biscuits with the melted butter until the mixture resembles wet sand and holds together when pressed.
Line an 8-inch springform pan with parchment paper, then firmly press the biscuit mixture into an even layer on the bottom.
Chill in the refrigerator while you prepare the remaining components.
Step 2: Make the Salted Caramel Sauce
- 1.5 cups sugar
- 1/4 cup water
- 3/4 cup whipping cream
- 3 tbsp unsalted butter
- 1.5 tsp salt
- 1.5 tsp vanilla extract
Combine the sugar and water in a saucepan over medium-high heat, stirring occasionally until the sugar dissolves.
Stop stirring once it begins to boil and let it cook undisturbed until it reaches a deep amber color—about 5-7 minutes.
Remove from heat immediately and carefully add the room-temperature whipping cream (it will bubble vigorously).
Stir constantly for about 1 minute until the bubbling subsides and the sauce becomes smooth.
Add the unsalted butter, salt, and vanilla extract, stirring until fully incorporated.
I like to let the caramel cool completely before using it so it reaches the right consistency for folding—this prevents the cream cheese mixture from breaking down.
Set aside to cool.
Step 3: Prepare the Cheesecake Filling
- 21 oz cream cheese
- 2 tsp vanilla extract
- 1/4 cup powdered sugar
- 1/2 cup salted caramel sauce from Step 2
- 1 cup whipping cream
- 2 Twix bars
Ensure the cream cheese is softened to room temperature (about 70°F) for a smooth, lump-free filling.
In a large bowl, beat the softened cream cheese with the vanilla extract and sifted powdered sugar until completely smooth and creamy, about 2-3 minutes.
Gently fold in the cooled caramel sauce from Step 2 using a spatula, being careful not to overwork the mixture.
In a separate bowl, whip the cold whipping cream to stiff peaks.
Carefully fold the whipped cream into the cream cheese mixture in two additions, folding just until no white streaks remain—overworking will deflate the whipped cream and result in a dense filling.
Fold in the chopped Twix pieces gently so they distribute evenly throughout.
Step 4: Assemble and Chill the Cake Base
- cheesecake filling mixture from Step 3
- chilled crust from Step 1
Pour the cheesecake filling mixture from Step 3 over the chilled crust from Step 1, spreading it into an even layer.
Refrigerate for at least 4-6 hours (or overnight) until the filling is firm enough to support the caramel and chocolate layers.
I find that refrigerating overnight gives the best texture—the filling sets properly and creates clean layers when sliced.
Step 5: Add the Caramel Layer
- 1/2 cup salted caramel sauce
Remove the cheesecake from the refrigerator and spread the 1/2 cup salted caramel sauce evenly over the filling, leaving about a 1/2-inch border around the edges (this prevents caramel from running over the sides).
Return to the refrigerator for 30 minutes to allow the caramel to set slightly before adding the chocolate layer.
Step 6: Create and Apply the Chocolate Topping
- 4 oz semisweet chocolate
- 4 oz whipping cream
Place the finely chopped semisweet chocolate in a heatproof bowl and pour the heated whipping cream (hot but not boiling) over it.
Let it sit for 1-2 minutes, then stir gently until the chocolate is completely melted and smooth.
Allow the chocolate mixture to cool for a few minutes until it’s warm but not hot, then pour it evenly over the caramel layer.
Spread it gently to the edges with a spatula.
Return the cheesecake to the refrigerator for at least 30 minutes until the chocolate sets completely.
Step 7: Final Garnish and Serve
- Twix bars
- caramel shards
- crushed biscuits
Once the chocolate layer is completely set, remove the cheesecake from the refrigerator and run a thin knife around the edges before releasing the springform pan.
Slice with a hot, damp knife (wiping between each cut) for clean pieces.
If desired, garnish with crushed Twix bars, caramel shards, or additional crushed digestive biscuits for texture and visual appeal.
Serve chilled.
Best No Bake Twix Cheesecake
Ingredients
Method
- Crush the digestive biscuits into fine crumbs—you want them resembling coarse sand rather than large chunks. Mix the crushed biscuits with the melted butter until the mixture resembles wet sand and holds together when pressed. Line an 8-inch springform pan with parchment paper, then firmly press the biscuit mixture into an even layer on the bottom. Chill in the refrigerator while you prepare the remaining components.
- Combine the sugar and water in a saucepan over medium-high heat, stirring occasionally until the sugar dissolves. Stop stirring once it begins to boil and let it cook undisturbed until it reaches a deep amber color—about 5-7 minutes. Remove from heat immediately and carefully add the room-temperature whipping cream (it will bubble vigorously). Stir constantly for about 1 minute until the bubbling subsides and the sauce becomes smooth. Add the unsalted butter, salt, and vanilla extract, stirring until fully incorporated. I like to let the caramel cool completely before using it so it reaches the right consistency for folding—this prevents the cream cheese mixture from breaking down. Set aside to cool.
- Ensure the cream cheese is softened to room temperature (about 70°F) for a smooth, lump-free filling. In a large bowl, beat the softened cream cheese with the vanilla extract and sifted powdered sugar until completely smooth and creamy, about 2-3 minutes. Gently fold in the cooled caramel sauce from Step 2 using a spatula, being careful not to overwork the mixture. In a separate bowl, whip the cold whipping cream to stiff peaks. Carefully fold the whipped cream into the cream cheese mixture in two additions, folding just until no white streaks remain—overworking will deflate the whipped cream and result in a dense filling. Fold in the chopped Twix pieces gently so they distribute evenly throughout.
- Pour the cheesecake filling mixture from Step 3 over the chilled crust from Step 1, spreading it into an even layer. Refrigerate for at least 4-6 hours (or overnight) until the filling is firm enough to support the caramel and chocolate layers. I find that refrigerating overnight gives the best texture—the filling sets properly and creates clean layers when sliced.
- Remove the cheesecake from the refrigerator and spread the 1/2 cup salted caramel sauce evenly over the filling, leaving about a 1/2-inch border around the edges (this prevents caramel from running over the sides). Return to the refrigerator for 30 minutes to allow the caramel to set slightly before adding the chocolate layer.
- Place the finely chopped semisweet chocolate in a heatproof bowl and pour the heated whipping cream (hot but not boiling) over it. Let it sit for 1-2 minutes, then stir gently until the chocolate is completely melted and smooth. Allow the chocolate mixture to cool for a few minutes until it's warm but not hot, then pour it evenly over the caramel layer. Spread it gently to the edges with a spatula. Return the cheesecake to the refrigerator for at least 30 minutes until the chocolate sets completely.
- Once the chocolate layer is completely set, remove the cheesecake from the refrigerator and run a thin knife around the edges before releasing the springform pan. Slice with a hot, damp knife (wiping between each cut) for clean pieces. If desired, garnish with crushed Twix bars, caramel shards, or additional crushed digestive biscuits for texture and visual appeal. Serve chilled.