I’ve always loved frozen treats, but I don’t always love the sugar crash that comes with them. Give me something sweet that also packs some protein, and I’m happy. These frozen yogurt bites check both boxes without making me feel like I need a nap an hour later.
The best part? You don’t need any special equipment. No ice cream maker, no fancy molds. Just a baking sheet, some parchment paper, and about ten minutes of your time. I make a batch on Sunday nights and snack on them all week long when I need something cold and a little sweet.
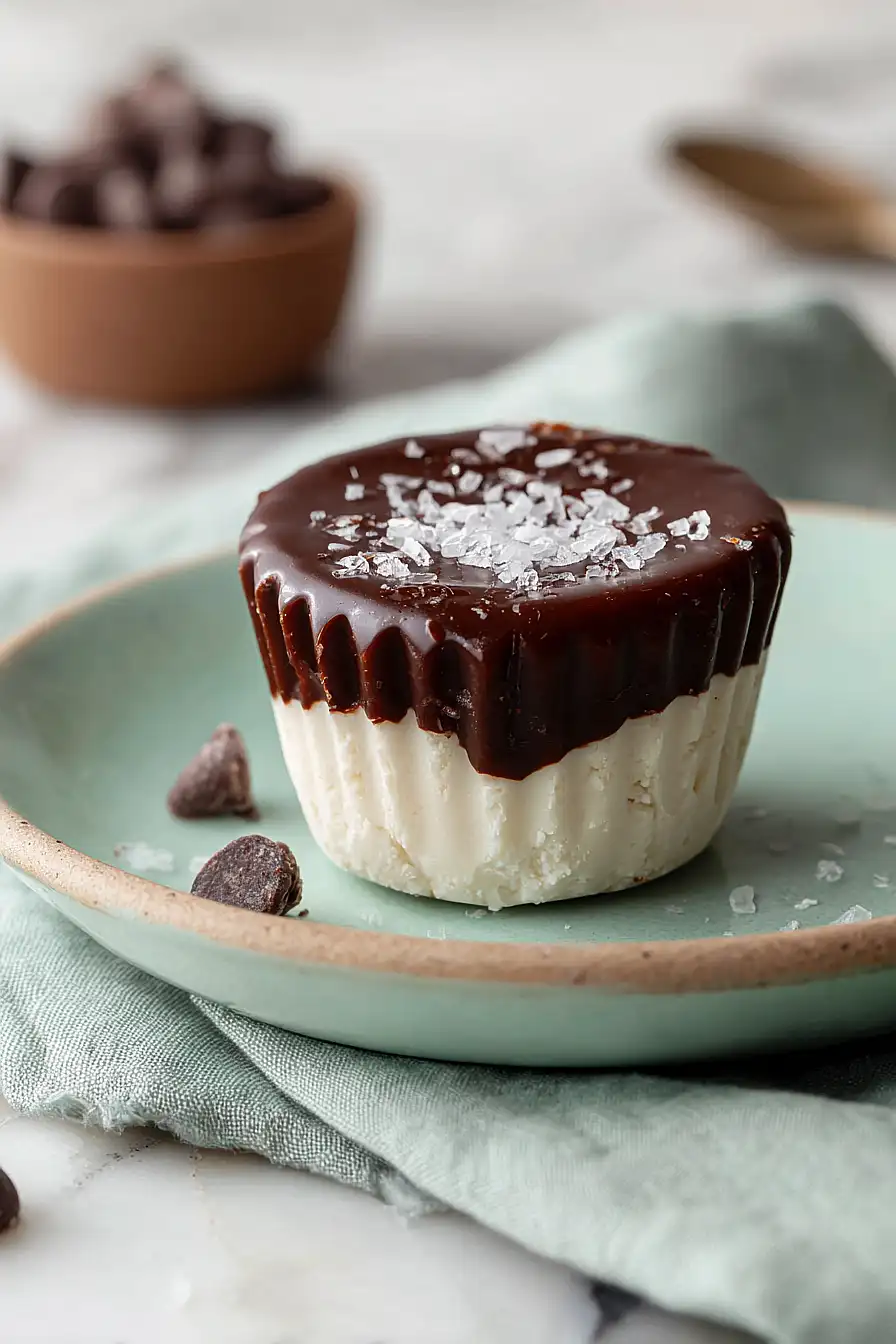
They’re tangy from the yogurt, creamy from the cashew butter, and that chocolate coating makes them feel like a real dessert. My kids think they’re getting a treat, and I’m not worrying about what’s actually in them.

Why You’ll Love These Vegan Frozen Yogurt Bites
- Guilt-free sweet treat – These frozen yogurt bites satisfy your dessert cravings while packing in protein and wholesome ingredients, so you can enjoy them as a snack or post-workout treat.
- Make-ahead convenience – You can prep a big batch on the weekend and keep them in the freezer for whenever you need a quick, healthy snack throughout the week.
- Simple ingredients – Just a handful of pantry staples like cashew butter, maple syrup, and chocolate chips come together to create these tasty bites.
- Kid-friendly – The sweet chocolate coating and bite-sized portions make these a fun treat that kids will actually ask for, and you’ll feel good about giving them.
- Customizable – You can easily swap the cashew butter for almond or peanut butter, or add your favorite toppings to make them your own.
What Kind of Greek Yogurt Should I Use?
For this recipe, you’ll want to pick up a thick, creamy Greek yogurt that will hold its shape when frozen. Full-fat Greek yogurt works best here because it creates a richer, creamier bite that won’t turn icy in the freezer. If you’re looking for a lighter option, 2% Greek yogurt will also work well, though I’d avoid fat-free versions since they tend to freeze harder and lose that smooth, creamy texture we’re going for. Plain, unsweetened Greek yogurt is your best bet since we’re already adding maple syrup for sweetness, but if you prefer a sweeter treat, you can use vanilla-flavored Greek yogurt and just reduce the maple syrup slightly.

Options for Substitutions
This recipe is pretty adaptable, so feel free to make these swaps based on what you have:
- Greek yogurt: Since this is a vegan recipe, make sure you’re using plant-based Greek yogurt like coconut, almond, or soy-based varieties. They all work well here, though coconut will give you a slightly richer taste.
- Cashew butter: Any nut or seed butter works great – try almond butter, peanut butter, or sunflower seed butter if you have a nut allergy. Just keep in mind that peanut butter has a stronger flavor.
- Maple syrup: Agave nectar or date syrup are good alternatives if you don’t have maple syrup. You could also use honey if you’re not strictly vegan.
- Protein powder: This is optional, so you can leave it out entirely. If you want to keep it, make sure you’re using a vegan protein powder like pea or hemp protein.
- Cacao nibs: If you don’t have cacao nibs, chopped dark chocolate, mini chocolate chips, or even crushed nuts add a nice crunch.
- Chocolate chips: Make sure to use dairy-free chocolate chips for a vegan recipe. You can also use a chopped dark chocolate bar instead.
- Coconut oil: A small amount of any neutral oil works, or you can use vegan butter for the chocolate coating.
Watch Out for These Mistakes While Making
The biggest mistake when making frozen yogurt bites is overfilling the molds, which leaves no room for the chocolate topping and creates a messy overflow – stick to the 2/3 full guideline so you have space for that chocolate layer.
Another common error is rushing the chocolate melting process by using high heat or long microwave intervals, which can cause the chocolate to seize up and become grainy instead of smooth – those 30-second bursts are there for a reason, and stirring between each interval helps ensure an even melt.
Don’t skip the coconut oil in your chocolate mixture, as it helps thin out the chocolate for easier pouring and gives you that satisfying snap when you bite into the frozen treats.
Finally, resist the urge to pop these out of the molds too early – if they haven’t frozen for the full 3-4 hours, they’ll be too soft to handle and might break apart, so patience really pays off here.
What to Serve With Frozen Yogurt Bites?
These frozen yogurt bites are perfect as a standalone snack, but they’re also great alongside fresh berries like strawberries, blueberries, or raspberries for a refreshing dessert plate. I love setting them out with some sliced bananas and a drizzle of extra cashew butter for dipping, which makes them feel more like a complete treat. They work really well as an after-dinner dessert with a cup of herbal tea or coffee, or you can pack them in a lunchbox with some apple slices and almonds for a balanced snack. If you’re serving them at a party, arrange them on a platter with other bite-sized treats like energy balls or fresh fruit skewers.
Storage Instructions
Freeze: These frozen yogurt bites are meant to live in your freezer! Store them in an airtight container or freezer bag with parchment paper between layers so they don’t stick together. They’ll keep perfectly for up to 3 months, making them a great treat to have ready whenever a craving hits.
Serve: Pull out however many bites you want straight from the freezer and enjoy them frozen. They’re best eaten within 5-10 minutes of taking them out, while they’re still firm and cold. If they sit out too long, they’ll start to soften and get a bit messy.
| Preparation Time | 15-20 minutes |
| Cooking Time | 180-240 minutes |
| Total Time | 195-260 minutes |
| Level of Difficulty | Easy |
| Servings | 24 bites |
Estimated Nutrition
Estimated nutrition for the whole recipe (without optional ingredients):
- Calories: 1150-1300
- Protein: 37-45 g
- Fat: 67-77 g
- Carbohydrates: 105-120 g
Ingredients
For the yogurt base:
- 1 cup greek yogurt (I prefer Forager Project for its thick, creamy texture)
- 4 tbsp cashew butter (stirred well until smooth and runny)
- 4 tbsp maple syrup
- 3 tbsp protein powder (I use Vega vanilla for the best flavor profile)
- 1 tsp vanilla
- 1/4 tsp salt
- 1 handful cacao nibs
For the chocolate coating:
- 3/4 cup chocolate chips (I always use Enjoy Life for a clean melt)
- 1 tbsp coconut oil
Step 1: Prepare the Yogurt Base Mixture
- 1 cup greek yogurt
- 4 tbsp cashew butter
- 4 tbsp maple syrup
- 3 tbsp protein powder
- 1 tsp vanilla
- 1/4 tsp salt
In a medium bowl, combine the greek yogurt, cashew butter, maple syrup, protein powder, vanilla, and salt.
Whisk together until completely smooth and well combined, making sure there are no lumps of protein powder.
This creates a thick, creamy base that’s ready to portion.
I like to taste a small spoonful at this point to make sure the sweetness and vanilla flavor are balanced to your preference—you can always add a touch more vanilla if needed.
Step 2: Fill Molds and Add Cacao Nibs
- yogurt base mixture from Step 1
- 1 handful cacao nibs
Divide the yogurt mixture from Step 1 among silicone molds or a lined ice cube tray, filling each cavity about two-thirds full.
Sprinkle a few cacao nibs into each mold, pressing them gently into the yogurt mixture so they stay put when you pour the chocolate coating.
This distributes the crunchy texture and chocolate flavor throughout each bite.
Step 3: Melt Chocolate and Coconut Oil
- 3/4 cup chocolate chips
- 1 tbsp coconut oil
Place the chocolate chips and coconut oil in a microwave-safe bowl.
Heat in 30-second intervals, stirring well between each interval, until the chocolate is completely melted and smooth (usually 1 to 1.5 minutes total).
Don’t overheat—the coconut oil helps create a thinner, more pourable chocolate coating that sets with a satisfying snap.
For a clean, shiny finish, I always use Enjoy Life chocolate chips since they melt beautifully and taste amazing.
Step 4: Coat with Chocolate and Freeze
- melted chocolate mixture from Step 3
- filled molds from Step 2
Pour or spoon the melted chocolate from Step 3 over the top of each yogurt-filled mold, covering the surface completely.
Place the molds in the freezer and freeze for 3 to 4 hours, or until the bites are completely solid and the chocolate is set.
Once fully frozen, pop the bites out of the molds and store them in an airtight container in the freezer for up to 2 weeks.
High Protein Vegan Frozen Yogurt Bites
Ingredients
Method
- In a medium bowl, combine the greek yogurt, cashew butter, maple syrup, protein powder, vanilla, and salt. Whisk together until completely smooth and well combined, making sure there are no lumps of protein powder. This creates a thick, creamy base that's ready to portion. I like to taste a small spoonful at this point to make sure the sweetness and vanilla flavor are balanced to your preference—you can always add a touch more vanilla if needed.
- Divide the yogurt mixture from Step 1 among silicone molds or a lined ice cube tray, filling each cavity about two-thirds full. Sprinkle a few cacao nibs into each mold, pressing them gently into the yogurt mixture so they stay put when you pour the chocolate coating. This distributes the crunchy texture and chocolate flavor throughout each bite.
- Place the chocolate chips and coconut oil in a microwave-safe bowl. Heat in 30-second intervals, stirring well between each interval, until the chocolate is completely melted and smooth (usually 1 to 1.5 minutes total). Don't overheat—the coconut oil helps create a thinner, more pourable chocolate coating that sets with a satisfying snap. For a clean, shiny finish, I always use Enjoy Life chocolate chips since they melt beautifully and taste amazing.
- Pour or spoon the melted chocolate from Step 3 over the top of each yogurt-filled mold, covering the surface completely. Place the molds in the freezer and freeze for 3 to 4 hours, or until the bites are completely solid and the chocolate is set. Once fully frozen, pop the bites out of the molds and store them in an airtight container in the freezer for up to 2 weeks.