If you ask me, dessert in a jar is one of the best ideas anyone’s ever had.
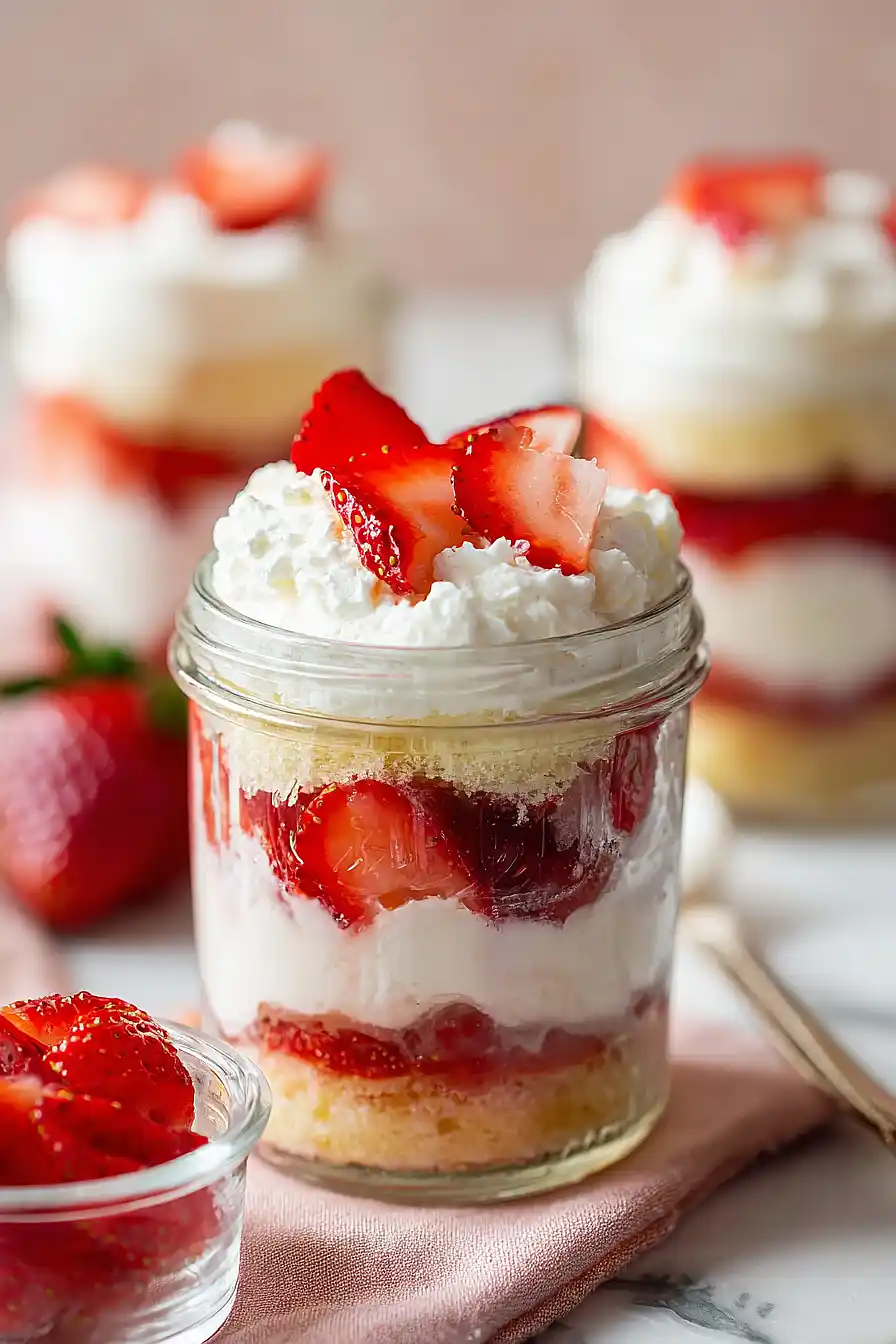
This strawberry cake in a jar is a fun twist on traditional layer cake that’s perfect for parties or just because. Tender vanilla cake pairs with fresh strawberries cooked down into a sweet, jammy sauce.
It’s layered with fluffy whipped cream that cuts through the sweetness just right. The jars make it easy to grab and go, plus everyone gets their own perfect portion.
It’s a crowd-pleasing dessert that feels special without being fussy, great for any time of year.

Why You’ll Love This Strawberry Cake in a Jar
- Perfect for gifting and parties – These individual jars make adorable presents or party desserts that your guests can grab and enjoy without any slicing or plating needed.
- Fresh strawberry flavor – Real strawberries give this cake a naturally sweet, fruity taste that beats any artificial flavoring.
- Make-ahead friendly – You can prepare these jars a day or two in advance, making them ideal for busy weekends or when you’re hosting.
- Fun and creative presentation – The layered look in clear jars makes this dessert as pretty as it is delicious, and it’s a nice change from traditional cake slices.
- Portion control built-in – Each jar is a single serving, so you don’t have to worry about cutting uneven pieces or overeating.
What Kind of Strawberries Should I Use?
Fresh strawberries are definitely the way to go for this recipe, and you’ll want to pick ones that are ripe but still firm. Look for berries that are bright red all the way through without any white or green patches near the stem, and avoid any that feel mushy or have soft spots. If fresh strawberries aren’t in season, you can use frozen ones in a pinch – just make sure to thaw them completely and drain off any excess liquid before using them. The sweetness of your strawberries will affect how the cake tastes, so give them a quick taste test before you start and adjust your sugar if needed.
Options for Substitutions
This recipe is pretty forgiving, so here are some swaps you can make if needed:
- Sour cream: If you’re out of sour cream, plain Greek yogurt works great as a 1:1 substitute. You can also use regular plain yogurt, though the texture might be slightly less rich.
- Butter: You can swap butter with an equal amount of vegetable oil or melted coconut oil. Keep in mind that oil will make the cake slightly denser and you’ll lose that buttery flavor.
- Fresh strawberries: Frozen strawberries work fine here – just thaw them completely and drain excess liquid before using. You might need to cook the strawberry mixture a bit longer to reach the right consistency.
- Heavy cream: For the cream topping, you can use whipping cream instead. Just make sure it has at least 30% fat content so it whips up properly.
- Lemon juice: No fresh lemon? Bottled lemon juice works just fine, or you can use lime juice for a slightly different citrus note.
- Cornstarch: If you don’t have cornstarch, you can leave it out – the cake will still turn out fine, just with a slightly different crumb.
Watch Out for These Mistakes While Baking
The biggest mistake when making cake in a jar is overfilling the jars, which leaves no room for the whipped cream topping and makes them messy to eat – aim to fill each jar only about two-thirds full with your cake and strawberry layers.
Don’t skip macerating the strawberries with sugar and lemon juice for the full 20 minutes, as this step draws out their natural juices and creates a syrup that keeps the cake layers moist and flavorful.
Another common error is assembling the jars too far in advance, which can make the cake soggy – these are best put together no more than 4-6 hours before serving for the ideal texture.
Make sure your cake is completely cool before cutting and layering, otherwise the whipped cream will melt and turn runny, ruining the pretty layers you worked so hard to create.

What to Serve With Strawberry Cake in a Jar?
These cute little cake jars are perfect for serving at parties or picnics since they’re already portioned out and easy to grab. I love pairing them with a scoop of vanilla ice cream on top, which melts into the layers and makes everything even more delicious. Fresh mint leaves make a nice garnish and add a pop of color, plus they complement the strawberry flavor really well. If you’re serving these for brunch, they go great alongside mimosas or iced coffee, and for a fun twist, you can add a dollop of whipped cream and some extra fresh strawberries on top right before serving.
Storage Instructions
Store: Keep your strawberry cake jars in the refrigerator since they have fresh cream and strawberries. They’ll stay fresh for about 3-4 days when covered with lids or plastic wrap. The cake might absorb some moisture from the berries over time, but honestly, that just makes it more delicious!
Make Ahead: These jars are perfect for making a day or two in advance for a party or gathering. The flavors actually get better as they sit together in the fridge. Just wait to add any final toppings or garnishes until right before serving so they look their best.
Freeze: I wouldn’t recommend freezing these since the fresh strawberries and cream don’t hold up well in the freezer. They tend to get watery and lose their texture when thawed, so it’s best to enjoy them fresh from the fridge.
| Preparation Time | 35-45 minutes |
| Cooking Time | 20-25 minutes |
| Total Time | 55-70 minutes |
| Level of Difficulty | Medium |
| Servings | 8 jars |
Estimated Nutrition
Estimated nutrition for the whole recipe (without optional ingredients):
- Calories: 4100-4400
- Protein: 45-55 g
- Fat: 170-185 g
- Carbohydrates: 590-620 g
Ingredients
For the cake:
- 2 1/4 cups flour (I always use King Arthur all-purpose flour)
- 3 1/2 tbsp cornstarch
- 1/2 tsp baking soda
- 1/2 tsp baking powder
- 12 tbsp butter (I like Kerrygold unsalted butter for this)
- 1 1/4 cups sugar
- 4 eggs (room temperature, about 70°F for better emulsion)
- 1 cup sour cream
- 1 tsp vanilla extract
For the strawberries:
- 4 cups strawberries (sliced into 1/4-inch thick rounds)
- 1 cup sugar
- 1/2 lemon juice (freshly squeezed for best brightness)
For the topping:
- 1 1/2 cups cream (very cold, straight from the fridge)
- 1 tsp vanilla extract
Step 1: Prepare Mise en Place and Preheat
- 4 eggs
- 12 tbsp butter
- 4 cups strawberries
Preheat your oven to 350°F and line a baking sheet with parchment paper.
While the oven heats, remove the butter and eggs from the refrigerator—room temperature eggs (around 70°F) emulsify better with the butter, creating a lighter, fluffier cake.
Slice your strawberries into 1/4-inch thick rounds and set aside.
This prep work takes just a few minutes and ensures everything is ready when you need it.
Step 2: Mix Dry Ingredients and Macerate Strawberries
- 2 1/4 cups flour
- 3 1/2 tbsp cornstarch
- 1/2 tsp baking soda
- 1/2 tsp baking powder
- 4 cups strawberries
- 1 cup sugar
- 1/2 lemon juice
In a medium bowl, whisk together the flour, cornstarch, baking soda, and baking powder—whisking instead of just stirring aerates the dry mixture slightly, which contributes to a tender crumb.
In a separate bowl, combine the sliced strawberries with 1 cup sugar and freshly squeezed lemon juice.
Stir gently and let sit at room temperature for about 20 minutes while you make the cake batter—this allows the strawberries to release their juices and develop deeper flavor.
I find that freshly squeezed lemon juice makes a noticeable difference in brightness compared to bottled.
Step 3: Create the Cake Batter
- 12 tbsp butter
- 1 1/4 cups sugar
- 4 eggs
- dry ingredient mixture from Step 2
- 1 cup sour cream
- 1 tsp vanilla extract
In a stand mixer, beat the room temperature butter with 1 1/4 cups sugar on medium-high speed for 3-4 minutes until the mixture is pale, fluffy, and noticeably increased in volume—this creaming process incorporates air that helps the cake rise.
Add the room temperature eggs one at a time, beating well after each addition to ensure proper emulsion.
Alternate adding the dry ingredient mixture from Step 2 and the sour cream in three additions, starting and ending with the dry mixture.
Begin with one-third of the dry mixture, then half the sour cream, then another third of dry mixture, then remaining sour cream, then final third of dry mixture—this alternating method prevents overmixing and keeps the batter tender.
Mix on low speed just until combined after each addition.
Step 4: Bake the Cake Layer
- cake batter from Step 3
Spread the batter evenly onto your prepared baking sheet in an approximately 1/2-inch thick layer, using an offset spatula to get it as level as possible for even baking.
Bake at 350°F for 18-22 minutes until a toothpick inserted in the center comes out clean and the top is light golden.
The cake should spring back lightly when touched.
Remove from the oven and let cool on the baking sheet for about 10 minutes, then turn out onto a wire rack to cool completely to room temperature—this usually takes 30-40 minutes.
Once cooled, cut the cake into circles using a biscuit cutter, small cup, or the rim of your jars, depending on your jar size.
Step 5: Whip the Cream
- 1 1/2 cups cream
- 1 tsp vanilla extract
Pour the very cold heavy cream into a chilled bowl (I chill mine in the freezer for 10 minutes before whipping).
Using a stand mixer with the whisk attachment or a hand mixer, beat the cold cream on medium-high speed until soft peaks form, about 1-2 minutes.
Add 1 tsp vanilla extract and beat for another 30 seconds until incorporated—do not overbeat or you’ll end up with butter.
The cream should be fluffy and hold its shape but still be light and billowy.
Keep refrigerated until assembly.
Step 6: Layer and Assemble in Jars
- cooked cake rounds from Step 4
- macerated strawberries from Step 2
- whipped cream from Step 5
Begin layering into your serving jars: start with a cake circle as the base, then a spoonful of macerated strawberries with their juices from Step 2, then a dollop of whipped cream from Step 5.
Repeat this layering 2-3 times depending on your jar height, finishing with a cake round on top.
The strawberry juices will gradually soak into the cake layers, creating a moist, flavorful dessert.
For the most visually appealing presentation, tilt the jars slightly as you layer so you can see the distinct layers through the glass.
Step 7: Finish and Chill
- whipped cream from Step 5
- macerated strawberries from Step 2
Top each jar with a generous dollop of whipped cream from Step 5 and a few of the prettiest strawberry slices.
Refrigerate for at least 30 minutes before serving—this allows all the flavors to meld and the textures to set properly.
The cakes are best served cold and enjoyed within 24 hours for optimal texture and flavor.
Classic Strawberry Cake in a Jar
Ingredients
Method
- Preheat your oven to 350°F and line a baking sheet with parchment paper. While the oven heats, remove the butter and eggs from the refrigerator—room temperature eggs (around 70°F) emulsify better with the butter, creating a lighter, fluffier cake. Slice your strawberries into 1/4-inch thick rounds and set aside. This prep work takes just a few minutes and ensures everything is ready when you need it.
- In a medium bowl, whisk together the flour, cornstarch, baking soda, and baking powder—whisking instead of just stirring aerates the dry mixture slightly, which contributes to a tender crumb. In a separate bowl, combine the sliced strawberries with 1 cup sugar and freshly squeezed lemon juice. Stir gently and let sit at room temperature for about 20 minutes while you make the cake batter—this allows the strawberries to release their juices and develop deeper flavor. I find that freshly squeezed lemon juice makes a noticeable difference in brightness compared to bottled.
- In a stand mixer, beat the room temperature butter with 1 1/4 cups sugar on medium-high speed for 3-4 minutes until the mixture is pale, fluffy, and noticeably increased in volume—this creaming process incorporates air that helps the cake rise. Add the room temperature eggs one at a time, beating well after each addition to ensure proper emulsion. Alternate adding the dry ingredient mixture from Step 2 and the sour cream in three additions, starting and ending with the dry mixture. Begin with one-third of the dry mixture, then half the sour cream, then another third of dry mixture, then remaining sour cream, then final third of dry mixture—this alternating method prevents overmixing and keeps the batter tender. Mix on low speed just until combined after each addition.
- Spread the batter evenly onto your prepared baking sheet in an approximately 1/2-inch thick layer, using an offset spatula to get it as level as possible for even baking. Bake at 350°F for 18-22 minutes until a toothpick inserted in the center comes out clean and the top is light golden. The cake should spring back lightly when touched. Remove from the oven and let cool on the baking sheet for about 10 minutes, then turn out onto a wire rack to cool completely to room temperature—this usually takes 30-40 minutes. Once cooled, cut the cake into circles using a biscuit cutter, small cup, or the rim of your jars, depending on your jar size.
- Pour the very cold heavy cream into a chilled bowl (I chill mine in the freezer for 10 minutes before whipping). Using a stand mixer with the whisk attachment or a hand mixer, beat the cold cream on medium-high speed until soft peaks form, about 1-2 minutes. Add 1 tsp vanilla extract and beat for another 30 seconds until incorporated—do not overbeat or you'll end up with butter. The cream should be fluffy and hold its shape but still be light and billowy. Keep refrigerated until assembly.
- Begin layering into your serving jars: start with a cake circle as the base, then a spoonful of macerated strawberries with their juices from Step 2, then a dollop of whipped cream from Step 5. Repeat this layering 2-3 times depending on your jar height, finishing with a cake round on top. The strawberry juices will gradually soak into the cake layers, creating a moist, flavorful dessert. For the most visually appealing presentation, tilt the jars slightly as you layer so you can see the distinct layers through the glass.
- Top each jar with a generous dollop of whipped cream from Step 5 and a few of the prettiest strawberry slices. Refrigerate for at least 30 minutes before serving—this allows all the flavors to meld and the textures to set properly. The cakes are best served cold and enjoyed within 24 hours for optimal texture and flavor.