I am NOT turning on my oven for garlic bread. Not in July. Not when there’s a perfectly good skillet on the stove.
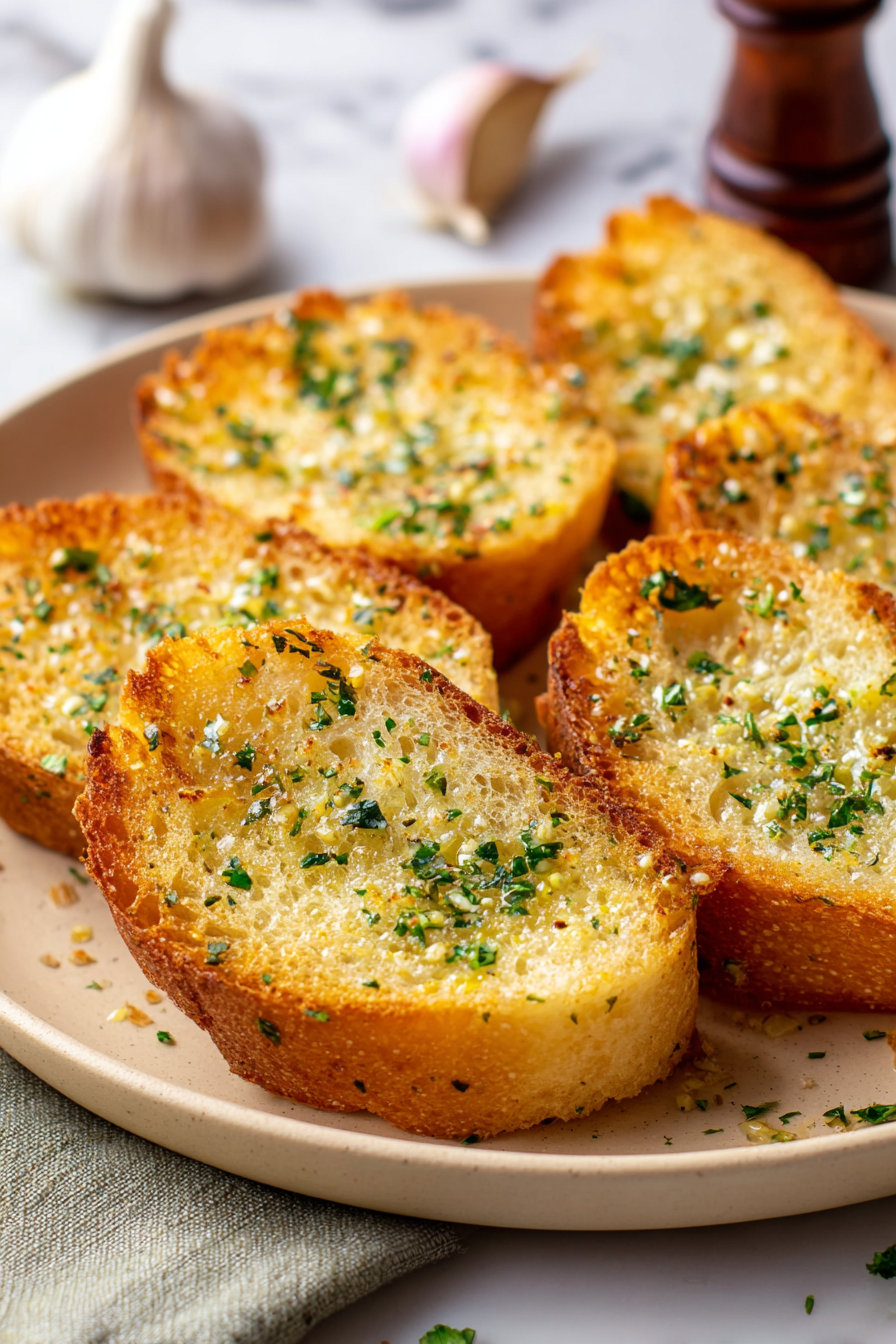
A thick layer of garlic-cilantro-chili butter slathered on baguette slices and toasted in a dry pan until golden and crisp? DONE. Crispy edges, pillowy middle, and the whole kitchen smells like a restaurant.
10 minutes start to finish. Pair it with pasta, dunk it in soup, or just stand over the sink with the plate. No judgment here.
Why Skip the Oven?
Sometimes the oven is just overkill. Here’s why the skillet is smarter.
- Zero preheating…. saves you 10+ minutes of standing around.
- Real-time browning control (you SEE it, no burnt garlic!).
- Energy efficient (small batch, WAY less heat wasted).
- Summer-friendly (your kitchen stays COOL).
- Faster crunch (skillet heat = crispier crust in 2 minutes flat).
How to Get Golden, Crispy Bread in a Pan
Crank your skillet to MEDIUM-LOW heat and give it a full minute to warm up properly. (Rushing this step is how you end up with sad, pale bread that tastes like disappointment.)
Slap those buttered slices down in a SINGLE LAYER with breathing room between them. Crowding the pan is the enemy of crispiness… we want hot air circulating, not steam trapped.
Cook for 1-2 MINUTES PER SIDE, pressing gently with a spatula for even contact. Flip when you see those gorgeous golden edges creeping up the crust. Serve IMMEDIATELY because crispy bread waits for no one!
Best Bread to Use (Beyond Baguette)
- DAY-OLD sourdough slices (sturdy crumb, toasts up CRISPY without going soggy under all that butter)
- Ciabatta rolls split in half (those open holes DRINK UP the garlic butter, every single nook)
- Crusty Italian loaf, cut 1-inch thick (rough texture grabs onto the garlic bits)
- Thick-cut Texas toast (pre-sliced, zero fuss, ready in a flash)
- Bolillo or French rolls (smaller portions, individual servings, no cutting required)
Skip anything too soft…. sandwich bread will collapse into MUSH in the pan. You want structure, a real crust, and a tight enough crumb to handle heavy butter without falling apart. Pick sturdy!
Storage & Reheating Tips
- Store leftovers in an AIRTIGHT CONTAINER in the fridge for up to 2 days
- Reheat in a DRY SKILLET over medium-low heat, 1-2 minutes per side…. skip the microwave or you’ll get soggy, sad bread!
- The butter mixture keeps in the fridge for 1 week (freeze up to 3 months if you’re a planner)
- Spread butter on FRESH SLICES and toast right before serving for MAXIMUM CRISPINESS
Estimated Nutrition
Estimated nutrition for the whole recipe (without optional ingredients):
- Calories: 950-1100
- Protein: 18-22 g
- Fat: 46-54 g
- Carbohydrates: 120-140 g
Ingredients
For the garlic butter:
- 3/4 cup butter (I prefer Kerrygold unsalted for a richer, creamier flavor)
- 6 garlic cloves (finely minced to distribute flavor evenly)
- 2 tbsp cilantro (finely chopped)
- 1/2 tsp black pepper
- 1/4 tsp sea salt
- 1/4 tsp red chili flakes (optional for a subtle kick)
For the bread:
- 2 baguettes (cut into 1-inch thick slices for the perfect crust-to-softness ratio)
Step 1: Whip Up Herb Garlic Butter
- 3/4 cup butter
- 6 garlic cloves, finely minced
- 2 tbsp cilantro, finely chopped
- 1/2 tsp black pepper
- 1/4 tsp sea salt
- 1/4 tsp red chili flakes
Mince the garlic cloves finely to ensure the flavor distributes evenly throughout the butter.
In a small bowl, combine the softened butter with the minced garlic, chopped cilantro, sea salt, black pepper, and red chili flakes if using.
Mix thoroughly until all ingredients are well incorporated and the mixture is uniform.
I prefer using quality butter like Kerrygold because it has a richer, creamier flavor that really shines in a simple recipe like this—it makes a noticeable difference in the final taste.
Step 2: Slice Baguettes Diagonally
- 2 baguettes
Cut the baguettes diagonally into 1-inch thick slices.
The diagonal cut increases the surface area and creates a more appealing presentation, plus it gives you more crust-to-softness ratio in each slice.
Arrange the slices on a clean work surface and prepare to spread the garlic butter.
Step 3: Slather Both Sides Generously
- garlic butter mixture from Step 1
- baguette slices from Step 2
Generously spread the garlic butter mixture from Step 1 on both sides of each baguette slice.
Work efficiently but carefully to ensure an even coating on both surfaces.
I like to use about 1 teaspoon of the mixture per side to get good coverage without making the bread too soggy.
Set the buttered slices aside on a plate.
Step 4: Pan-Fry Until Golden
- buttered bread slices from Step 3
Heat a large skillet or griddle over medium-low heat for about 1 minute.
Once heated, working in batches if necessary to avoid overcrowding, place the buttered bread slices in the pan and cook for 1-2 minutes per side until golden brown and crispy.
The medium-low heat allows the butter to melt and toast the bread gently without burning the garlic.
Serve immediately while still warm and crispy.
Classic Garlic Bread No Oven
Ingredients
Method
- Mince the garlic cloves finely to ensure the flavor distributes evenly throughout the butter. In a small bowl, combine the softened butter with the minced garlic, chopped cilantro, sea salt, black pepper, and red chili flakes if using. Mix thoroughly until all ingredients are well incorporated and the mixture is uniform. I prefer using quality butter like Kerrygold because it has a richer, creamier flavor that really shines in a simple recipe like this—it makes a noticeable difference in the final taste.
- Cut the baguettes diagonally into 1-inch thick slices. The diagonal cut increases the surface area and creates a more appealing presentation, plus it gives you more crust-to-softness ratio in each slice. Arrange the slices on a clean work surface and prepare to spread the garlic butter.
- Generously spread the garlic butter mixture from Step 1 on both sides of each baguette slice. Work efficiently but carefully to ensure an even coating on both surfaces. I like to use about 1 teaspoon of the mixture per side to get good coverage without making the bread too soggy. Set the buttered slices aside on a plate.
- Heat a large skillet or griddle over medium-low heat for about 1 minute. Once heated, working in batches if necessary to avoid overcrowding, place the buttered bread slices in the pan and cook for 1-2 minutes per side until golden brown and crispy. The medium-low heat allows the butter to melt and toast the bread gently without burning the garlic. Serve immediately while still warm and crispy.