If you ask me, Mickey Mouse cookies are pretty much guaranteed to make Valentine’s Day more fun.
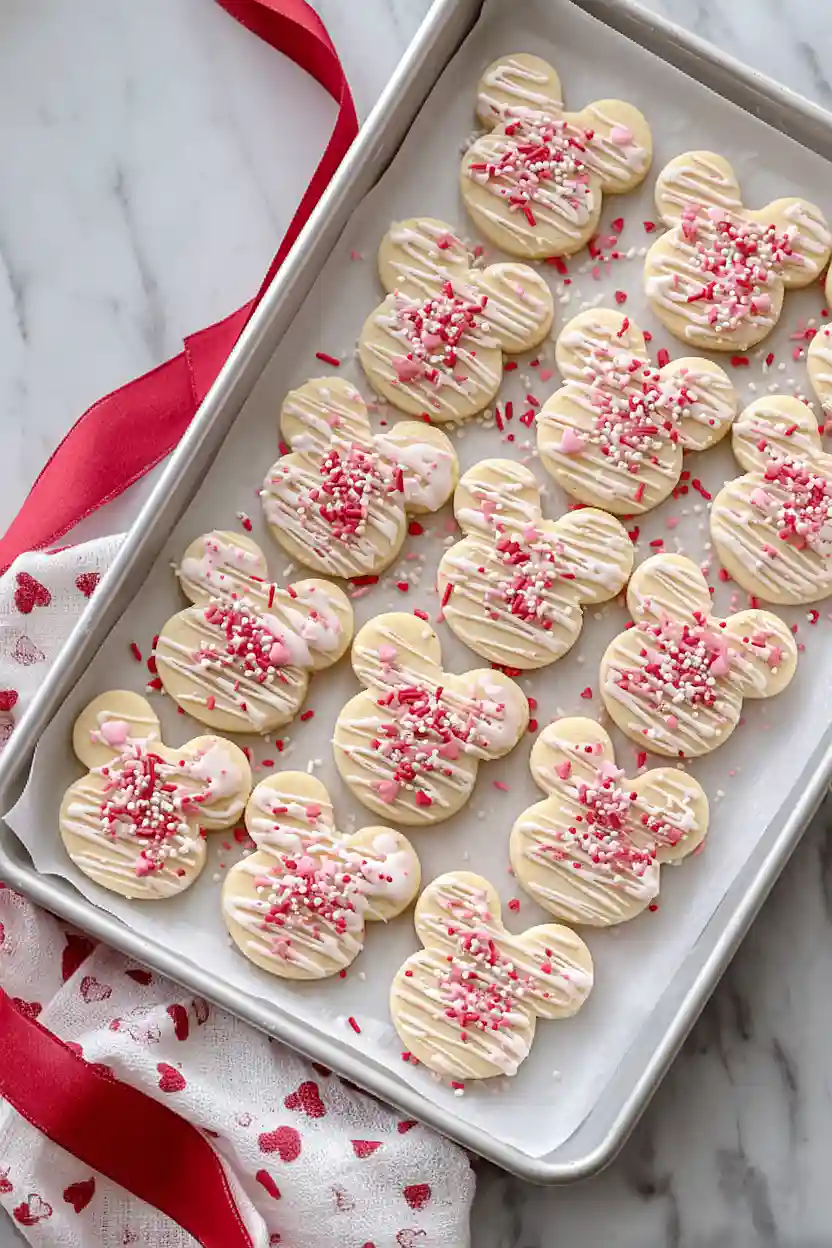
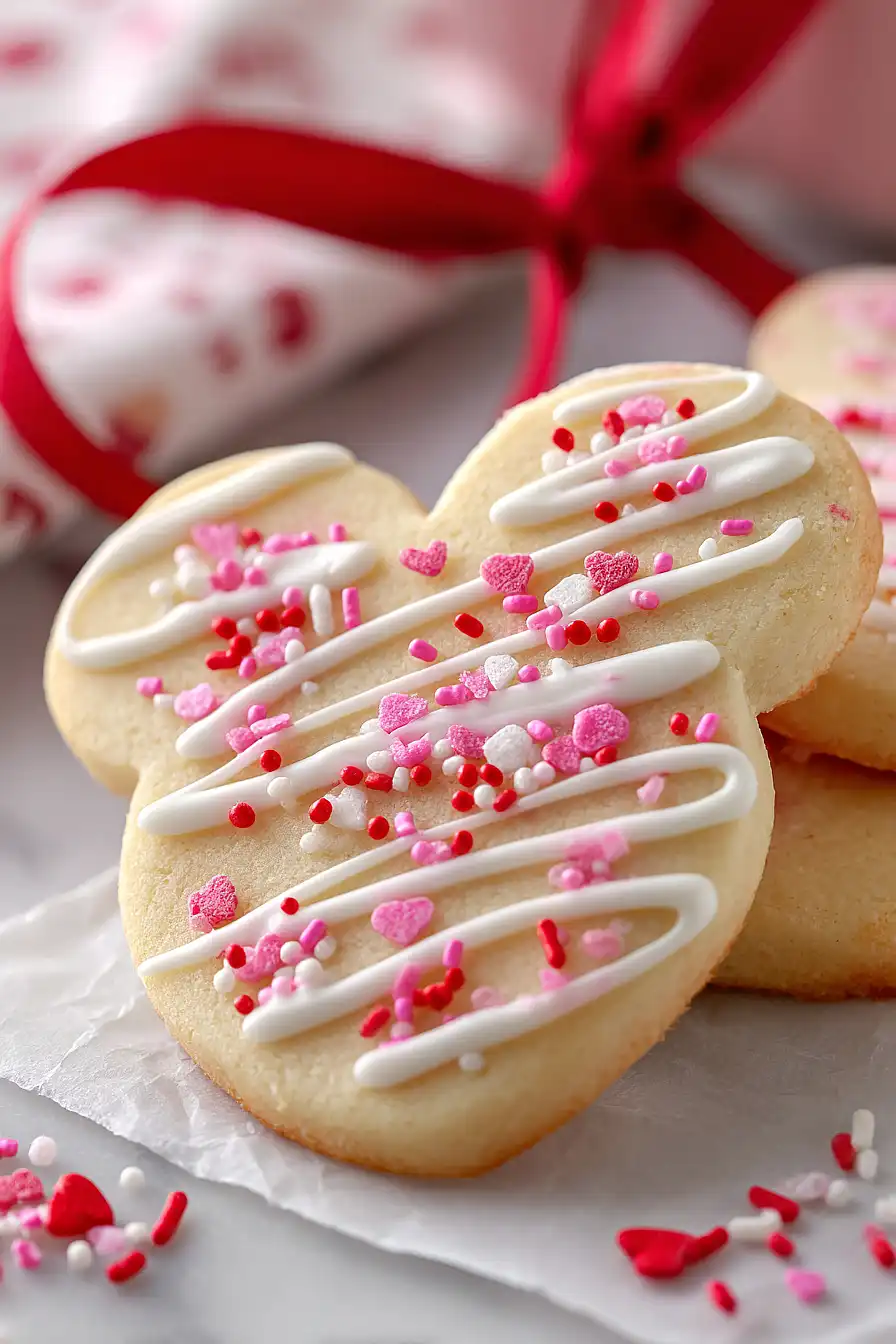
These shortbread cookies are loaded with colorful nonpareils and topped with a simple vanilla glaze. The buttery dough comes together easily and holds its shape perfectly when you cut out those iconic mouse ears.
They’re finished with a sweet milk glaze and an extra sprinkle of nonpareils on top. The result is a cookie that’s just as cute as it is tasty.
It’s a festive treat that kids and adults alike will love, perfect for classroom parties or a sweet surprise at home.
Why You’ll Love These Mickey Mouse Valentine’s Day Cookies
- Quick and easy – These cookies come together in under an hour, making them perfect for last-minute Valentine’s Day treats or when you need something sweet in a hurry.
- Kid-friendly activity – The Mickey Mouse shape and colorful nonpareils make these cookies fun for kids to help decorate, turning baking into quality family time.
- Simple ingredients – You probably already have most of these pantry staples at home, so no special shopping trip required.
- Festive and adorable – The classic Mickey Mouse shape combined with Valentine’s Day decorations makes these cookies perfect for classroom parties, gift-giving, or just celebrating the holiday at home.
What Kind of Butter Should I Use?
For these Mickey Mouse cookies, you’ll want to use unsalted butter so you have better control over the salt level in your dough. Regular salted butter can work in a pinch, but you might want to reduce the added salt by half to avoid overly salty cookies. Make sure your butter is at room temperature before you start – it should be soft enough to leave an indent when you press it, but not melted or greasy. If you only have cold butter, you can cut it into small cubes and let it sit on the counter for about 30 minutes, or microwave it in short 5-second bursts until it’s softened but not melted.
Options for Substitutions
These cookies are pretty straightforward, but here are some swaps you can make if needed:
- Butter: You can use margarine or a butter substitute in equal amounts, though the flavor won’t be quite as rich. Make sure whatever you use is cold and firm for the best cookie texture.
- Vanilla essence: Vanilla extract works just as well as vanilla essence – they’re basically the same thing. You can also try almond extract for a different flavor, but use only half the amount since it’s stronger.
- All-purpose flour: This is one ingredient you shouldn’t substitute. The flour is what gives these cookies their structure, and swapping it for something like almond flour or gluten-free flour will change the texture completely.
- Nonpareils: If you can’t find nonpareils, try using sprinkles, sanding sugar, or even mini chocolate chips. Just keep in mind that chocolate chips might melt a bit during baking.
- Milk: Any milk works here – whole, 2%, almond, or oat milk. You can also use heavy cream for a richer glaze, or water in a pinch, though the glaze won’t be as creamy.
Watch Out for These Mistakes While Baking
The biggest mistake when making decorated cookies is over-baking them, which leads to hard, crunchy edges instead of soft, chewy centers – pull them from the oven when they’re just barely set and still look slightly underdone in the middle.
Skipping the chilling step for your dough can cause the cookies to spread too much and lose their Mickey Mouse shape, so pop the dough in the fridge for at least 30 minutes before rolling and cutting.
When adding the nonpareils to your dough, be gentle and don’t overmix or the colors will bleed and turn your dough an unappetizing gray color.
Finally, make sure your cookies are completely cool before adding the icing – warm cookies will cause the glaze to melt and slide right off, and your decorative nonpareils won’t stick properly.

What to Serve With Mickey Mouse Valentine’s Day Cookies?
These cookies are perfect for a Valentine’s Day party spread alongside other sweet treats like chocolate-covered strawberries, conversation heart candies, or pink frosted cupcakes. Kids love pairing them with a cold glass of milk or hot chocolate with marshmallows, which makes the whole experience feel extra special. If you’re putting together a dessert table, consider adding some red and pink M&Ms in little bowls, heart-shaped Rice Krispie treats, or even a simple fruit platter with strawberries and raspberries to balance out all the sweetness. These cookies also work great as part of a Valentine’s cookie exchange or packaged up in cellophane bags as gifts for classmates and friends.
Storage Instructions
Store: These Mickey Mouse cookies stay fresh in an airtight container at room temperature for up to a week. Just make sure the icing is completely set before you stack them, or they might stick together. I like to put a sheet of parchment paper between layers just to be safe.
Freeze: You can freeze these cookies for up to 3 months, either before or after decorating. If they’re already iced, freeze them on a baking sheet first until solid, then transfer to a freezer bag. Undecorated cookies can go straight into a freezer-safe container and you can ice them whenever you’re ready.
Make Ahead: The dough is great for making ahead! Wrap it tightly in plastic wrap and keep it in the fridge for up to 3 days before rolling and baking. You can also bake the cookies a day or two early and decorate them closer to Valentine’s Day so they look their freshest.
| Preparation Time | 30-40 minutes |
| Cooking Time | 8-10 minutes |
| Total Time | 40-50 minutes |
| Level of Difficulty | Medium |
| Servings | 36 cookies |
Estimated Nutrition
Estimated nutrition for the whole recipe (without optional ingredients):
- Calories: 3000-3200
- Protein: 20-24 g
- Fat: 180-190 g
- Carbohydrates: 350-370 g
Ingredients
For the dough:
- 1.25 cups butter (I like Kerrygold unsalted butter for this)
- 0.66 cup sugar
- 1.5 tsp vanilla
- 2.75 cups flour (I always use King Arthur all-purpose flour)
- 0.75 tsp salt
- 1/4 cup nonpareils (added at the very end to prevent bleeding)
For the icing:
- 1 cup powdered sugar (sifted to remove lumps)
- 6 tbsp milk
- 0.75 tsp vanilla
- 4 tbsp nonpareils
Step 1: Prepare Your Workspace and Mise en Place
- 1 cup powdered sugar
- 2.75 cups flour
Preheat your oven to 350°F and line your baking sheets with parchment paper.
Sift the powdered sugar for the frosting to remove any lumps—this ensures a smooth, lump-free icing that pipes beautifully.
Measure out all your ingredients so everything is ready when you need it.
I always sift my flour too when making sugar cookies to achieve a more tender, delicate crumb.
Step 2: Make the Cookie Dough
- 1.25 cups butter
- 0.66 cup sugar
- 1.5 tsp vanilla
- 2.75 cups flour
- 0.75 tsp salt
In a large bowl, beat together the butter and sugar until the mixture is light and fluffy, about 2-3 minutes—this incorporates air into the dough for a lighter texture.
Add the vanilla extract and mix until combined.
In a separate bowl, whisk together the flour and salt.
Add the dry ingredient mixture to the wet ingredients and mix until just combined into a cohesive dough.
I like to use Kerrygold butter for its rich flavor, and I make sure not to overmix once the dry ingredients are added to keep the cookies tender.
Step 3: Add Sprinkles and Shape the Cookies
- cookie dough from Step 2
- 1/4 cup nonpareils
Fold the 1/4 cup nonpareils into the dough from Step 2 until evenly distributed—I add them at this stage rather than during mixing to prevent the colors from bleeding into the dough.
Roll the dough out between two sheets of parchment paper to about 1/4 inch thickness for even baking.
Using your Mickey Mouse cookie cutter, cut out 36 shapes and transfer them to the prepared baking sheets, spacing them about an inch apart.
Step 4: Bake and Cool the Cookies
- shaped cookies from Step 3
Bake the cookies for 8-10 minutes until the edges are just set but the centers still look slightly underdone—they’ll continue to cook as they cool.
Remove from the oven and let the cookies rest on the baking sheet for 5 minutes to firm up, then transfer them to a wire rack to cool completely.
This brief resting period prevents the delicate cookies from breaking during transfer.
Step 5: Prepare the Icing and Decorate
- powdered sugar mixture
- cooled cookies from Step 4
- 4 tbsp nonpareils
While the cookies cool, whisk together the powdered sugar from Step 1, milk, and vanilla extract until you reach a smooth, pourable consistency—adjust with a touch more milk if it’s too thick.
Transfer the icing to a piping bag with a fine tip.
Once the cookies are completely cooled, drizzle the icing over each cookie in your desired pattern, then immediately sprinkle the 4 tablespoons of nonpareils over the wet icing so they adhere.
Allow the icing to set completely before serving, about 15-30 minutes.
Tasty Mickey Mouse Valentine's Day Cookies
Ingredients
Method
- Preheat your oven to 350°F and line your baking sheets with parchment paper. Sift the powdered sugar for the frosting to remove any lumps—this ensures a smooth, lump-free icing that pipes beautifully. Measure out all your ingredients so everything is ready when you need it. I always sift my flour too when making sugar cookies to achieve a more tender, delicate crumb.
- In a large bowl, beat together the butter and sugar until the mixture is light and fluffy, about 2-3 minutes—this incorporates air into the dough for a lighter texture. Add the vanilla extract and mix until combined. In a separate bowl, whisk together the flour and salt. Add the dry ingredient mixture to the wet ingredients and mix until just combined into a cohesive dough. I like to use Kerrygold butter for its rich flavor, and I make sure not to overmix once the dry ingredients are added to keep the cookies tender.
- Fold the 1/4 cup nonpareils into the dough from Step 2 until evenly distributed—I add them at this stage rather than during mixing to prevent the colors from bleeding into the dough. Roll the dough out between two sheets of parchment paper to about 1/4 inch thickness for even baking. Using your Mickey Mouse cookie cutter, cut out 36 shapes and transfer them to the prepared baking sheets, spacing them about an inch apart.
- Bake the cookies for 8-10 minutes until the edges are just set but the centers still look slightly underdone—they'll continue to cook as they cool. Remove from the oven and let the cookies rest on the baking sheet for 5 minutes to firm up, then transfer them to a wire rack to cool completely. This brief resting period prevents the delicate cookies from breaking during transfer.
- While the cookies cool, whisk together the powdered sugar from Step 1, milk, and vanilla extract until you reach a smooth, pourable consistency—adjust with a touch more milk if it's too thick. Transfer the icing to a piping bag with a fine tip. Once the cookies are completely cooled, drizzle the icing over each cookie in your desired pattern, then immediately sprinkle the 4 tablespoons of nonpareils over the wet icing so they adhere. Allow the icing to set completely before serving, about 15-30 minutes.