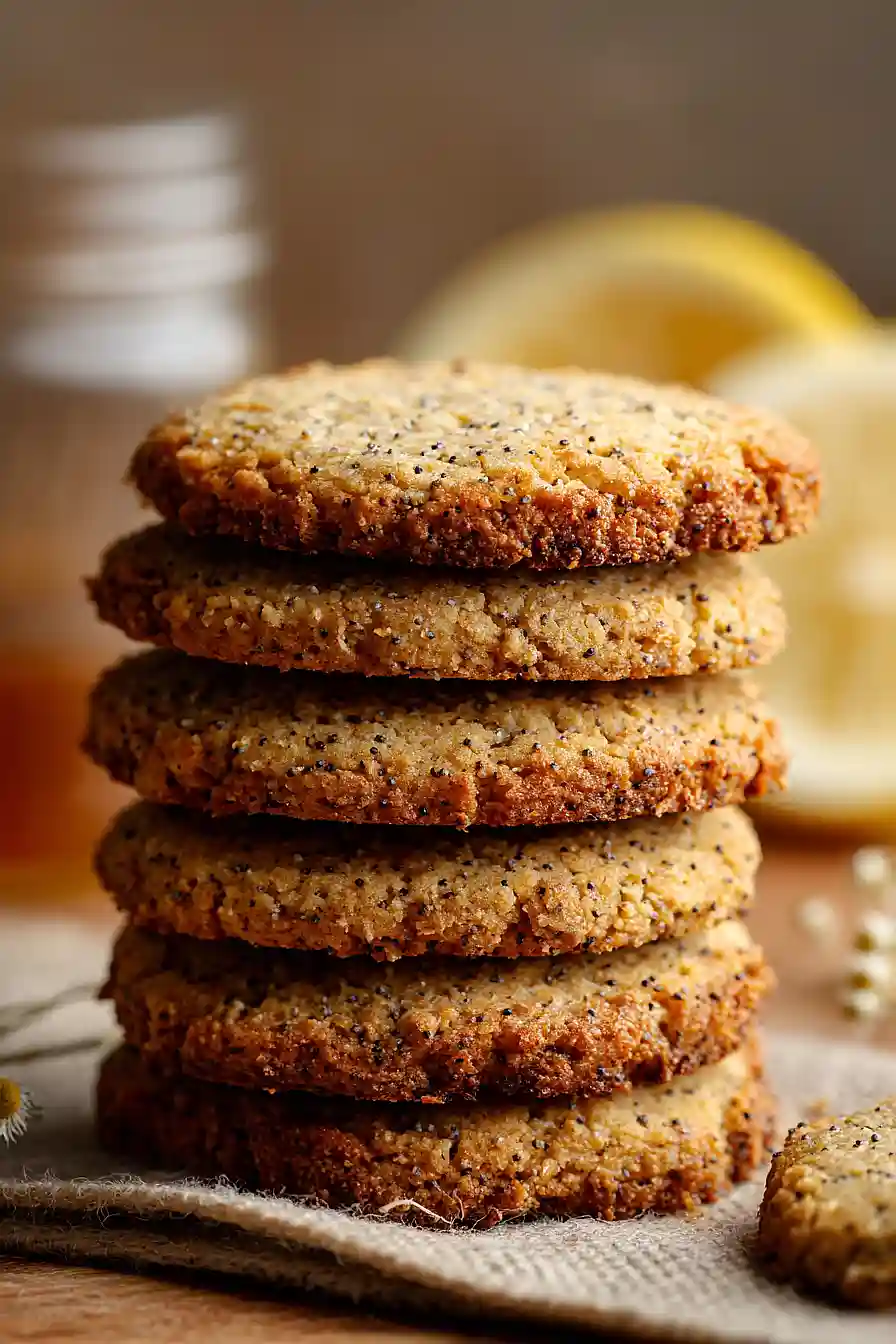
I never thought I’d get this excited about a cookie that’s naturally gluten-free. But here we are. These lemon poppy seed cookies have become my go-to when I want something light and bright without all the fuss of traditional sugar cookies.
The best part? They come together in one bowl with ingredients I usually have on hand. Almond flour gives them this soft, almost melt-in-your-mouth texture that’s nothing like regular cookies. And the lemon? It’s the perfect amount of tangy without making you pucker.
I started making these when my daughter asked for something “not chocolate” to bring to her class party. Now they’re on repeat in our house. They’re simple enough for a Tuesday afternoon but taste special enough that no one needs to know how easy they actually were.

Why You’ll Love These Lemon Poppy Seed Almond Flour Cookies
- Gluten-free and grain-free – Made with almond flour instead of regular flour, these cookies are perfect if you’re avoiding gluten or following a paleo-style diet.
- Bright, refreshing flavor – The combination of fresh lemon zest and juice gives these cookies a light, citrusy taste that’s perfect for spring and summer.
- Simple pantry ingredients – You probably have most of these items in your kitchen already, making this an easy recipe to whip up on a whim.
- Quick to make – From start to finish, these cookies are ready in under an hour, making them a great option for last-minute dessert needs or afternoon snacking.
- Naturally sweetened – Using maple syrup and just a touch of sugar, these cookies have a more natural sweetness that isn’t overpowering.
What Kind of Almond Flour Should I Use?
For these cookies, you’ll want to use blanched almond flour rather than almond meal, as it creates a lighter, smoother texture. Blanched almond flour is made from almonds with the skins removed, which gives your cookies a more uniform color and less grainy texture. If you can only find almond meal (which includes the skins), your cookies will still turn out tasty but might have a slightly denser texture and darker appearance. Store your almond flour in the fridge or freezer to keep it fresh, since the natural oils can go rancid at room temperature over time.

Options for Substitutions
These cookies are pretty adaptable, so here are some swaps you can make:
- Almond flour: This is the base of the cookie, so I’d recommend sticking with almond flour for the best texture. Other nut flours like hazelnut or cashew might work, but they’ll change the flavor and texture quite a bit.
- Tapioca starch: You can swap this with arrowroot starch or cornstarch in equal amounts. Both will help bind the cookies together.
- Maple syrup: Honey or agave nectar work well here. Just keep in mind that honey will make the cookies slightly sweeter and stickier.
- Coconut oil: Melted butter or any neutral oil like avocado oil will do the trick. If using butter, the cookies might spread a bit more during baking.
- Lemon juice and zest: Fresh lemon is best for that bright citrus flavor, but bottled lemon juice works in a pinch. You can also try lime for a different twist.
- Poppyseeds: If you don’t have poppyseeds, you can leave them out or try chia seeds for a similar look and a bit of crunch.
Watch Out for These Mistakes While Baking
The biggest mistake with almond flour cookies is skipping the freezing step, which might seem unnecessary but actually prevents the dough from spreading too thin and turning into flat, crispy discs instead of thick, chewy cookies.
Another common error is overbaking – since these cookies don’t brown much due to the almond flour, pull them out when they look slightly underdone at 10 minutes, as they’ll continue cooking on the hot tray and firm up as they cool.
Be careful not to overmix once you add the wet ingredients to the dry, as almond flour can release oils when worked too much, making your cookies greasy rather than tender.
Finally, make sure your coconut oil is melted but not hot when you add it to the dough, since warm oil can make the dough too loose and affect how the cookies hold their shape during baking.
What to Serve With Lemon Poppy Seed Cookies?
These cookies are perfect alongside a hot cup of tea or coffee for an afternoon snack, especially Earl Grey or chamomile which complement the lemon flavor nicely. They also make a great addition to a brunch spread – try serving them with fresh berries, yogurt, and granola for a complete breakfast table. Since they’re naturally gluten-free and not too sweet, they work well as a light dessert after a heavier meal, or you can pack them up as a midday treat when you need a little pick-me-up. I love keeping a batch in an airtight container for easy grab-and-go snacking throughout the week.
Storage Instructions
Store: These lemon poppy seed cookies stay fresh in an airtight container at room temperature for about 5 days. Just make sure they’re completely cooled before you stack them, or they might stick together a bit.
Freeze: You can freeze these cookies for up to 3 months in a freezer-safe container with parchment paper between the layers. They thaw pretty quickly at room temperature, usually in about 15-20 minutes, so they’re great to have on hand when you need a quick treat.
Make Ahead: The cookie dough actually works great when made ahead. You can scoop the dough into balls and refrigerate them for up to 2 days before baking, or freeze the dough balls for up to a month and bake them straight from frozen (just add a minute or two to the baking time).
| Preparation Time | 30-40 minutes |
| Cooking Time | 10-15 minutes |
| Total Time | 40-55 minutes |
| Level of Difficulty | Easy |
| Servings | 12 cookies |
Estimated Nutrition
Estimated nutrition for the whole recipe (without optional ingredients):
- Calories: 650-750
- Protein: 10-14 g
- Fat: 32-38 g
- Carbohydrates: 75-85 g
Ingredients
For the dry mix:
- 1 1/4 cups almond flour (I always use King Arthur for a fine, consistent crumb)
- 4 tbsp tapioca starch (gives the cookies a better chew and structure)
- 1/4 tsp baking soda
- 1/2 tsp salt
- 2 tbsp sugar
- 1 1/2 tsp poppyseeds
For the wet mix:
- 1 tbsp coconut oil (melted and cooled to room temperature)
- 3 tbsp maple syrup (I prefer Crown Maple for its rich depth)
- 1 tsp lemon juice
- 1 lemon zest
- 1/2 tsp vanilla essence
- 1/4 tsp almond extract
- 1 pinch turmeric (optional but recommended for a vibrant yellow color)
Step 1: Prepare the Dry Ingredient Base
- 1 1/4 cups almond flour
- 4 tbsp tapioca starch
- 1/4 tsp baking soda
- 1/2 tsp salt
- 2 tbsp sugar
- 1 1/2 tsp poppy seeds
In a medium bowl, whisk together the almond flour, tapioca starch, baking soda, salt, sugar, and poppy seeds.
This combines all your dry ingredients evenly so the leavening agent and seasonings distribute uniformly throughout the dough.
I always recommend whisking rather than just stirring—it aerates the flour and prevents clumping, especially important with almond flour’s tendency to pack down.
Step 2: Combine Wet Ingredients and Zest
- 1 tbsp coconut oil
- 3 tbsp maple syrup
- 1 tsp lemon juice
- 1 lemon zest
- 1/2 tsp vanilla essence
- 1/4 tsp almond extract
- 1 pinch turmeric
In a small bowl or measuring cup, whisk together the melted and cooled coconut oil, maple syrup, lemon juice, lemon zest, vanilla essence, almond extract, and the pinch of turmeric if using.
The turmeric adds a beautiful golden hue to the cookies and complements the lemon beautifully.
Make sure your coconut oil is truly cooled to room temperature before mixing—if it’s too warm, it can slightly cook the other ingredients.
Step 3: Form the Cookie Dough
- dry ingredient mixture from Step 1
- wet ingredient mixture from Step 2
Pour the wet ingredient mixture from Step 2 into the bowl with the dry ingredients from Step 1.
Using a spatula or wooden spoon, fold and stir until a cohesive dough forms—don’t overmix, as this can make the cookies tough.
The dough should come together quickly and feel slightly sticky but moldable.
This is where the tapioca starch does its job: it helps bind everything together while providing that signature chewy texture.
Step 4: Chill the Dough and Preheat the Oven
Place the dough in the freezer for 10-15 minutes while you preheat your oven to 335°F and line a baking sheet with parchment paper.
The chilling time allows the flavors to meld and makes the dough easier to scoop without spreading.
This is an efficient use of time—everything is ready to go the moment the dough is firm enough to portion.
Step 5: Scoop and Bake the Cookies
- dough from Step 3
Remove the chilled dough from the freezer and scoop it onto the prepared baking sheet using a cookie scoop or small spoon, spacing them about an inch apart.
Bake for 10-11 minutes at 335°F until the edges are just set but the centers still look slightly underdone—they’ll continue to cook slightly as they cool.
I find that these cookies are best when they retain a tiny bit of chewiness in the center, which is why I don’t overbake them.
Step 6: Cool and Enjoy
Allow the cookies to cool on the baking sheet for 2-3 minutes, then transfer them to a clean piece of parchment paper or a wire rack to cool for another 5 minutes.
This two-stage cooling process prevents them from breaking apart while still allowing them to set properly.
Once cooled, they’ll have a tender crumb with a delightful chewy center.
Easy Lemon Poppy Seed Almond Flour Cookies
Ingredients
Method
- In a medium bowl, whisk together the almond flour, tapioca starch, baking soda, salt, sugar, and poppy seeds. This combines all your dry ingredients evenly so the leavening agent and seasonings distribute uniformly throughout the dough. I always recommend whisking rather than just stirring—it aerates the flour and prevents clumping, especially important with almond flour's tendency to pack down.
- In a small bowl or measuring cup, whisk together the melted and cooled coconut oil, maple syrup, lemon juice, lemon zest, vanilla essence, almond extract, and the pinch of turmeric if using. The turmeric adds a beautiful golden hue to the cookies and complements the lemon beautifully. Make sure your coconut oil is truly cooled to room temperature before mixing—if it's too warm, it can slightly cook the other ingredients.
- Pour the wet ingredient mixture from Step 2 into the bowl with the dry ingredients from Step 1. Using a spatula or wooden spoon, fold and stir until a cohesive dough forms—don't overmix, as this can make the cookies tough. The dough should come together quickly and feel slightly sticky but moldable. This is where the tapioca starch does its job: it helps bind everything together while providing that signature chewy texture.
- Place the dough in the freezer for 10-15 minutes while you preheat your oven to 335°F and line a baking sheet with parchment paper. The chilling time allows the flavors to meld and makes the dough easier to scoop without spreading. This is an efficient use of time—everything is ready to go the moment the dough is firm enough to portion.
- Remove the chilled dough from the freezer and scoop it onto the prepared baking sheet using a cookie scoop or small spoon, spacing them about an inch apart. Bake for 10-11 minutes at 335°F until the edges are just set but the centers still look slightly underdone—they'll continue to cook slightly as they cool. I find that these cookies are best when they retain a tiny bit of chewiness in the center, which is why I don't overbake them.
- Allow the cookies to cool on the baking sheet for 2-3 minutes, then transfer them to a clean piece of parchment paper or a wire rack to cool for another 5 minutes. This two-stage cooling process prevents them from breaking apart while still allowing them to set properly. Once cooled, they'll have a tender crumb with a delightful chewy center.