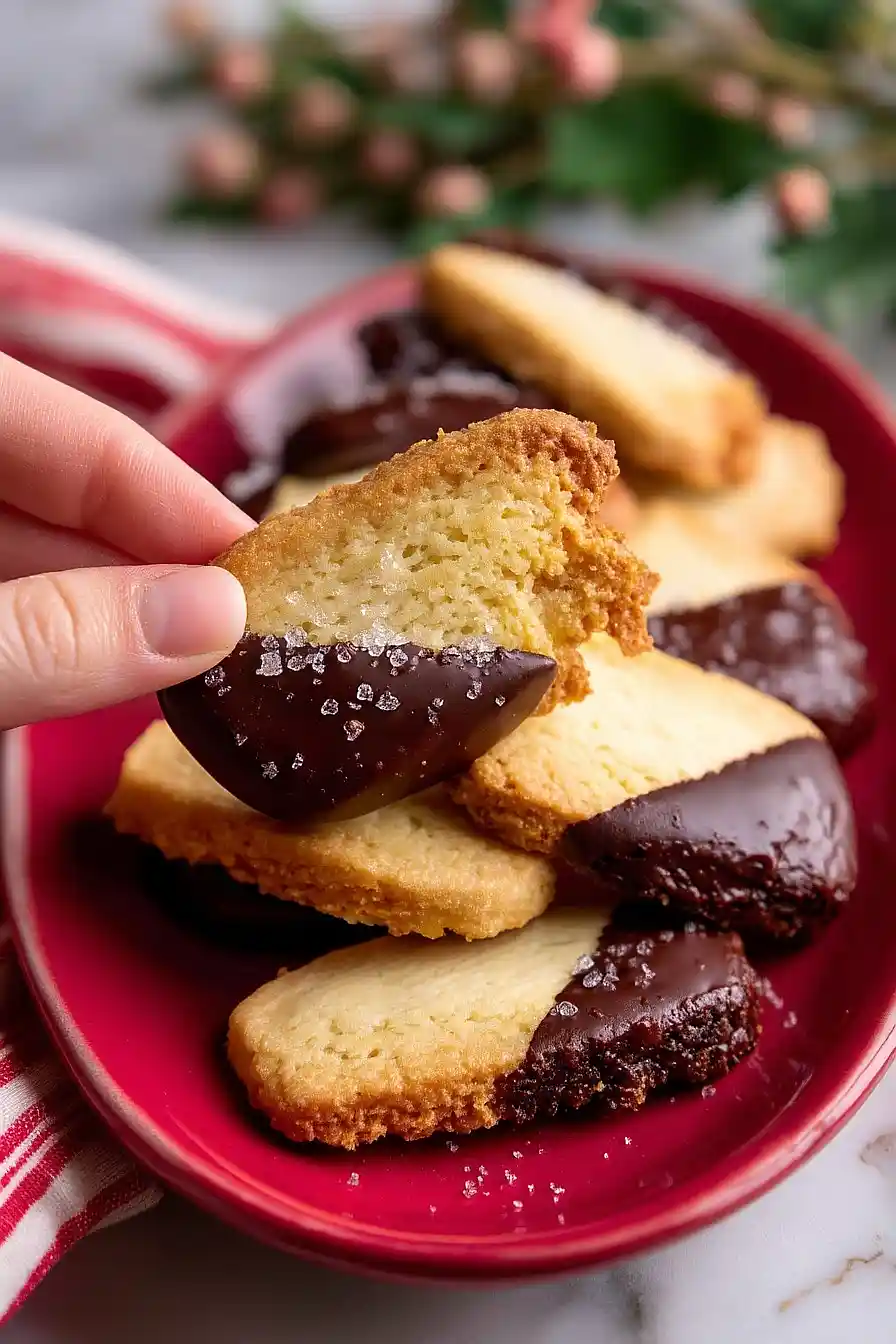
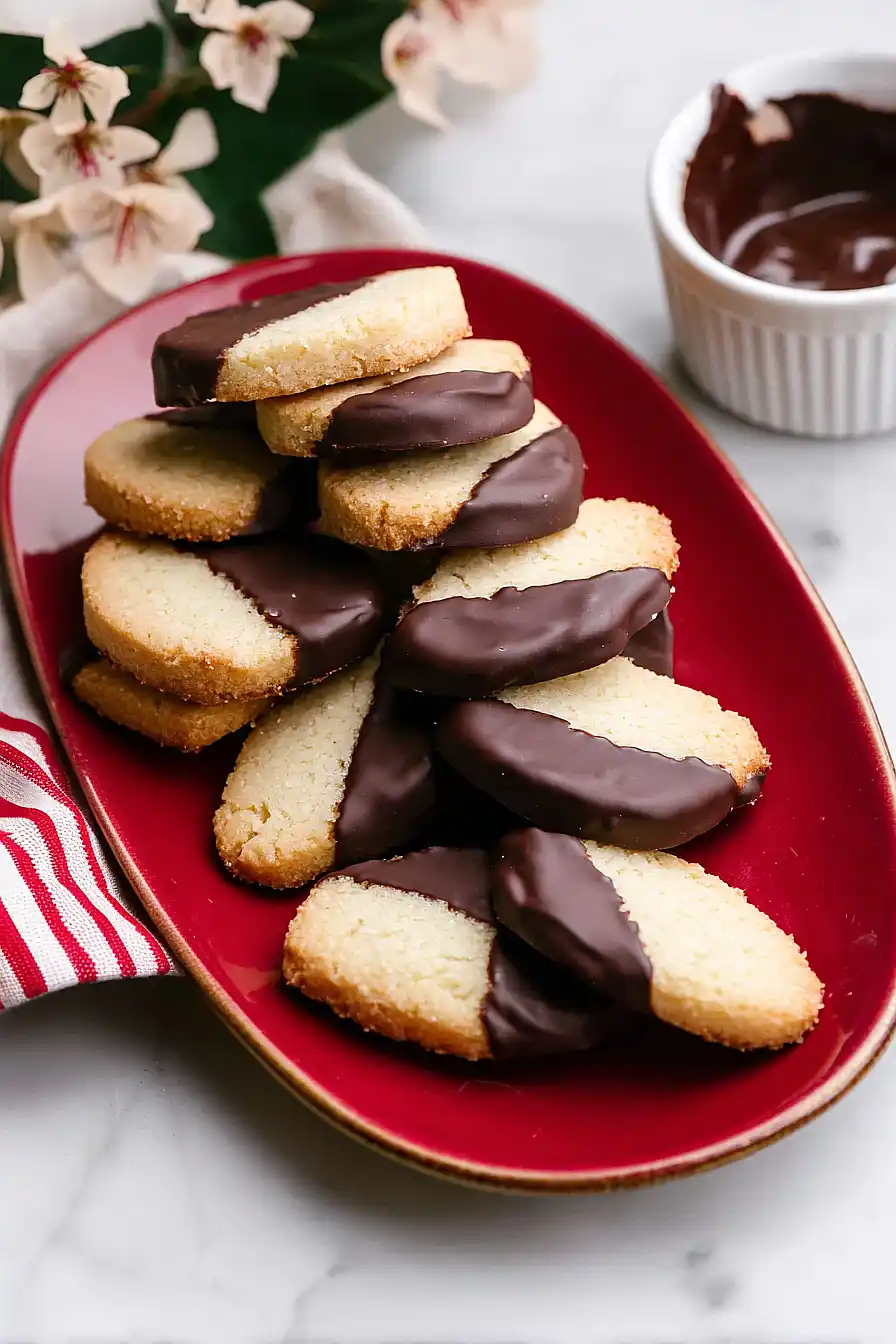
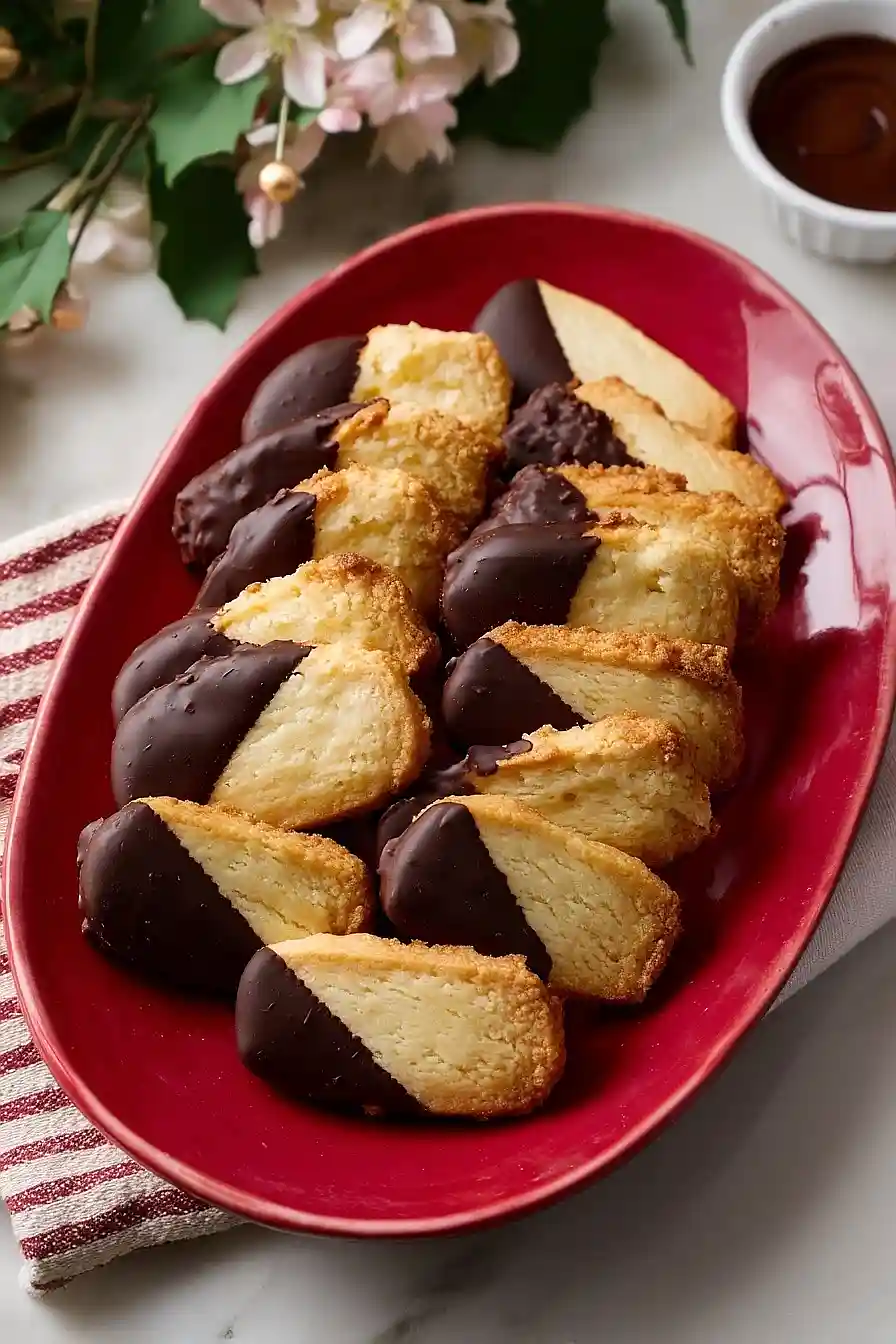
Here is my favorite chocolate dipped shortbread cookie recipe, with a simple buttery shortbread base that melts in your mouth, and a coating of rich chocolate that hardens into a perfect crispy shell.
These cookies are always a hit at my house, especially during the holidays. They look fancy but are actually super easy to make, and I love that you only need a handful of ingredients you probably already have in your pantry.
Why You’ll Love These Chocolate Dipped Shortbread Cookies
- Simple ingredients – You only need six basic pantry staples to make these cookies – no fancy ingredients or special trips to the store required.
- Buttery, melt-in-your-mouth texture – The classic shortbread base is rich and crumbly, and the chocolate coating adds the perfect sweet finish.
- Perfect for gifting – These cookies look impressive and travel well, making them ideal for holiday cookie exchanges, parties, or homemade gifts.
- Make-ahead friendly – You can prepare the dough in advance and bake when you’re ready, or store the finished cookies for several days without losing quality.
What Kind of Chocolate Should I Use?
You’ve got plenty of options when it comes to the chocolate for dipping your shortbread cookies. Dark, milk, or semi-sweet chocolate all work great, so just go with whatever you prefer or have on hand. If you’re using chocolate chips, they’ll melt up just fine, but chopped chocolate bars tend to melt a bit smoother and give you a nicer coating. For the easiest melting and dipping experience, look for chocolate that’s specifically labeled as “melting chocolate” or “dipping chocolate” at the store – these are formulated to stay smooth and glossy without seizing up on you.
Options for Substitutions
These cookies are pretty straightforward, but here are some swaps you can make if needed:
- Unsalted butter: You can use salted butter instead – just skip the added salt in the recipe. If you’re dairy-free, try using plant-based butter sticks (not margarine in a tub), though the texture might be slightly different.
- Granulated sugar: Powdered sugar works well here and actually gives you a more tender, melt-in-your-mouth cookie. You can also try superfine sugar for a similar result.
- All purpose flour: For a gluten-free version, use a 1:1 gluten-free baking flour blend. The cookies might be a bit more crumbly, so handle them gently.
- Vanilla extract: Feel free to swap vanilla with almond extract for a different flavor profile, or try adding a bit of lemon or orange zest instead.
- Chocolate: Any chocolate works here – dark, milk, or white chocolate are all fair game. You can also use chocolate chips instead of a chocolate bar, though melting might take a bit longer.
Watch Out for These Mistakes While Baking
The biggest mistake with shortbread cookies is overworking the dough, which develops too much gluten and turns your cookies tough instead of tender and crumbly – mix just until the flour disappears and stop.
Another common error is baking them until they’re golden brown, but shortbread should stay pale with just slightly darker edges since overbaking makes them hard and dry rather than melt-in-your-mouth.
When dipping in chocolate, make sure your cookies are completely cool and the chocolate isn’t too hot (let it cool for a minute after melting), otherwise the cookies can break apart or the chocolate will be too thin and runny.
For cleaner dips, use a fork to lift the cookies out of the chocolate and gently tap off the excess before placing them on parchment paper to set.
What to Serve With Chocolate Dipped Shortbread Cookies?
These cookies are perfect alongside a hot cup of coffee or tea, especially in the afternoon when you need a little pick-me-up. I love serving them with a glass of cold milk for dunking, which makes the chocolate coating even better. They’re also great on a dessert platter with fresh berries and whipped cream if you’re having people over. For a cozy evening treat, try pairing them with hot chocolate or a scoop of vanilla ice cream.
Storage Instructions
Store: Keep your chocolate dipped shortbread cookies in an airtight container at room temperature for up to a week. I like to layer them between sheets of parchment paper so the chocolate doesn’t stick together. They actually taste even better after a day or two when the flavors have had time to meld.
Freeze: These cookies freeze really well for up to 3 months. Just make sure they’re completely cool and the chocolate has set before freezing. Stack them with parchment paper in between and store in a freezer-safe container or bag.
Thaw: When you want to enjoy your frozen cookies, just take out however many you need and let them sit at room temperature for about 20 minutes. They’ll taste just as good as the day you made them!
| Preparation Time | 30-45 minutes |
| Cooking Time | 20-25 minutes |
| Total Time | 70-90 minutes |
| Level of Difficulty | Medium |
Estimated Nutrition
Estimated nutrition for the whole recipe (without optional ingredients):
- Calories: 1700-1900
- Protein: 16-20 g
- Fat: 100-115 g
- Carbohydrates: 190-210 g
Ingredients
For the cookies:
- 1/2 cup unsalted butter (room temperature, about 70°F)
- 1/2 tsp salt
- 1/2 tsp vanilla extract (pure vanilla preferred)
- 6 tbsp granulated sugar
- 1.25 cups all-purpose flour (I use King Arthur all-purpose flour)
For the chocolate coating:
- 6 oz chocolate (semi-sweet or dark, chopped into small pieces for even melting)
Step 1: Cream Butter and Sugar, Then Mix in Dry Ingredients
- 1/2 cup unsalted butter
- 6 tbsp granulated sugar
- 1/2 tsp vanilla extract
- 1.25 cups all-purpose flour
- 1/2 tsp salt
In a medium bowl, combine the room temperature butter and granulated sugar, then beat together until the mixture is light and fluffy, about 2-3 minutes—this incorporates air and creates a tender cookie texture.
Add the vanilla extract and mix until combined.
In a separate bowl, whisk together the flour and salt to distribute the salt evenly.
Add the dry ingredient mixture to the butter mixture and stir until just combined; don’t overmix, as this can develop gluten and make the cookies tough.
The dough should come together in loose, crumbly pieces.
Step 2: Shape and Chill the Dough
- dough from Step 1
Turn the dough out onto a clean surface and gently knead it just a few times to bring it together into a ball.
I find that chilling the dough makes it much easier to cut into uniform pieces without the cookies spreading during baking.
Flatten the dough into a rectangle (roughly 1/4-inch thick) and wrap it in plastic wrap or transfer it to a parchment-lined baking sheet, then refrigerate for at least 1 hour until firm.
Step 3: Prepare Oven and Cut Cookies
- chilled dough from Step 2
Preheat your oven to 350°F while the dough chills.
Once the dough is firm, unwrap it and cut it into cookies using a sharp knife, making each piece roughly 1/2 inch wide—uniform sizing ensures they bake evenly.
Arrange the cut cookies on a parchment-lined baking sheet in a single layer, spacing them about an inch apart to allow for even heat circulation.
Step 4: Bake the Shortbread Cookies
- cookies from Step 3
Place the baking sheet in the preheated 350°F oven and bake for about 20 minutes, until the edges are just barely golden but the centers still look slightly underbaked—they’ll firm up as they cool, and this is what keeps shortbread tender and buttery.
Remove from the oven and let the cookies cool on the baking sheet for 15-20 minutes before transferring them to a wire rack to cool completely.
This resting time allows them to set properly without becoming brittle.
Step 5: Melt Chocolate and Dip Cookies
- 6 oz chocolate
- cooled cookies from Step 4
Once the cookies are completely cooled, finely chop the semi-sweet or dark chocolate and melt it in a small saucepan over low heat, stirring frequently to prevent scorching—or use a double boiler method if you prefer extra caution.
For easier dipping, transfer the melted chocolate to a small ramekin or shallow bowl.
Dip the top of each cooled cookie into the chocolate, allowing excess to drip off, then place it on a parchment-lined plate or baking sheet.
I like to let a little chocolate pool on each cookie for a professional-looking finish.
Step 6: Set the Chocolate Coating
- chocolate-dipped cookies from Step 5
Once all cookies are dipped, refrigerate them for about 20 minutes until the chocolate coating is fully set and firm to the touch.
This prevents the chocolate from smudging when you handle the cookies, and it gives them a nice snap when you bite into them.
Crispy Chocolate Dipped Shortbread Cookies
Ingredients
Method
- In a medium bowl, combine the room temperature butter and granulated sugar, then beat together until the mixture is light and fluffy, about 2-3 minutes—this incorporates air and creates a tender cookie texture. Add the vanilla extract and mix until combined. In a separate bowl, whisk together the flour and salt to distribute the salt evenly. Add the dry ingredient mixture to the butter mixture and stir until just combined; don't overmix, as this can develop gluten and make the cookies tough. The dough should come together in loose, crumbly pieces.
- Turn the dough out onto a clean surface and gently knead it just a few times to bring it together into a ball. I find that chilling the dough makes it much easier to cut into uniform pieces without the cookies spreading during baking. Flatten the dough into a rectangle (roughly 1/4-inch thick) and wrap it in plastic wrap or transfer it to a parchment-lined baking sheet, then refrigerate for at least 1 hour until firm.
- Preheat your oven to 350°F while the dough chills. Once the dough is firm, unwrap it and cut it into cookies using a sharp knife, making each piece roughly 1/2 inch wide—uniform sizing ensures they bake evenly. Arrange the cut cookies on a parchment-lined baking sheet in a single layer, spacing them about an inch apart to allow for even heat circulation.
- Place the baking sheet in the preheated 350°F oven and bake for about 20 minutes, until the edges are just barely golden but the centers still look slightly underbaked—they'll firm up as they cool, and this is what keeps shortbread tender and buttery. Remove from the oven and let the cookies cool on the baking sheet for 15-20 minutes before transferring them to a wire rack to cool completely. This resting time allows them to set properly without becoming brittle.
- Once the cookies are completely cooled, finely chop the semi-sweet or dark chocolate and melt it in a small saucepan over low heat, stirring frequently to prevent scorching—or use a double boiler method if you prefer extra caution. For easier dipping, transfer the melted chocolate to a small ramekin or shallow bowl. Dip the top of each cooled cookie into the chocolate, allowing excess to drip off, then place it on a parchment-lined plate or baking sheet. I like to let a little chocolate pool on each cookie for a professional-looking finish.
- Once all cookies are dipped, refrigerate them for about 20 minutes until the chocolate coating is fully set and firm to the touch. This prevents the chocolate from smudging when you handle the cookies, and it gives them a nice snap when you bite into them.