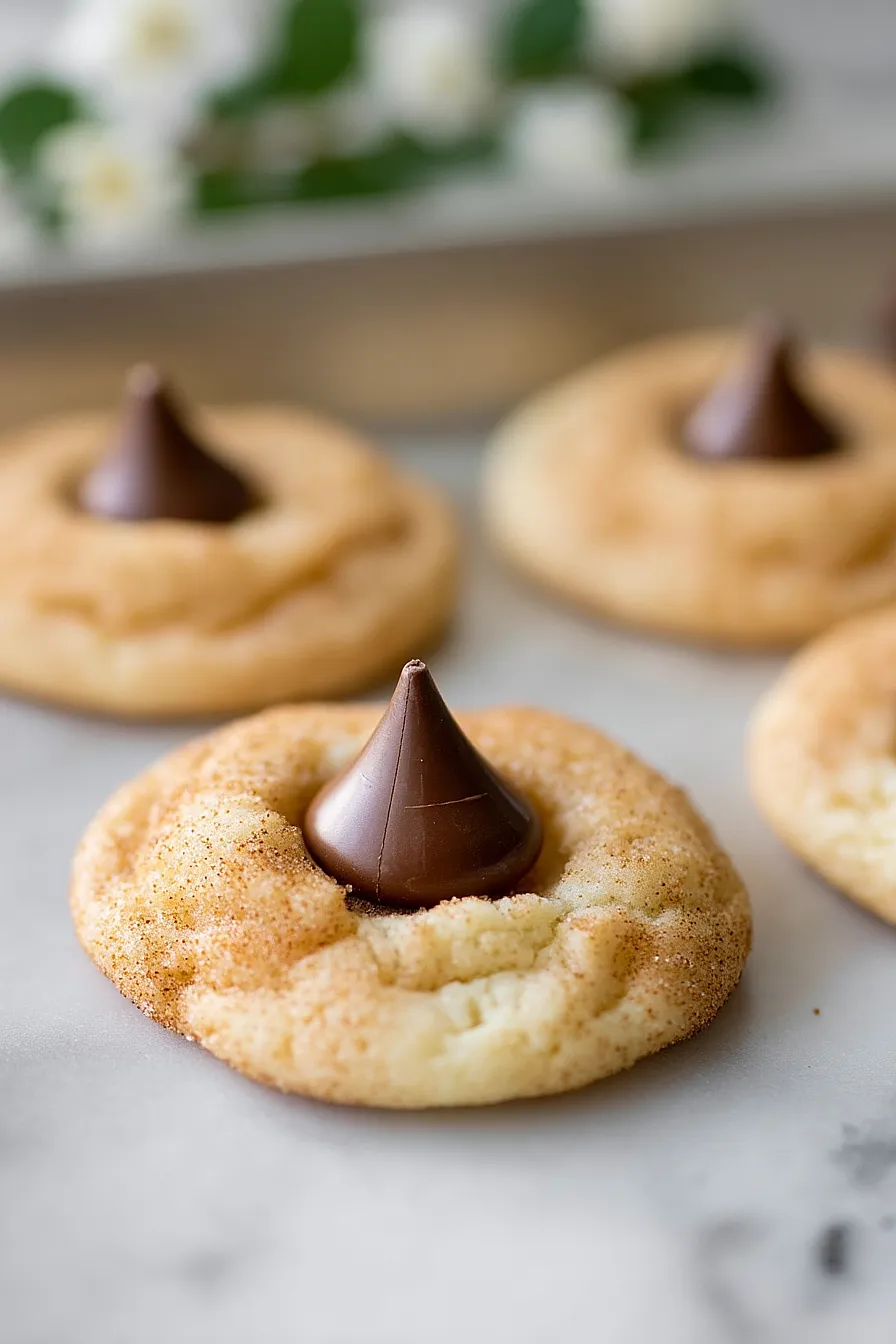
I’ve always believed that the best cookies are the ones that surprise you. Sure, regular snickerdoodles are great with their cinnamon-sugar coating and soft, chewy centers. But add a chocolate kiss on top? Now you’ve got something worth making a double batch for.
These cookies are perfect when you want something a little different from your standard chocolate chip. The cinnamon and sugar give you that classic snickerdoodle flavor, while the Hershey’s Kiss adds a chocolate element that makes them feel extra special. I like to make these when I need a treat that looks like I spent hours in the kitchen but actually comes together pretty quickly.
The best part? You probably have most of these ingredients in your pantry already. A little butter, some flour, cinnamon, and those iconic silver-wrapped chocolates. That’s all you need to make cookies that disappear faster than you can say “save some for later.”

Why You’ll Love These Snickerdoodles with Hershey Kisses
- Quick and easy – These cookies come together in under 30 minutes, making them perfect for last-minute baking or when you need a sweet treat fast.
- Fun twist on a classic – The chocolate kiss on top adds a delicious surprise to traditional snickerdoodles, giving you the best of both worlds in one cookie.
- Simple ingredients – You probably have most of these pantry staples on hand already, so you can whip up a batch whenever the craving hits.
- Great for sharing – These cookies look festive and taste amazing, making them ideal for parties, cookie exchanges, or gift-giving during the holidays.
What Kind of Chocolate Kisses Should I Use?
The classic choice for this recipe is the original milk chocolate Hershey’s Kisses, which give you that perfect balance of creamy chocolate against the cinnamon-sugar cookie. That said, you can definitely switch things up with dark chocolate Kisses if you prefer a less sweet option, or even try the caramel-filled ones for an extra treat. Make sure to unwrap all your Kisses before you start baking so you can press them into the cookies right when they come out of the oven – trying to unwrap them while your cookies are cooling is no fun. If Hershey’s Kisses aren’t available, any similar cone-shaped chocolate candy will work just fine.
Options for Substitutions
These cookies are pretty forgiving when it comes to swaps, so here are some options if you need them:
- Unsalted butter: You can use salted butter instead – just skip the added salt in the recipe. Margarine works too, though the flavor won’t be quite as rich.
- Cream of tartar: This is what gives snickerdoodles their signature tang, so I’d recommend keeping it if possible. But in a pinch, you can substitute with 1 1/2 teaspoons of lemon juice or white vinegar mixed into the wet ingredients.
- Cane sugar: Regular granulated white sugar works just fine here. The cookies will taste exactly the same.
- Hershey Kisses: Feel free to use any chocolate kisses you like – dark chocolate, caramel-filled, or even peppermint during the holidays. You could also skip them entirely for classic snickerdoodles, or press in a chocolate chip instead.
- All-purpose flour: Stick with all-purpose flour for this recipe – it’s really important for getting the right texture. Other flours will change how the cookies turn out.
Watch Out for These Mistakes While Baking
The biggest mistake people make with snickerdoodles is skipping the cream of tartar, which gives these cookies their signature tangy flavor and chewy texture – don’t try to substitute it with baking powder or you’ll end up with a completely different cookie.
Another common error is pressing the Hershey kisses into the cookies right out of the oven, which can cause them to crack and fall apart, so wait about 2 minutes after removing them from the oven before gently pressing the kisses into the centers.
Make sure your butter is truly softened to room temperature (not melted or too cold), as this affects how the cookies spread and maintain their thickness during baking.
Finally, don’t overbake these cookies – they should look slightly underdone in the center when you pull them out at around 8-10 minutes, as they’ll continue cooking on the hot baking sheet and firm up as they cool.
What to Serve With Snickerdoodles?
These cinnamon-sugar cookies are perfect alongside a cold glass of milk or a warm mug of hot chocolate, especially during the cooler months. I love serving them as part of a cookie platter for parties or holiday gatherings, paired with other classics like chocolate chip cookies or peanut butter blossoms. They also make a great afternoon snack with a cup of coffee or tea, and kids absolutely love them in their lunchboxes. If you’re feeling fancy, serve them with vanilla ice cream for an easy dessert that everyone will enjoy.
Storage Instructions
Store: Keep your snickerdoodles in an airtight container at room temperature for up to 5 days. I like to tuck a piece of bread in the container to help keep them soft and chewy. Just make sure they’re completely cooled before storing, or the Hershey kisses might get a bit melty.
Freeze: These cookies freeze really well for up to 3 months. You can freeze them already baked in a freezer-safe container, or freeze the dough balls before baking. If freezing the dough, roll them in the cinnamon sugar first, then bake straight from frozen adding an extra minute or two to the baking time.
Serve: Frozen baked cookies thaw in about 30 minutes on the counter, or you can warm them in the microwave for just 10 seconds to get that fresh-baked feel. They taste amazing either way, and the chocolate kisses stay perfectly in place!
| Preparation Time | 15-20 minutes |
| Cooking Time | 10-15 minutes |
| Total Time | 25-35 minutes |
| Level of Difficulty | Medium |
Estimated Nutrition
Estimated nutrition for the whole recipe (without optional ingredients):
- Calories: 2000-2200
- Protein: 20-25 g
- Fat: 90-100 g
- Carbohydrates: 290-320 g
Ingredients
For the dough:
- 3/4 cup cane sugar
- 1 large egg
- 1 tsp cream of tartar
- 1/2 cup unsalted butter (softened to room temperature)
- 1/2 tsp baking soda
- 1 1/3 cup all-purpose flour (I use King Arthur all-purpose flour)
- 1/8 tsp salt
For the coating:
- 3 tbsp ground cinnamon (freshly ground for best flavor)
- 3 tbsp cane sugar
For the topping:
- 24 Hershey’s Kisses (unwrapped)
Step 1: Cream Butter and Sugar, Build the Base
- 1/2 cup unsalted butter
- 3/4 cup cane sugar
- 1 large egg
In a medium bowl, beat the softened butter and 3/4 cup cane sugar together until light and fluffy, about 2-3 minutes.
This creaming process incorporates air into the dough, which helps the cookies rise and become tender.
Add the egg and beat until fully incorporated and the mixture is smooth.
I find that room temperature ingredients mix much more evenly, so make sure your butter is soft enough to leave an indent when you press it but still holds its shape.
Step 2: Mix Dry Ingredients Separately
- 1 1/3 cup all-purpose flour
- 1 tsp cream of tartar
- 1/2 tsp baking soda
- 1/8 tsp salt
In a separate small bowl, whisk together the flour, cream of tartar, baking soda, and salt.
Mixing these dry ingredients separately ensures the leavening agents (baking soda and cream of tartar) are evenly distributed throughout the dough, which gives you consistent rise and that signature snickerdoodle tang.
Set this mixture aside until you’re ready to combine it with the wet ingredients.
Step 3: Combine and Chill the Dough
- wet ingredient mixture from Step 1
- dry ingredient mixture from Step 2
Add the dry ingredient mixture from Step 2 to the creamed butter mixture from Step 1, stirring gently until a cohesive dough forms.
Don’t overmix—just combine until no streaks of flour remain.
Transfer the dough to the refrigerator for 15 minutes.
This chilling step is crucial because it firms up the dough, making it easier to roll and shape, and it also allows the flavors to develop slightly.
Cold dough spreads less during baking, giving you thicker, chewier cookies.
Step 4: Prepare Cinnamon Sugar Coating and Preheat Oven
- 3 tbsp ground cinnamon
- 3 tbsp cane sugar
While the dough chills, preheat your oven to 350°F and prepare your baking sheet by lining it with parchment paper or a silicone baking mat.
In a small bowl, mix the 3 tablespoons of ground cinnamon with the 3 tablespoons of cane sugar.
I prefer using freshly ground cinnamon from whole quills when I can find them—the aroma and flavor are noticeably more vibrant than pre-ground.
Having this coating ready and your oven preheated means you can move quickly once the dough is ready.
Step 5: Shape, Coat, and Arrange Cookies
- chilled dough from Step 3
- cinnamon-sugar mixture from Step 4
Remove the dough from the refrigerator.
Scoop approximately 1 tablespoon of dough at a time, roll it gently between your palms into a smooth ball, then immediately roll it in the cinnamon-sugar mixture from Step 4 until evenly coated.
Place each coated ball on the prepared baking sheet, spacing them about 2 inches apart—they’ll spread slightly as they bake.
Working quickly keeps the dough from warming up too much, which maintains that tender texture we’re after.
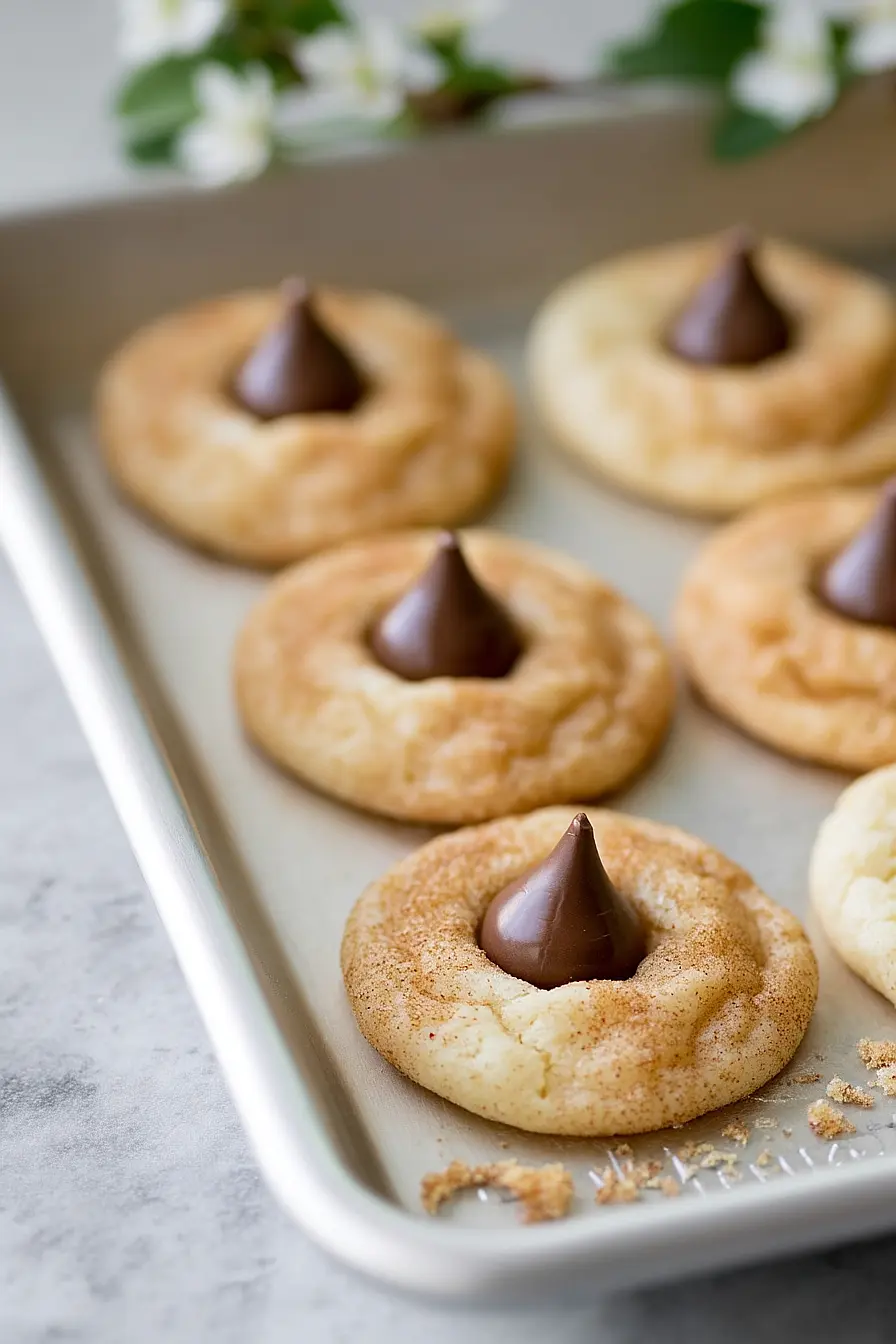
Step 6: Bake and Finish with Chocolate Kisses
- baked cookies
- 24 Hershey’s Kisses
Bake the cookies for 10 minutes at 350°F.
They should be set around the edges but still soft in the center—they’ll look slightly underbaked, which is exactly right.
Remove the baking sheet from the oven and immediately press one unwrapped Hershey’s Kiss into the center of each warm cookie, pressing gently until it’s anchored but not pushed all the way through to the bottom.
The residual heat will soften the chocolate just enough to make it stick without melting completely.
Let the cookies cool on the baking sheet for 5 minutes before transferring them to a wire rack to cool completely.
Classic Snickerdoodles with Hershey Kisses
Ingredients
Method
- In a medium bowl, beat the softened butter and 3/4 cup cane sugar together until light and fluffy, about 2-3 minutes. This creaming process incorporates air into the dough, which helps the cookies rise and become tender. Add the egg and beat until fully incorporated and the mixture is smooth. I find that room temperature ingredients mix much more evenly, so make sure your butter is soft enough to leave an indent when you press it but still holds its shape.
- In a separate small bowl, whisk together the flour, cream of tartar, baking soda, and salt. Mixing these dry ingredients separately ensures the leavening agents (baking soda and cream of tartar) are evenly distributed throughout the dough, which gives you consistent rise and that signature snickerdoodle tang. Set this mixture aside until you're ready to combine it with the wet ingredients.
- Add the dry ingredient mixture from Step 2 to the creamed butter mixture from Step 1, stirring gently until a cohesive dough forms. Don't overmix—just combine until no streaks of flour remain. Transfer the dough to the refrigerator for 15 minutes. This chilling step is crucial because it firms up the dough, making it easier to roll and shape, and it also allows the flavors to develop slightly. Cold dough spreads less during baking, giving you thicker, chewier cookies.
- While the dough chills, preheat your oven to 350°F and prepare your baking sheet by lining it with parchment paper or a silicone baking mat. In a small bowl, mix the 3 tablespoons of ground cinnamon with the 3 tablespoons of cane sugar. I prefer using freshly ground cinnamon from whole quills when I can find them—the aroma and flavor are noticeably more vibrant than pre-ground. Having this coating ready and your oven preheated means you can move quickly once the dough is ready.
- Remove the dough from the refrigerator. Scoop approximately 1 tablespoon of dough at a time, roll it gently between your palms into a smooth ball, then immediately roll it in the cinnamon-sugar mixture from Step 4 until evenly coated. Place each coated ball on the prepared baking sheet, spacing them about 2 inches apart—they'll spread slightly as they bake. Working quickly keeps the dough from warming up too much, which maintains that tender texture we're after.
- Bake the cookies for 10 minutes at 350°F. They should be set around the edges but still soft in the center—they'll look slightly underbaked, which is exactly right. Remove the baking sheet from the oven and immediately press one unwrapped Hershey's Kiss into the center of each warm cookie, pressing gently until it's anchored but not pushed all the way through to the bottom. The residual heat will soften the chocolate just enough to make it stick without melting completely. Let the cookies cool on the baking sheet for 5 minutes before transferring them to a wire rack to cool completely.
Seems to me 3 tbsp is too much. do you mean tsp?