I didn’t grow up eating iced oatmeal raisin cookies—my mom made the regular kind, straight from the oven with nothing on top. They were good, don’t get me wrong, but something was missing.
The first time I tried an iced version at a bakery in Portland, I got it. That sweet glaze on top changes everything. It adds just enough sweetness to balance out the warm cinnamon and chewy oats, and it makes the cookies look like you bought them from a fancy shop instead of making them in your kitchen on a Tuesday night.
Now I make them this way all the time. My kids actually prefer them to chocolate chip, which is saying something. The icing takes maybe five extra minutes, and it’s just powdered sugar and milk—nothing complicated.
Why You’ll Love These Iced Oatmeal Raisin Cookies
- Quick and easy – These cookies come together in under 30 minutes, making them perfect for last-minute cravings or when you need a homemade treat in a hurry.
- Sweet icing twist – The simple powdered sugar glaze takes classic oatmeal raisin cookies to the next level, adding just the right amount of sweetness without being overwhelming.
- Pantry-friendly ingredients – You probably already have everything you need in your kitchen to whip up a batch of these cookies right now.
- Soft and chewy texture – The combination of butter, oats, and the right baking time creates cookies that are perfectly soft in the middle with slightly crisp edges.
- Great for sharing – This recipe makes plenty of cookies for lunchboxes, potlucks, or just keeping a stash in your cookie jar throughout the week.
What Kind of Oats Should I Use?
For oatmeal cookies, you’ll want to stick with old-fashioned rolled oats, which are sometimes labeled as “old-fashioned oats” at the grocery store. These oats hold their shape during baking and give you that classic chewy texture everyone loves in an oatmeal cookie. Quick oats will work in a pinch, but they’ll make your cookies a bit softer and less textured since they’re more finely cut. Whatever you do, skip the instant oatmeal packets – those are way too processed and will turn mushy in your cookies. Steel-cut oats are also a no-go here since they’re too hard and won’t soften up enough during the short baking time.
Options for Substitutions
These cookies are pretty forgiving, so feel free to make a few swaps based on what you have:
- Unsalted butter: You can use salted butter if that’s what you have – just skip the added salt in the recipe. Margarine works too, though the flavor won’t be quite as rich.
- Rolled oats: Quick oats can work in a pinch, but your cookies will have a softer, less chewy texture. Avoid instant oats though, as they’ll make the cookies too mushy.
- Raisins: Not a raisin fan? Swap them out for dried cranberries, chopped dates, chocolate chips, or even chopped walnuts. You can also use a mix of any of these.
- All-purpose flour: Whole wheat flour can replace up to half the all-purpose flour for a nuttier flavor and more fiber. Going all whole wheat might make them a bit dense, so start with a 50/50 mix.
- Milk for icing: Any milk works here – dairy, almond, oat, or even water if you’re in a bind. You can also use cream for a richer icing or add a splash of vanilla or maple syrup for extra flavor.
Watch Out for These Mistakes While Baking
The biggest mistake people make with oatmeal raisin cookies is overmixing the dough once the flour is added, which develops too much gluten and creates tough, dense cookies instead of chewy ones – mix just until the flour disappears.
Another common error is skipping the step of letting your butter come to room temperature, as cold butter won’t cream properly with the sugars and results in flat, greasy cookies that spread too much in the oven.
To keep your cookies from turning out hard and dry, pull them from the oven when the edges are golden but the centers still look slightly underdone, since they’ll continue baking on the hot pan for a few minutes after removal.
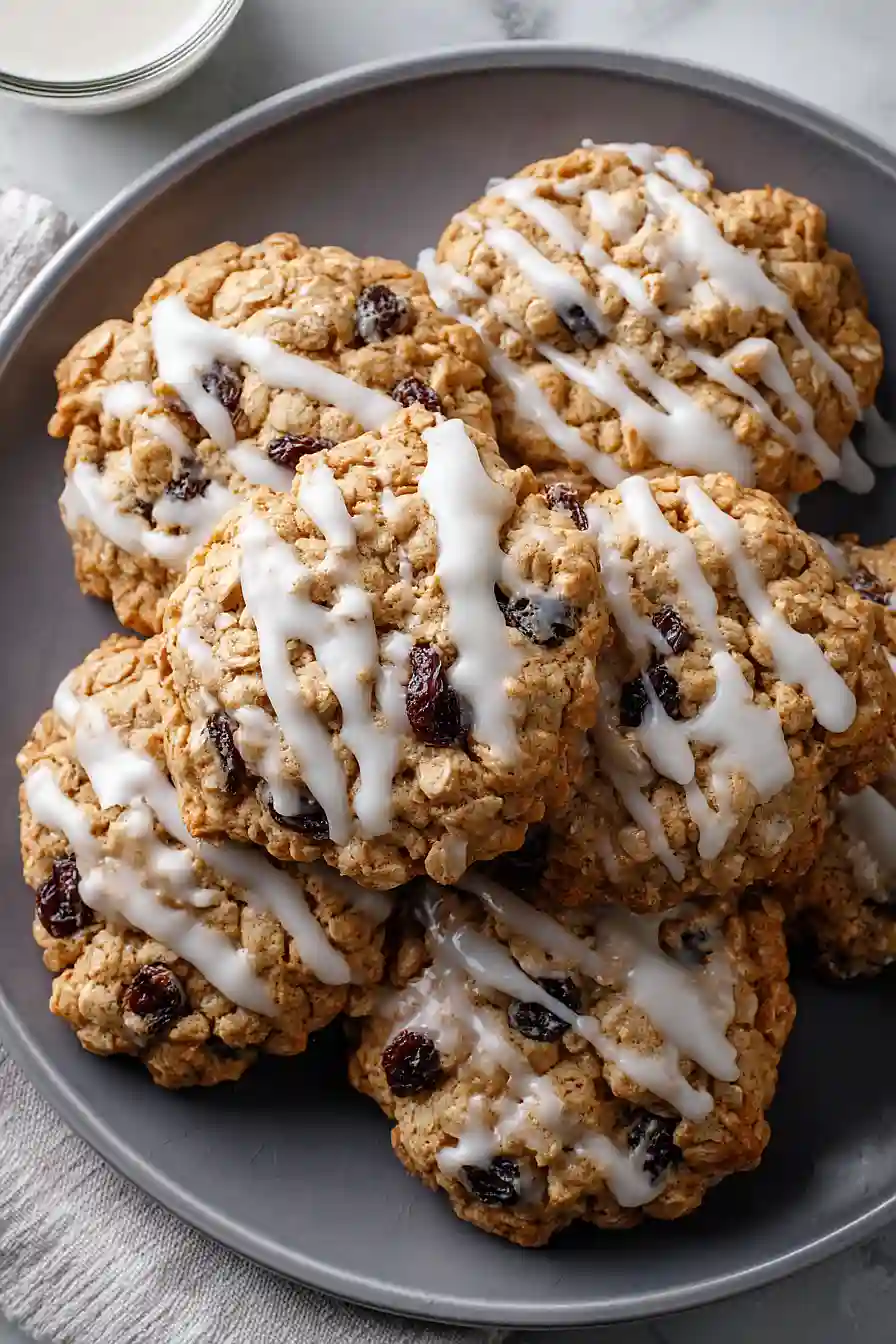
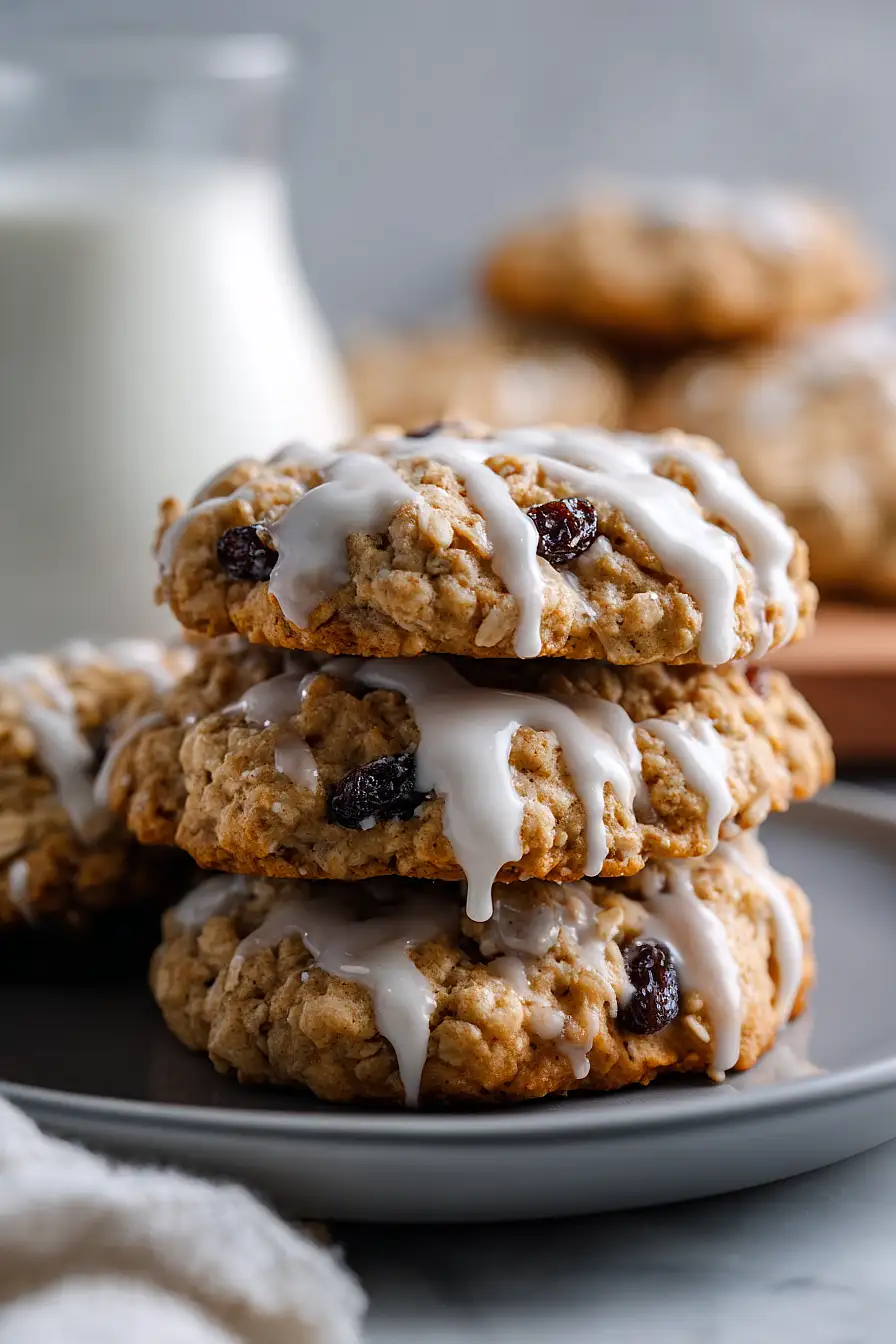
Finally, wait until the cookies are completely cool before adding the icing – if they’re even slightly warm, the icing will melt and slide right off instead of setting into that perfect sweet glaze.

What to Serve With Iced Oatmeal Raisin Cookies?
These cookies are perfect alongside a cold glass of milk or a hot cup of coffee for an afternoon snack. I love packing them in lunchboxes with some apple slices and cheese cubes for a balanced treat, or serving them at the end of a casual dinner party with vanilla ice cream. They also make a great addition to a cookie platter when you’re entertaining – just arrange them with some chocolate chip cookies and sugar cookies for variety. If you’re feeling fancy, you can crumble a couple over Greek yogurt with a drizzle of honey for breakfast.
Storage Instructions
Store: Keep your iced oatmeal raisin cookies in an airtight container at room temperature for up to 5 days. Make sure the icing is completely set before stacking them, or place parchment paper between layers to keep them from sticking together.
Freeze: These cookies freeze really well for up to 3 months. I like to freeze them without the icing, then add it fresh when I’m ready to serve. Just stack them with parchment paper in between and pop them in a freezer-safe container or bag.
Thaw: Let frozen cookies sit at room temperature for about 30 minutes before enjoying. If you froze them without icing, just whip up a quick batch of the glaze and drizzle it on once they’ve thawed.
| Preparation Time | 15-20 minutes |
| Cooking Time | 8-10 minutes |
| Total Time | 23-30 minutes |
| Level of Difficulty | Easy |
Estimated Nutrition
Estimated nutrition for the whole recipe (without optional ingredients):
- Calories: 3300-3500
- Protein: 35-40 g
- Fat: 130-140 g
- Carbohydrates: 500-520 g
Ingredients
For the cookies:
- 1 tsp ground cinnamon (freshly ground preferred)
- 1 tsp baking soda
- 1/2 cup raisins (plump and moist)
- 2.5 cups rolled oats (old-fashioned oats, not instant)
- 1 tsp vanilla extract (I use Madagascar vanilla for best flavor)
- 1/2 cup brown sugar (packed)
- 1/2 cup granulated sugar
- 1.5 cups all-purpose flour (I use King Arthur all-purpose flour)
- 1 cup unsalted butter (softened to room temperature, about 70°F)
- 1/4 tsp salt
- 1 egg (room temperature)
For the icing glaze:
- 1.5 tbsp milk (whole milk works best)
- 1 cup powdered sugar (sifted to remove lumps)
Step 1: Prepare Mise en Place and Preheat
- 1 cup powdered sugar
- 1.5 cups all-purpose flour
- 2.5 cups rolled oats
- 1 tsp ground cinnamon
- 1 tsp baking soda
- 1/4 tsp salt
Preheat your oven to 350°F and position a rack in the center.
While the oven heats, sift the powdered sugar into a small bowl to remove any lumps—this ensures your icing will be smooth and drizzle-able later.
Measure out all your dry ingredients (flour, oats, cinnamon, baking soda, salt) into one bowl and set aside.
This prep work ensures everything is ready when you need it, preventing rushed mixing and uneven baking.
Step 2: Cream Butter and Sugars
- 1 cup unsalted butter
- 1/2 cup brown sugar
- 1/2 cup granulated sugar
In a large mixing bowl, combine the softened butter with both the brown sugar and granulated sugar.
Using an electric mixer or vigorous hand mixing, beat for 2-3 minutes until the mixture becomes light, fluffy, and noticeably pale.
This creaming process incorporates air into the dough, which helps the cookies rise and achieve a tender crumb.
I always use room temperature butter because cold butter won’t cream properly and warm butter will make the dough greasy.
Step 3: Add Wet Ingredients and Mix
- 1 egg
- 1 tsp vanilla extract
Add the room temperature egg and vanilla extract to your creamed butter mixture.
Mix on medium speed for about 1 minute until everything is well combined and the mixture looks smooth.
The room temperature egg incorporates more easily and creates better emulsification with the butter base.
I find that using Madagascar vanilla instead of regular vanilla really elevates these cookies with a richer, more complex flavor.
Step 4: Combine Wet and Dry Ingredients
- dry ingredient mixture from Step 1
- 1.5 tbsp milk
Add the dry ingredient mixture from Step 1 to your wet mixture from Step 3, then stir until just combined.
Mix on low speed to avoid overworking the dough, which can lead to tough cookies.
Once the flour is mostly incorporated, add the milk and continue mixing until you have a cohesive dough.
The milk adds just enough moisture to help bind everything while keeping the dough tender.
Step 5: Fold in Raisins and Portion Dough
- 1/2 cup raisins
- dough from Step 4
Gently fold the plump raisins into the dough using a spatula or wooden spoon, being careful not to overmix.
Once the raisins are evenly distributed, drop rounded tablespoons of dough onto your prepared baking sheets, spacing them about 2 inches apart to allow for spreading.
I like to use a cookie scoop here for consistent sizing, which helps all the cookies bake evenly.
Step 6: Bake and Cool Cookies
Bake the cookies at 350°F for 8-10 minutes, until the edges are lightly golden but the centers still look slightly underdone.
Remove from the oven and let the cookies cool on the baking sheet for 2-3 minutes (they’ll continue to cook slightly from residual heat), then transfer them to a wire cooling rack.
Baking them slightly underdone ensures they stay chewy in the center; they’ll firm up as they cool completely.
Step 7: Make Icing and Finish
- 1 cup powdered sugar
- 1.5 tbsp milk
While the cookies cool, whisk together the sifted powdered sugar from Step 1 and milk until you reach a smooth, pourable consistency.
Drizzle the icing over the cooled cookies using a fork or squeeze bottle, then let it set for 10-15 minutes before serving.
The icing should be thin enough to drizzle but thick enough to stay on the cookies.
Cinnamon Iced Oatmeal Raisin Cookies
Ingredients
Method
- Preheat your oven to 350°F and position a rack in the center. While the oven heats, sift the powdered sugar into a small bowl to remove any lumps—this ensures your icing will be smooth and drizzle-able later. Measure out all your dry ingredients (flour, oats, cinnamon, baking soda, salt) into one bowl and set aside. This prep work ensures everything is ready when you need it, preventing rushed mixing and uneven baking.
- In a large mixing bowl, combine the softened butter with both the brown sugar and granulated sugar. Using an electric mixer or vigorous hand mixing, beat for 2-3 minutes until the mixture becomes light, fluffy, and noticeably pale. This creaming process incorporates air into the dough, which helps the cookies rise and achieve a tender crumb. I always use room temperature butter because cold butter won't cream properly and warm butter will make the dough greasy.
- Add the room temperature egg and vanilla extract to your creamed butter mixture. Mix on medium speed for about 1 minute until everything is well combined and the mixture looks smooth. The room temperature egg incorporates more easily and creates better emulsification with the butter base. I find that using Madagascar vanilla instead of regular vanilla really elevates these cookies with a richer, more complex flavor.
- Add the dry ingredient mixture from Step 1 to your wet mixture from Step 3, then stir until just combined. Mix on low speed to avoid overworking the dough, which can lead to tough cookies. Once the flour is mostly incorporated, add the milk and continue mixing until you have a cohesive dough. The milk adds just enough moisture to help bind everything while keeping the dough tender.
- Gently fold the plump raisins into the dough using a spatula or wooden spoon, being careful not to overmix. Once the raisins are evenly distributed, drop rounded tablespoons of dough onto your prepared baking sheets, spacing them about 2 inches apart to allow for spreading. I like to use a cookie scoop here for consistent sizing, which helps all the cookies bake evenly.
- Bake the cookies at 350°F for 8-10 minutes, until the edges are lightly golden but the centers still look slightly underdone. Remove from the oven and let the cookies cool on the baking sheet for 2-3 minutes (they'll continue to cook slightly from residual heat), then transfer them to a wire cooling rack. Baking them slightly underdone ensures they stay chewy in the center; they'll firm up as they cool completely.
- While the cookies cool, whisk together the sifted powdered sugar from Step 1 and milk until you reach a smooth, pourable consistency. Drizzle the icing over the cooled cookies using a fork or squeeze bottle, then let it set for 10-15 minutes before serving. The icing should be thin enough to drizzle but thick enough to stay on the cookies.