Finding a cookie that feels special but doesn’t require fancy techniques or hard-to-find ingredients can be tough. Most crinkle cookies stick to plain chocolate, which is great, but sometimes you want something with a little more personality without spending hours in the kitchen.
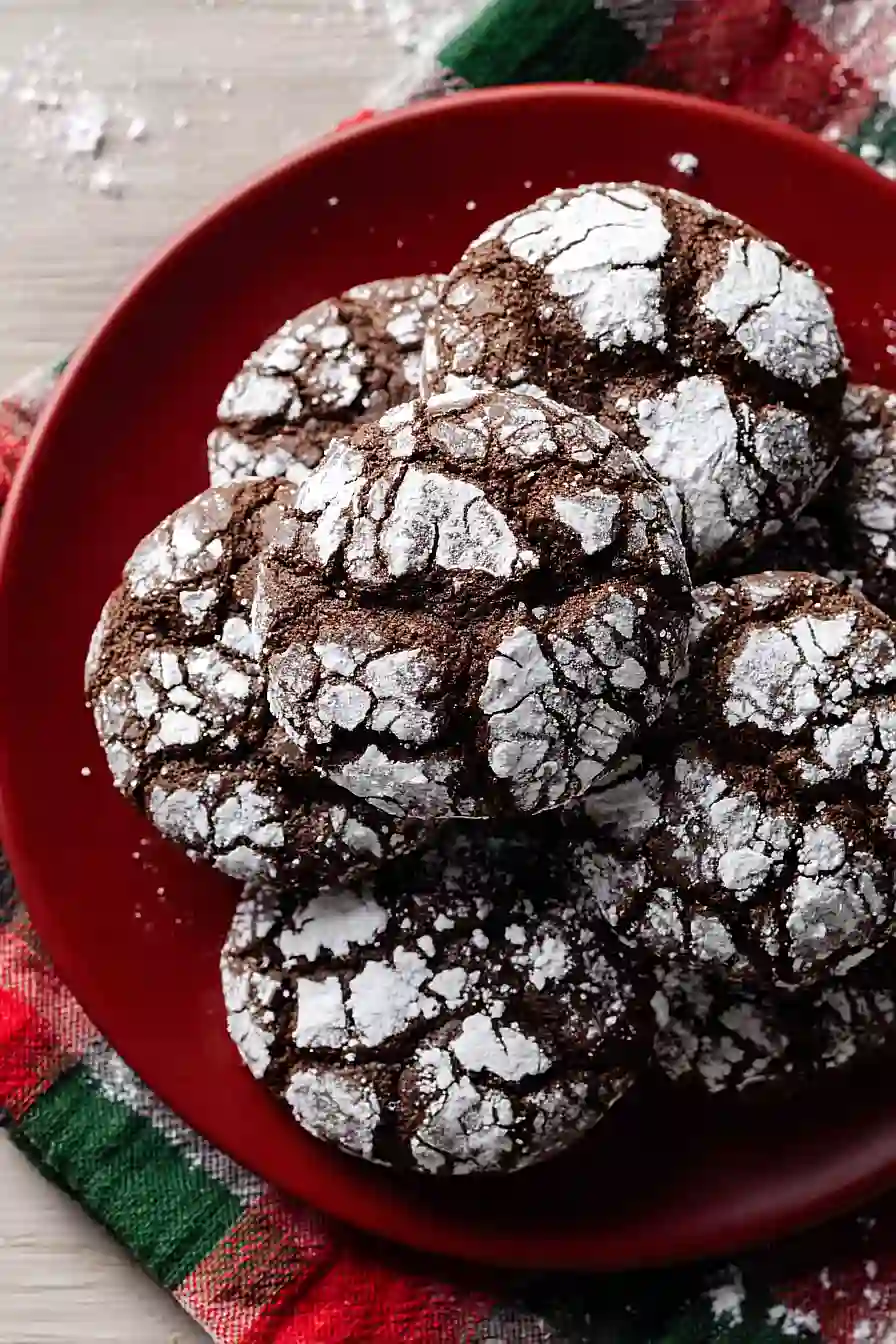
That’s where these Mexican chocolate crinkle cookies come in. They bring together warm cinnamon and authentic Mexican chocolate for a cookie that tastes different from your typical batch, but they’re just as easy to make as any other crinkle cookie you’ve tried. Plus, that classic powdered sugar coating gives you those pretty cracks without any extra work.
Why You’ll Love These Mexican Chocolate Crinkle Cookies
- Unique flavor twist – The combination of Mexican chocolate and cinnamon gives these cookies a warm, spiced flavor that sets them apart from regular chocolate cookies.
- Beautiful presentation – The crackled powdered sugar coating creates an eye-catching look that makes these cookies perfect for holiday cookie trays or gift giving.
- Simple ingredients – You probably have most of these pantry staples on hand already, making this an easy recipe to whip up whenever a chocolate craving hits.
- Make-ahead friendly – The dough needs to chill anyway, so you can prep these in advance and bake them fresh when you’re ready to serve.
What Kind of Mexican Chocolate Should I Use?
Mexican chocolate is the star of these cookies, and you have a few good options to choose from. Traditional brands like Abuelita or Ibarra are perfect for this recipe – they come in round tablets and are already flavored with cinnamon and sugar, which adds to the warm, spiced flavor of the cookies. You can find these at most grocery stores in the international aisle or at Latin markets. If you can’t track down Mexican chocolate, you can substitute with semi-sweet chocolate and add an extra half teaspoon of cinnamon to get a similar effect. Just make sure to grate your chocolate finely so it melts evenly into the dough and distributes throughout each cookie.
Options for Substitutions
These cookies are pretty forgiving when it comes to swaps, though a few ingredients are best left as-is:
- Mexican chocolate: This is the star of the show, so I’d recommend keeping it if possible. But if you can’t find it, use semi-sweet chocolate chips and add an extra 1/2 teaspoon of cinnamon plus a pinch of cayenne pepper to mimic that spiced chocolate flavor.
- Canola oil: Any neutral oil works here – vegetable oil, grapeseed oil, or even melted coconut oil are all fine substitutes. Just stick with oil rather than butter to keep that signature crinkle texture.
- All-purpose flour: You can use a 1:1 gluten-free flour blend if needed. The cookies might spread slightly less, but they’ll still taste great.
- Eggs: For each egg, you can substitute with 1 flax egg (1 tablespoon ground flaxseed mixed with 3 tablespoons water, let sit for 5 minutes). The texture will be slightly different but still good.
- Powdered sugar coating: Don’t skip this – it’s what creates those classic crinkles. However, you can roll them in granulated sugar instead if you’re out of powdered sugar, though you won’t get the same white contrast.
Watch Out for These Mistakes While Baking
The biggest mistake when making crinkle cookies is skipping the chilling step – if your dough is too warm, the cookies will spread too quickly in the oven and you’ll lose those signature cracks.
Another common error is rolling the dough balls in powdered sugar while they’re still warm from your hands, which causes the sugar to dissolve and disappear during baking – make sure to chill the dough balls first, then roll them generously in powdered sugar right before they go in the oven.
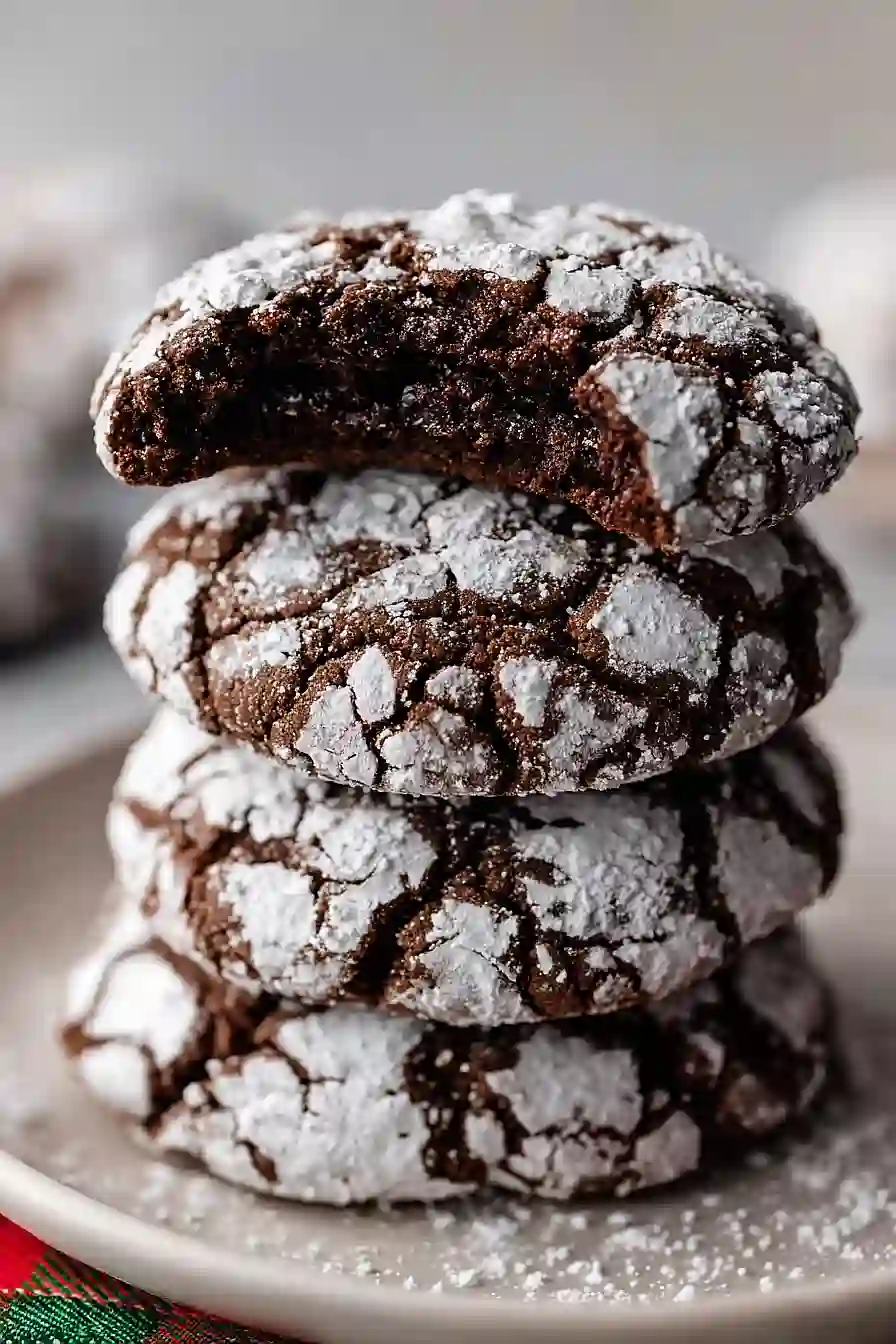
Don’t overbake these cookies or they’ll turn dry and hard instead of staying soft and fudgy in the center – they should look slightly underdone when you pull them out at around 10-12 minutes.
For the best crinkle effect, roll your dough balls larger than you think (about 2 tablespoons each) and coat them twice in powdered sugar for that beautiful contrast against the dark chocolate.
What to Serve With Mexican Chocolate Crinkle Cookies?
These cookies are perfect alongside a big mug of hot coffee or Mexican hot chocolate, especially on a chilly afternoon. I love setting them out with a scoop of vanilla ice cream or dulce de leche ice cream for dessert – the warm spices in the cookies pair beautifully with the cold, creamy sweetness. They’re also great for cookie exchanges or holiday parties since they look fancy with that crackled powdered sugar coating, but they’re actually super easy to make. If you want to go all out, serve them with a shot of espresso for dipping, or alongside some fresh berries and whipped cream for a simple but satisfying dessert spread.
Storage Instructions
Store: Keep your Mexican chocolate crinkle cookies in an airtight container at room temperature for up to 5 days. They’ll stay soft and chewy if you tuck a piece of bread in the container with them, which helps maintain moisture.
Freeze: These cookies freeze really well for up to 3 months. You can freeze them already baked in a freezer-safe container, or freeze the dough balls before rolling them in powdered sugar. If freezing the dough, just let them thaw slightly before coating and baking.
Enjoy: Frozen baked cookies taste great straight from the freezer, or you can let them sit at room temperature for about 10 minutes. If you want them warm, pop them in the microwave for just 10-15 seconds to bring back that fresh-baked feel.
| Preparation Time | 20-30 minutes |
| Cooking Time | 8-10 minutes |
| Total Time | 1 hour 28 minutes – 1 hour 40 minutes |
| Level of Difficulty | Medium |
Estimated Nutrition
Estimated nutrition for the whole recipe (without optional ingredients):
- Calories: 1800-2000
- Protein: 25-30 g
- Fat: 65-75 g
- Carbohydrates: 270-300 g
Ingredients
For the dough:
- 2 tsp vanilla extract
- 3 oz Mexican chocolate (such as Abuelita or Ibarra brand)
- 2 large eggs (room temperature)
- 1/2 tsp salt
- 1/4 cup unsweetened cocoa powder (Dutch-process for deeper chocolate flavor)
- 1 tsp ground cinnamon (freshly ground preferred for more flavor)
- 1 cup all-purpose flour (I use King Arthur all-purpose flour)
- 1/3 cup sugar (melted chocolate will make dough glossy)
- 1/4 cup canola oil (or any neutral oil)
- 1 tsp baking powder
For coating:
- 1/2 cup powdered sugar (sifted to remove lumps)
Step 1: Melt the Mexican Chocolate and Combine Dry Ingredients
- 3 oz Mexican chocolate
- 1 cup all-purpose flour
- 1/4 cup unsweetened cocoa powder
- 1 tsp ground cinnamon
- 1 tsp baking powder
- 1/2 tsp salt
Start by melting the Mexican chocolate gently—I prefer using a microwave in 20-second intervals, stirring between each pulse, to prevent scorching and preserve the cinnamon and spice notes.
While the chocolate melts, whisk together the flour, cocoa powder, cinnamon, baking powder, and salt in a large bowl.
This pre-mixing ensures the leavening and spices are evenly distributed throughout the dough for consistent flavor in every bite.
Step 2: Build the Wet Base with Oil, Sugar, and Eggs
- 1/4 cup canola oil
- 1/3 cup sugar
- 2 large eggs
- 2 tsp vanilla extract
In a separate bowl, whisk together the canola oil and sugar until the mixture becomes glossy and slightly emulsified—this creates a better texture in the final cookie.
Add the room-temperature eggs one at a time, whisking well after each addition to incorporate air and create a cohesive base.
Stir in the vanilla extract last.
The room-temperature eggs are key here because they blend more smoothly into the oil and sugar, creating a lighter dough.
Step 3: Combine Wet and Dry Ingredients with Melted Chocolate
- melted chocolate from Step 1
- wet ingredient mixture from Step 2
- dry ingredient mixture from Step 1
Pour the warm melted chocolate into the wet ingredient mixture from Step 2 and stir until fully incorporated—the warmth of the chocolate will help it blend seamlessly.
Now gently fold in the dry ingredient mixture from Step 1 using a spatula or wooden spoon, stirring until just combined.
Be careful not to overmix, as this can develop gluten and make the cookies tough rather than tender with a slight crack.
Step 4: Chill the Dough
Cover the dough and refrigerate for at least 1 hour (or up to 24 hours).
This resting time allows the flour to fully hydrate, the flavors to meld, and the dough to firm up enough for easier handling.
Chilling also prevents the cookies from spreading too much during baking, which helps create that signature crinkled texture.
Step 5: Preheat Oven and Prepare Cookie Balls
- chilled dough from Step 4
- 1/2 cup powdered sugar
While the dough chills, preheat your oven to 350°F.
Once the oven is ready and the dough has finished chilling, sift the powdered sugar into a shallow bowl.
Using a tablespoon or small cookie scoop, form 1½-inch dough balls and immediately roll each one in the powdered sugar until fully coated on all sides.
This coating is what creates the beautiful crinkled appearance as the cookies bake and the sugar cracks from the expanding dough.
Step 6: Bake Until Set with Slight Underdone Centers
- powdered sugar-coated dough balls from Step 5
Arrange the powdered sugar-coated dough balls on a parchment-lined baking sheet, spacing them about 2 inches apart.
Bake for 8 to 10 minutes—the cookies are done when the edges are set but the center still looks slightly underbaked.
I like to pull mine out right when the edges look firm but the very center jiggles slightly when you gently shake the pan; they’ll continue cooking on the hot sheet for a minute or two and will set up perfectly as they cool, giving you that tender, fudgy interior with crispy edges.
Step 7: Cool and Serve
Let the cookies cool on the baking sheet for 5 minutes, then transfer them to a wire rack to cool completely.
This brief resting time on the sheet prevents breakage while still allowing heat to escape.
Best Mexican Chocolate Crinkle Cookies
Ingredients
Method
- Start by melting the Mexican chocolate gently—I prefer using a microwave in 20-second intervals, stirring between each pulse, to prevent scorching and preserve the cinnamon and spice notes. While the chocolate melts, whisk together the flour, cocoa powder, cinnamon, baking powder, and salt in a large bowl. This pre-mixing ensures the leavening and spices are evenly distributed throughout the dough for consistent flavor in every bite.
- In a separate bowl, whisk together the canola oil and sugar until the mixture becomes glossy and slightly emulsified—this creates a better texture in the final cookie. Add the room-temperature eggs one at a time, whisking well after each addition to incorporate air and create a cohesive base. Stir in the vanilla extract last. The room-temperature eggs are key here because they blend more smoothly into the oil and sugar, creating a lighter dough.
- Pour the warm melted chocolate into the wet ingredient mixture from Step 2 and stir until fully incorporated—the warmth of the chocolate will help it blend seamlessly. Now gently fold in the dry ingredient mixture from Step 1 using a spatula or wooden spoon, stirring until just combined. Be careful not to overmix, as this can develop gluten and make the cookies tough rather than tender with a slight crack.
- Cover the dough and refrigerate for at least 1 hour (or up to 24 hours). This resting time allows the flour to fully hydrate, the flavors to meld, and the dough to firm up enough for easier handling. Chilling also prevents the cookies from spreading too much during baking, which helps create that signature crinkled texture.
- While the dough chills, preheat your oven to 350°F. Once the oven is ready and the dough has finished chilling, sift the powdered sugar into a shallow bowl. Using a tablespoon or small cookie scoop, form 1½-inch dough balls and immediately roll each one in the powdered sugar until fully coated on all sides. This coating is what creates the beautiful crinkled appearance as the cookies bake and the sugar cracks from the expanding dough.
- Arrange the powdered sugar-coated dough balls on a parchment-lined baking sheet, spacing them about 2 inches apart. Bake for 8 to 10 minutes—the cookies are done when the edges are set but the center still looks slightly underbaked. I like to pull mine out right when the edges look firm but the very center jiggles slightly when you gently shake the pan; they'll continue cooking on the hot sheet for a minute or two and will set up perfectly as they cool, giving you that tender, fudgy interior with crispy edges.
- Let the cookies cool on the baking sheet for 5 minutes, then transfer them to a wire rack to cool completely. This brief resting time on the sheet prevents breakage while still allowing heat to escape.