Finding a cookie that feels special enough for the holidays but won’t eat up your entire weekend in the kitchen can be tough. Traditional linzer cookies are beautiful, sure, but they usually require a whole afternoon of rolling, cutting, and assembling—not exactly ideal when you’ve got a dozen other things on your to-do list.
That’s where these peanut butter and jam linzer cookies come in. They give you all the charm of classic linzers with that iconic cutout window, but the dough is way more forgiving to work with thanks to the peanut butter. Plus, they’re made with ingredients you probably already have in your pantry, and they come together faster than you’d think.
Why You’ll Love These Peanut Butter and Jam Linzer Cookies
- Nostalgic flavor combination – These cookies taste like your favorite childhood PB&J sandwich, but dressed up in a fancy cookie form that’s perfect for sharing with friends and family.
- Make-ahead friendly – You can prepare the dough in advance and keep it in the fridge or freezer, making it easy to bake fresh cookies whenever you need them.
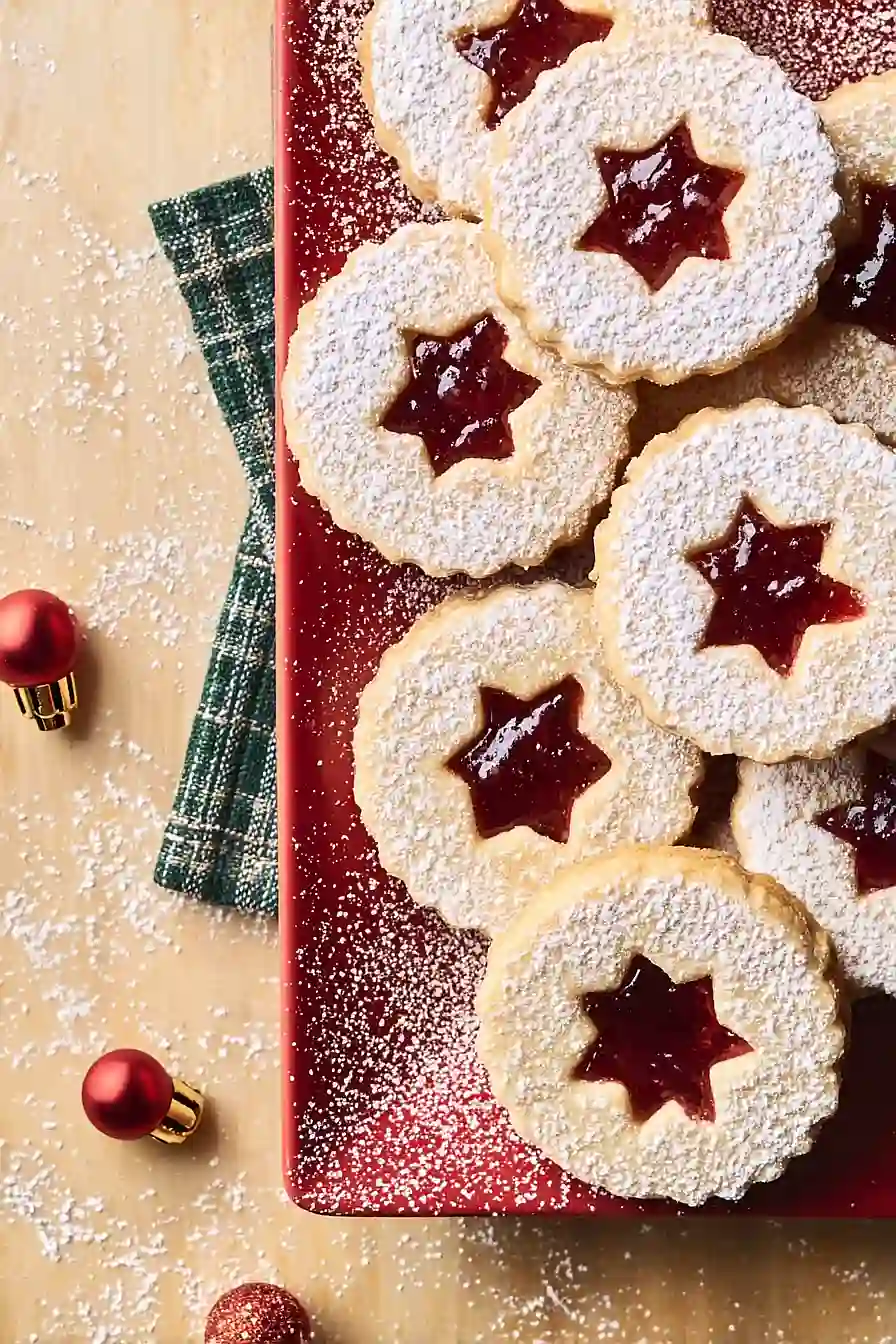
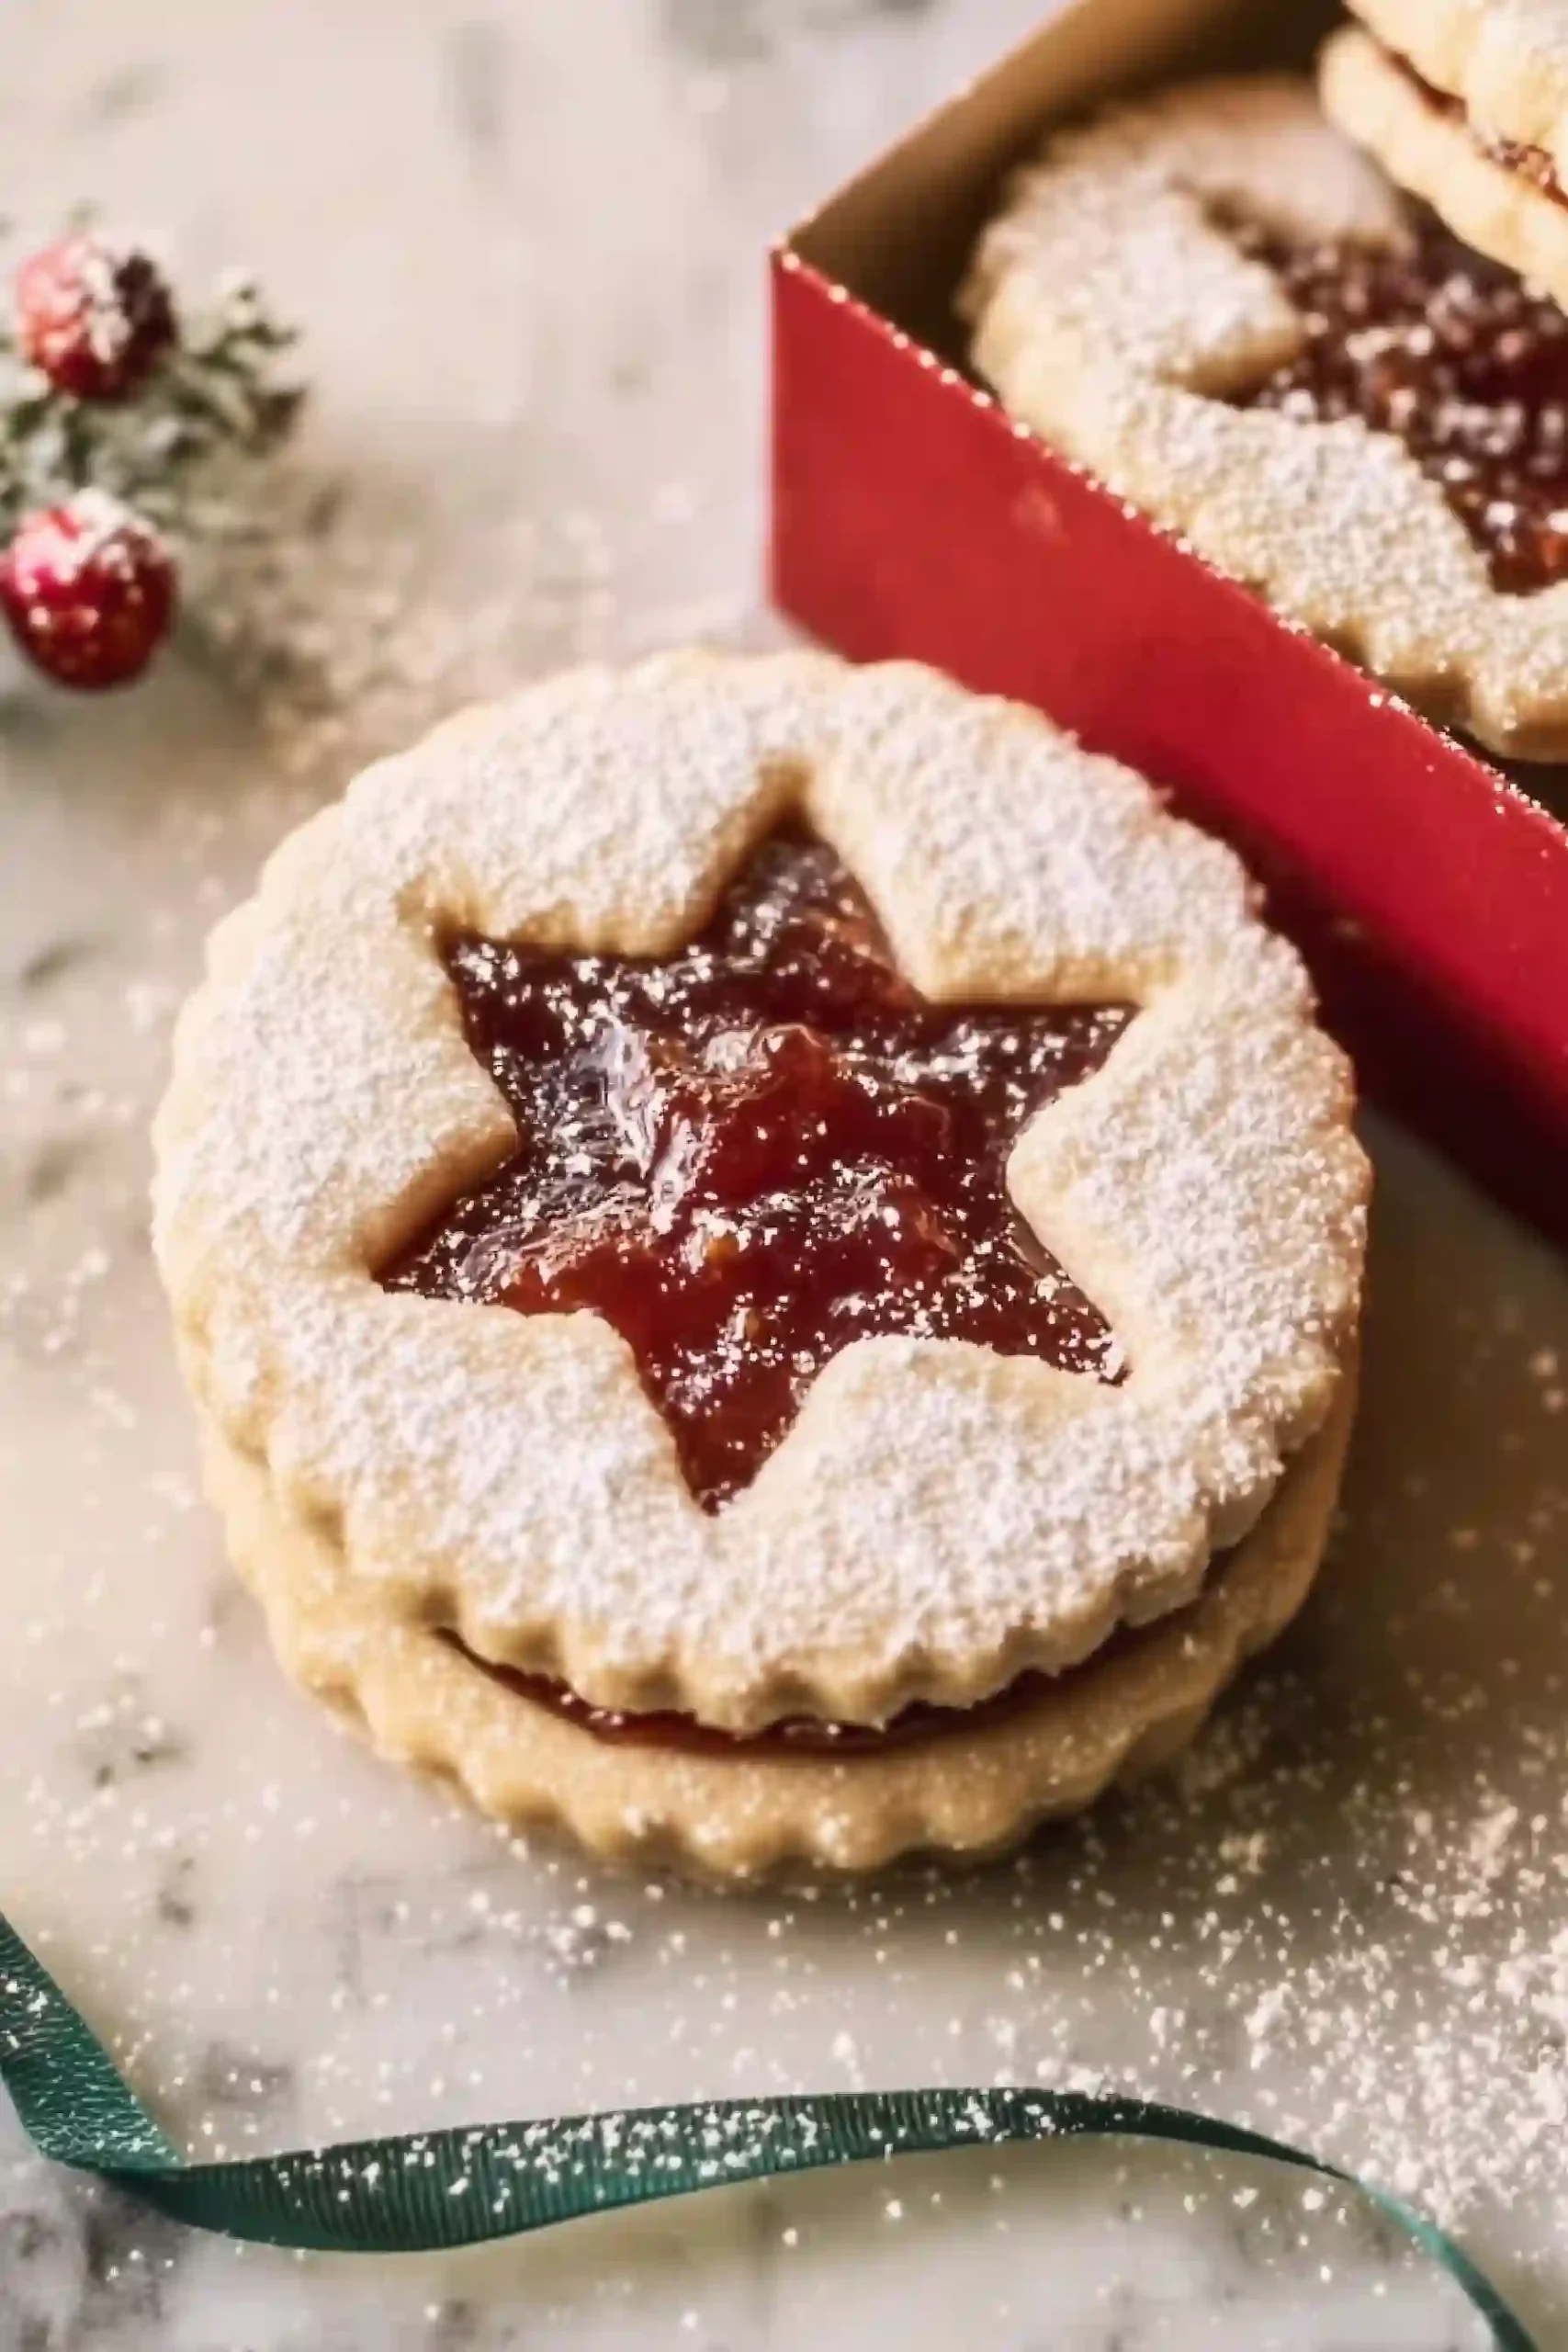
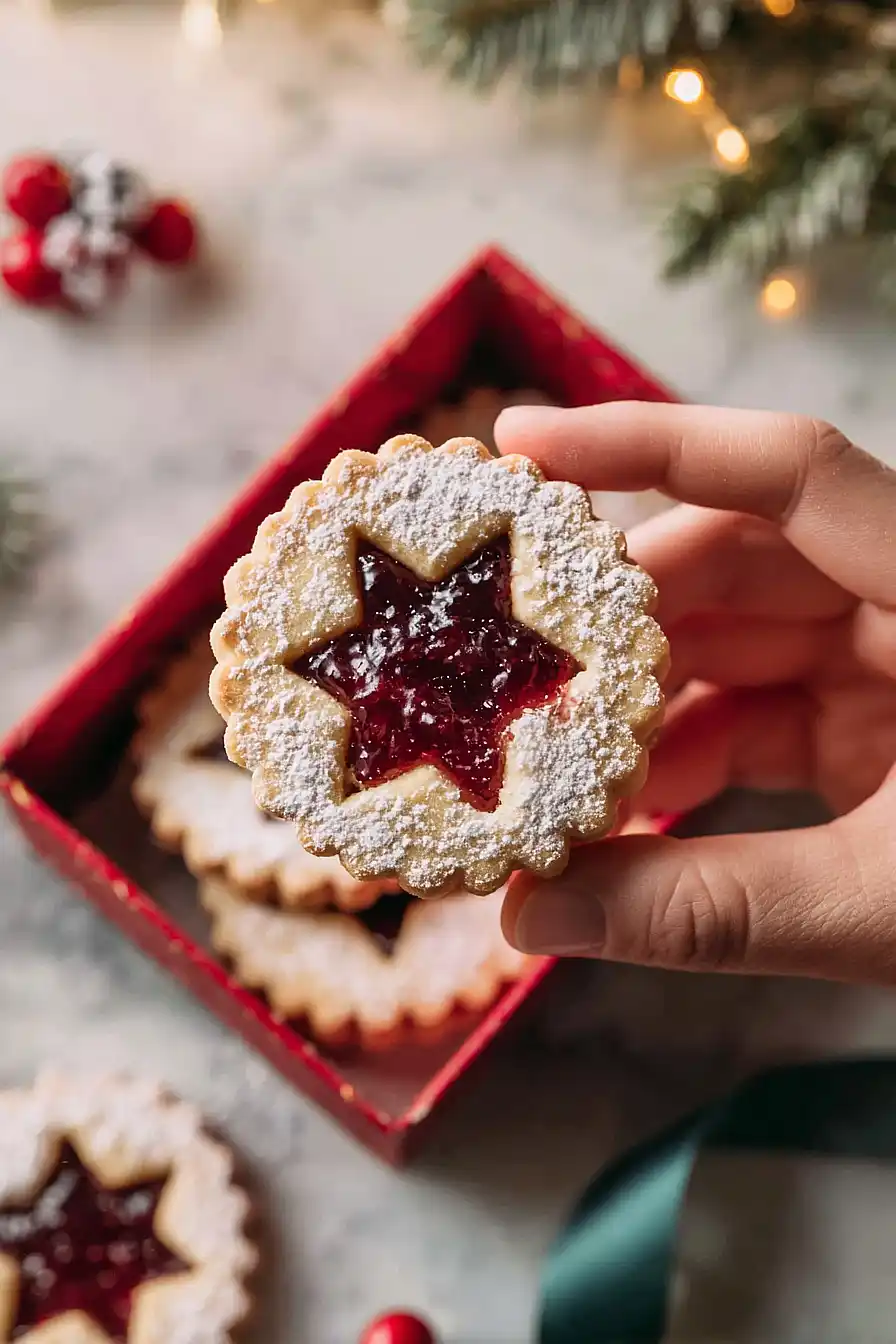
- Beautiful presentation – The cut-out centers showing the jam underneath make these cookies look bakery-worthy, even though they’re simple to make at home.
- Perfect for any occasion – Whether you’re packing them for lunch boxes, serving them at a holiday party, or giving them as gifts, these cookies work for everything.
What Kind of Peanut Butter Should I Use?
For these linzer cookies, you’ll want to stick with creamy peanut butter rather than chunky, since it needs to blend smoothly into the dough. Regular store-brand peanut butter like Jif or Skippy works perfectly here – in fact, it’s actually better than the natural stuff for this recipe. Natural peanut butter tends to be oilier and can make your dough too soft or greasy, which makes it harder to roll out and cut into those pretty shapes. If you only have natural peanut butter on hand, make sure to stir it really well and maybe chill your dough a bit longer before rolling.
Options for Substitutions
These cookies are pretty forgiving when it comes to swapping ingredients:
- Creamy peanut butter: You can use crunchy peanut butter if that’s what you have, though the texture will be slightly different. Almond butter or cashew butter work too, just keep in mind the flavor will change a bit.
- Brown sugar: Regular white granulated sugar works fine here. Your cookies will be a touch less chewy and won’t have that slight molasses flavor, but they’ll still taste great.
- Cream cheese: If you don’t have cream cheese, you can skip it and add an extra 2 tablespoons of butter instead. The texture will be slightly less tender but still delicious.
- Raspberry jam: Any jam or preserves you like will work – strawberry, apricot, grape, or even Nutella if you want to go the chocolate route. Just make sure it’s thick enough that it won’t run out during baking.
- All purpose flour: This is one ingredient you shouldn’t substitute. The recipe needs regular all purpose flour to get the right cookie texture and structure.
Watch Out for These Mistakes While Baking
The biggest mistake with linzer cookies is rolling the dough too thin, which makes them fragile and prone to breaking when you try to sandwich them together – aim for about 1/4 inch thickness so they’re sturdy enough to handle.
Overfilling the cookies with jam is another common error that leads to a sticky mess, so use just about 1/2 teaspoon of jam per cookie and leave a small border around the edges.
Make sure your butter and cream cheese are truly at room temperature before mixing, as cold ingredients won’t cream properly and can result in dense, tough cookies instead of the tender texture you’re looking for.
Finally, let the bottom cookies cool completely before adding the jam – warm cookies will cause the jam to run off the sides and make assembly frustrating.
What to Serve With Peanut Butter and Jam Linzer Cookies?
These cookies are perfect alongside a cold glass of milk or a hot cup of coffee for an afternoon snack. I love setting them out on a platter for holiday gatherings or cookie exchanges since they look fancy but taste like your favorite childhood sandwich. They also pair really well with vanilla ice cream if you want to turn them into a simple dessert, or you can serve them with fresh berries and whipped cream for a tea party vibe. If you’re packing them for a lunchbox or picnic, they travel great and hold up well without getting soggy.
Storage Instructions
Store: These cookies stay fresh in an airtight container at room temperature for about 5 days. Just make sure they’re completely cool before stacking them, and you can put a piece of parchment paper between layers if you want to keep them looking pretty with the powdered sugar on top.
Freeze: You can freeze the baked cookies for up to 3 months in a freezer-safe container with parchment between the layers. If you want to get ahead on prep, you can also freeze the unbaked dough wrapped tightly in plastic wrap for up to 2 months, then thaw it in the fridge overnight before rolling and cutting.
Serve: Let frozen cookies thaw at room temperature for about 30 minutes before serving. If the powdered sugar looks a bit dull after storage, just dust them with a fresh sprinkle right before you put them out. They taste great at room temperature or even slightly chilled from the fridge!
| Preparation Time | 60-75 minutes |
| Cooking Time | 12-14 minutes |
| Total Time | 72-89 minutes |
| Level of Difficulty | Medium |
Estimated Nutrition
Estimated nutrition for the whole recipe (without optional ingredients):
- Calories: 7100-7700
- Protein: 85-95 g
- Fat: 390-420 g
- Carbohydrates: 890-950 g
Ingredients
For the dough:
- 1 tsp baking powder
- 2 cups brown sugar (packed)
- 1 cup creamy peanut butter (I use Skippy or Jif for consistency)
- 6 cups all-purpose flour (I use King Arthur all-purpose flour)
- 1 lb unsalted butter (softened to room temperature, about 70°F)
- 2 eggs (room temperature)
- 4 tbsp cream cheese (softened)
- 1 tbsp vanilla extract (pure vanilla preferred for best flavor)
- 2 tsp kosher salt
For the filling:
- 1 cup raspberry jam (seedless preferred for smoother spreading)
For finishing (optional):
- powdered sugar (for dusting, optional but recommended for presentation)
Step 1: Prepare Mise en Place and Sift Dry Ingredients
- 6 cups all-purpose flour
- 2 tsp kosher salt
- 1 tsp baking powder
Sift together the all-purpose flour, kosher salt, and baking powder in a medium bowl, then set aside.
This removes lumps and aerates the flour for a more tender cookie.
While you’re doing this, remove your butter and eggs from the refrigerator if they aren’t already at room temperature—cold ingredients won’t cream properly and will result in dense cookies.
Step 2: Cream Butter and Sugar
- 1 lb unsalted butter
- 2 cups brown sugar
In a large mixing bowl, beat the softened unsalted butter and packed brown sugar together for 4 minutes on medium-high speed.
You’re looking for a light, fluffy mixture that’s noticeably paler in color—this process incorporates air into the dough, which helps the cookies rise and become tender.
Stop halfway through and scrape down the bowl to ensure everything is evenly combined.
Step 3: Incorporate Peanut Butter, Cream Cheese, Eggs, and Vanilla
- 1 cup creamy peanut butter
- 4 tbsp cream cheese
- 2 eggs
- 1 tbsp vanilla extract
Add the creamy peanut butter and softened cream cheese to the creamed butter and sugar, then beat for 2 minutes until fully combined.
The cream cheese adds richness and a subtle tang that balances the peanut butter beautifully.
Next, add the room-temperature eggs and vanilla extract, beating for 1 minute until the mixture is smooth and homogeneous.
I like to use pure vanilla extract rather than imitation—the flavor difference is worth it in a cookie this simple.
Step 4: Combine Wet and Dry Ingredients
- dry ingredient mixture from Step 1
Add the dry ingredient mixture from Step 1 to the wet mixture in three additions, mixing on low speed after each addition until just combined.
Don’t overmix once you add the flour—this develops gluten and makes cookies tough.
Stop as soon as you don’t see any white streaks of flour remaining.
The dough will be thick and slightly stiff, which is exactly what you want.
Step 5: Chill the Dough
- dough from Step 4
Divide the dough into two equal portions and shape each into a disk about 1 inch thick.
Wrap each disk tightly in plastic wrap and refrigerate for at least 1 hour.
Chilled dough is much easier to roll and cut without spreading, and it helps the cookies maintain their shape during baking.
While the dough chills, preheat your oven to 350°F and line your baking sheets with parchment paper.
Step 6: Roll, Cut, and Bake the Cookies
- chilled dough from Step 5
Working with one disk at a time, roll the chilled dough to ¼ inch thickness on a lightly floured surface.
Cut out cookie shapes using your desired cutter—linzer cookies are traditionally round.
From half of your cut cookies, use a smaller cutter (about 1 inch) to cut out a window in the center of each cookie, then place all cookies on parchment-lined baking sheets.
Bake for 12-14 minutes until the edges are lightly golden but the centers still feel slightly soft—they’ll continue to cook as they cool.
I find the cookies are perfect when the edges are just barely turning brown, as overbaking will make them too crispy.
Step 7: Assemble and Finish
- baked cookies from Step 6
- 1 cup raspberry jam
- powdered sugar
Cool all baked cookies on wire racks until they reach room temperature.
Once cooled, spread about 1 tablespoon of seedless raspberry jam on each whole cookie (the ones without windows).
Top each jam-filled cookie with a windowed cookie, pressing gently so the jam shows through the center cutout.
If desired, lightly dust the finished cookies with powdered sugar for a classic bakery appearance.
These cookies are best served the same day but will keep in an airtight container for up to 3 days.
Simple Peanut Butter and Jam Linzer Cookies
Ingredients
Method
- Sift together the all-purpose flour, kosher salt, and baking powder in a medium bowl, then set aside. This removes lumps and aerates the flour for a more tender cookie. While you're doing this, remove your butter and eggs from the refrigerator if they aren't already at room temperature—cold ingredients won't cream properly and will result in dense cookies.
- In a large mixing bowl, beat the softened unsalted butter and packed brown sugar together for 4 minutes on medium-high speed. You're looking for a light, fluffy mixture that's noticeably paler in color—this process incorporates air into the dough, which helps the cookies rise and become tender. Stop halfway through and scrape down the bowl to ensure everything is evenly combined.
- Add the creamy peanut butter and softened cream cheese to the creamed butter and sugar, then beat for 2 minutes until fully combined. The cream cheese adds richness and a subtle tang that balances the peanut butter beautifully. Next, add the room-temperature eggs and vanilla extract, beating for 1 minute until the mixture is smooth and homogeneous. I like to use pure vanilla extract rather than imitation—the flavor difference is worth it in a cookie this simple.
- Add the dry ingredient mixture from Step 1 to the wet mixture in three additions, mixing on low speed after each addition until just combined. Don't overmix once you add the flour—this develops gluten and makes cookies tough. Stop as soon as you don't see any white streaks of flour remaining. The dough will be thick and slightly stiff, which is exactly what you want.
- Divide the dough into two equal portions and shape each into a disk about 1 inch thick. Wrap each disk tightly in plastic wrap and refrigerate for at least 1 hour. Chilled dough is much easier to roll and cut without spreading, and it helps the cookies maintain their shape during baking. While the dough chills, preheat your oven to 350°F and line your baking sheets with parchment paper.
- Working with one disk at a time, roll the chilled dough to ¼ inch thickness on a lightly floured surface. Cut out cookie shapes using your desired cutter—linzer cookies are traditionally round. From half of your cut cookies, use a smaller cutter (about 1 inch) to cut out a window in the center of each cookie, then place all cookies on parchment-lined baking sheets. Bake for 12-14 minutes until the edges are lightly golden but the centers still feel slightly soft—they'll continue to cook as they cool. I find the cookies are perfect when the edges are just barely turning brown, as overbaking will make them too crispy.
- Cool all baked cookies on wire racks until they reach room temperature. Once cooled, spread about 1 tablespoon of seedless raspberry jam on each whole cookie (the ones without windows). Top each jam-filled cookie with a windowed cookie, pressing gently so the jam shows through the center cutout. If desired, lightly dust the finished cookies with powdered sugar for a classic bakery appearance. These cookies are best served the same day but will keep in an airtight container for up to 3 days.