I used to think making pumpkin pie was way too much work for a weeknight dessert. All that rolling out pie crust and waiting for a whole pie to bake seemed like a weekend project at best.
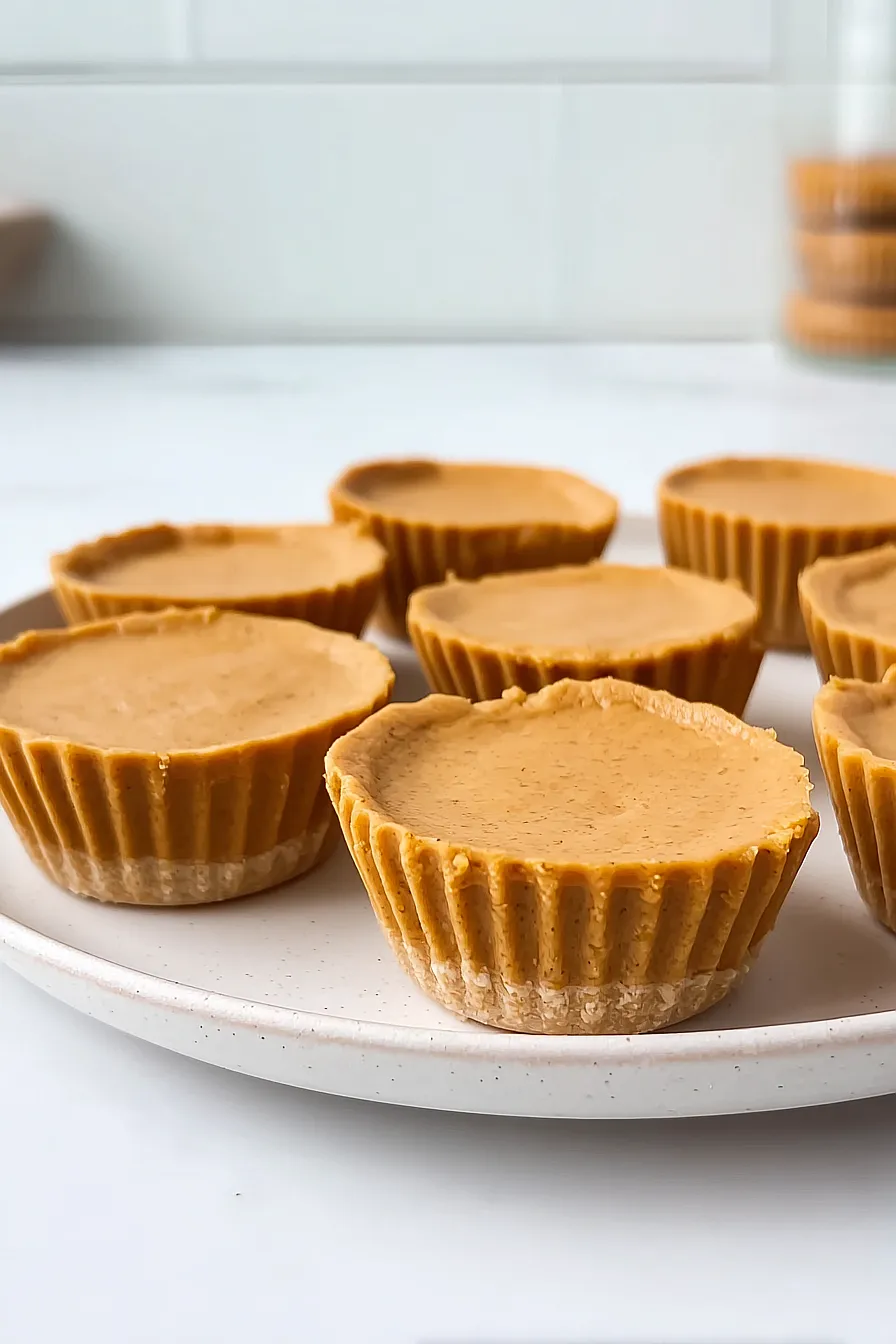
Then I discovered these mini pumpkin pie cups. They use store-bought phyllo cups as the base, so there’s no crust rolling involved. The filling takes about five minutes to mix together, and they bake in just fifteen minutes. Now I can have fresh pumpkin pie on a Tuesday night without the fuss.
Why You’ll Love These Mini Pumpkin Pie Cups
- Naturally gluten-free and dairy-free – Made with almond and coconut flour instead of traditional wheat, these little treats work perfectly for anyone avoiding gluten or dairy without sacrificing that classic pumpkin pie taste.
- Refined sugar-free – Sweetened only with maple syrup, you can enjoy these guilt-free knowing there’s no processed sugar hiding in your dessert.
- Perfect portion control – These individual cups make it easy to enjoy just the right amount of dessert, and they’re so cute for entertaining or bringing to parties.
- Simple, wholesome ingredients – You probably already have most of these pantry staples on hand, and there’s nothing artificial or hard to pronounce in the ingredient list.
- Make-ahead friendly – These cups actually taste better after chilling, so you can prep them a day ahead for stress-free entertaining or meal prep.
What Kind of Pumpkin Puree Should I Use?
For these mini pumpkin pie cups, you’ll want to use plain pumpkin puree, not pumpkin pie filling – there’s a big difference! Plain pumpkin puree is just cooked and mashed pumpkin with no added spices or sweeteners, while pumpkin pie filling already has sugar and spices mixed in. You can find canned pumpkin puree in the baking aisle of most grocery stores, and brands like Libby’s are reliable choices. If you’re feeling ambitious, you can also make your own by roasting a sugar pumpkin and pureeing the flesh, but canned works just as well and saves you time.

Options for Substitutions
This recipe is pretty forgiving when it comes to swaps, which makes it great for different dietary needs:
- Almond flour: You can substitute with oat flour or all-purpose flour if needed. If using regular flour, you might need slightly less since it’s denser than almond flour.
- Coconut flour: This can be tricky to substitute since coconut flour is super absorbent. Try using additional almond flour or oat flour instead, but you may need to add a tablespoon or two more liquid to get the right consistency.
- Cashew butter: Any nut or seed butter works here – almond butter, sunflower seed butter, or even tahini will give you different but delicious flavors.
- Coconut oil: You can swap this with melted butter if you’re not dairy-free, or try avocado oil for a neutral taste. Make sure whatever you use is in liquid form when mixing.
- Maple syrup: Honey works as a 1:1 replacement if you’re not vegan, or try agave nectar. You could also use brown sugar, but start with about 3 tablespoons since it’s sweeter.
- Pumpkin pie spice: No pumpkin pie spice? Mix together 1 tsp cinnamon, 1/2 tsp ginger, 1/4 tsp nutmeg, and a pinch of cloves.
Watch Out for These Mistakes While Baking
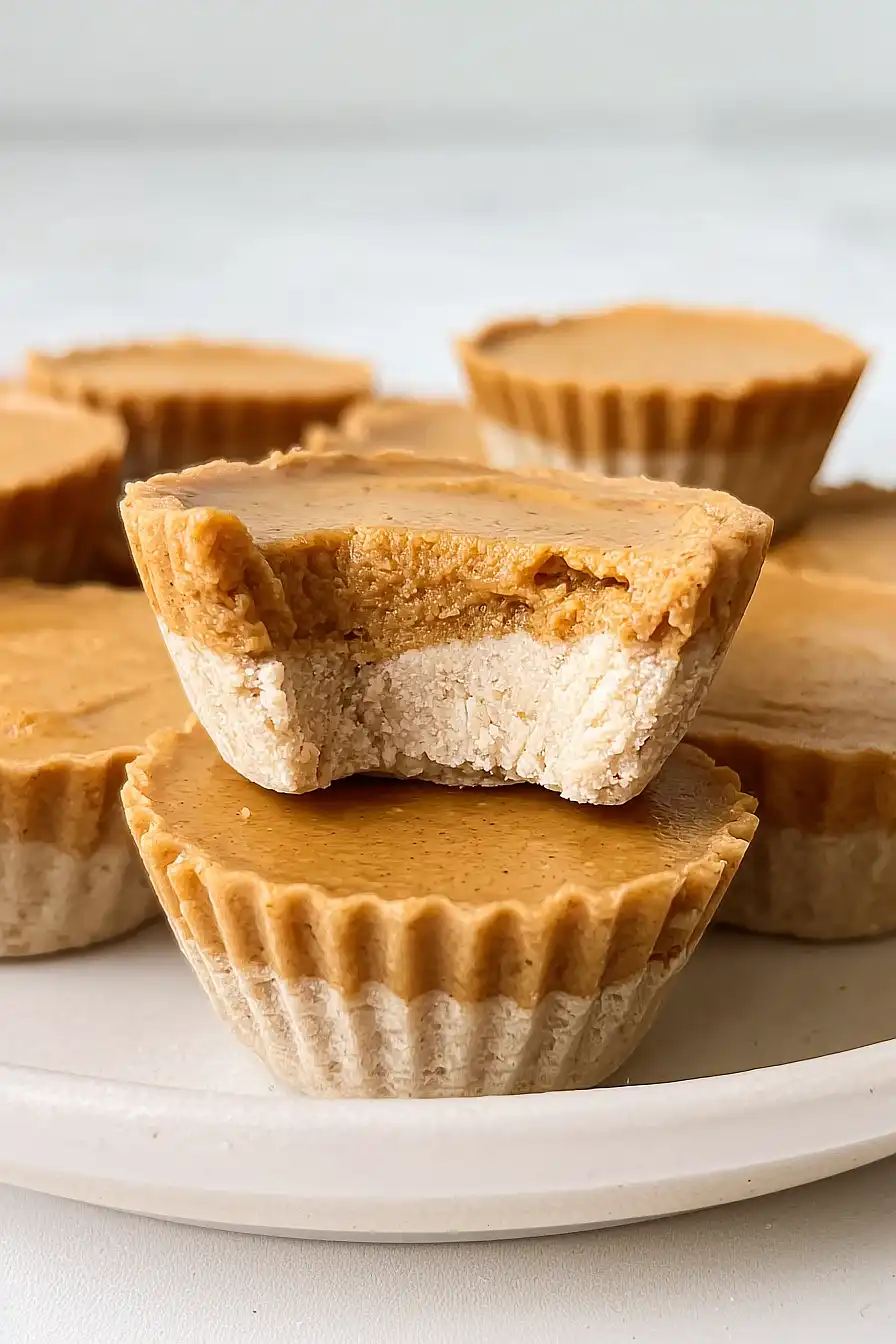
The biggest mistake with mini pumpkin pie cups is not pressing the crust mixture firmly enough into your muffin tins, which leads to crumbly crusts that fall apart when you try to remove them – use the back of a spoon or your fingers to really pack it down.
Another common error is using coconut oil that’s too hot when mixing the filling, as this can cause the cashew butter to seize up and create a grainy texture instead of smooth and creamy.
Make sure your coconut oil is just melted and slightly warm, not hot, and always let the cups chill in the refrigerator for at least 2 hours before serving so they hold their shape properly.
If you’re having trouble getting them out of the muffin tin, try lining each cup with parchment paper or using silicone molds for easier removal.
What to Serve With Mini Pumpkin Pie Cups?
These little pumpkin pie cups are perfect on their own, but they’re even better with a dollop of whipped coconut cream or a drizzle of extra maple syrup on top. Since they’re made with wholesome ingredients like almond flour and cashew butter, they pair nicely with a warm cup of spiced chai tea or coffee for an afternoon treat. You could also serve them alongside other fall desserts at a dinner party, or pack them up as a sweet snack for picnics and potlucks. For an extra special touch, try sprinkling some toasted pumpkin seeds or a pinch of cinnamon on top before serving.
Storage Instructions
Refrigerate: These little pumpkin pie cups need to stay chilled to keep their perfect texture. Store them in an airtight container in the fridge for up to 5 days. I actually think they taste even better after sitting overnight because all the flavors have time to meld together!
Freeze: Want to make these ahead for a party or just have some ready when a craving hits? These freeze wonderfully for up to 3 months. Just wrap each cup individually or place them in a freezer-safe container with parchment paper between layers.
Serve: Let frozen cups thaw in the fridge for about 2-3 hours before serving, or leave them out at room temperature for 30-45 minutes if you’re in a hurry. They’re actually delicious served slightly chilled, so don’t worry about getting them to room temperature if you prefer that cool, creamy texture.
| Preparation Time | 15-20 minutes |
| Cooking Time | 12-15 minutes |
| Total Time | 2 hours 27-35 minutes |
| Level of Difficulty | Easy |
Estimated Nutrition
Estimated nutrition for the whole recipe (without optional ingredients):
- Calories: 1400-1550
- Protein: 18-22 g
- Fat: 110-122 g
- Carbohydrates: 88-98 g
Ingredients
For the crust:
- 1/2 cup almond meal
- 1/4 cup coconut flour
- 3 tbsp melted coconut oil
- 2 tbsp maple syrup
For the pumpkin layer:
- 1/2 cup creamy cashew butter or other nut/seed butter
- 1/2 cup coconut oil
- 1/3 cup canned pumpkin puree
- 1/4 cup maple syrup
- 1 tsp pure vanilla extract
- 2 tsp pumpkin pie spice blend
- 1/4 tsp fine sea salt
Step 1: Prepare and Bake the Crust
- 1/2 cup almond meal
- 1/4 cup coconut flour
- 3 tbsp melted coconut oil
- 2 tbsp maple syrup
Preheat your oven to 350°F (177°C).
Line a cupcake tin with liners and set aside.
In a small bowl, combine the almond meal, coconut flour, melted coconut oil, and maple syrup (measured as 2 tablespoons).
Mix thoroughly to form a crumbly dough.
Scoop out about 1 tablespoon of the mixture for each cupcake liner, roll into balls, and press each one into the bottom of a liner to form a crust.
Bake the crusts for 12 minutes, or until the edges begin to brown lightly.
Let the crusts cool completely before proceeding.
I always make sure the crust is fully cooled so it doesn’t melt the pumpkin layer when added later.
Step 2: Make the Pumpkin Layer
- 1/2 cup creamy cashew butter or other nut/seed butter
- 1/2 cup coconut oil
- 1/3 cup canned pumpkin puree
- 1/4 cup maple syrup
- 1 tsp pure vanilla extract
- 2 tsp pumpkin pie spice blend
- 1/4 tsp fine sea salt
In a separate bowl, add the cashew butter, coconut oil, canned pumpkin puree, maple syrup (measured as 1/4 cup), pure vanilla extract, pumpkin pie spice, and fine sea salt.
Microwave the mixture for 15-30 seconds or use a stovetop to gently warm until the coconut oil has melted.
Stir thoroughly until everything is fully combined and smooth.
Step 3: Assemble and Freeze the Pumpkin Cups
- pumpkin mixture from Step 2
- baked crusts from Step 1
Pour the prepared pumpkin mixture (from Step 2) evenly over the cooled crusts (from Step 1) in each cupcake liner.
Transfer the tray to the freezer and let the pumpkin cups set for at least two hours, or until firm.
For extra indulgence, I sometimes sprinkle a bit more pumpkin spice on top before freezing.
Step 4: Top and Serve
Once the pumpkin cups are set, remove them from the freezer.
Optionally, top each with a dollop of whipped cream just before serving.
Let them soften at room temperature for a few minutes for the best texture.
Enjoy!
Gluten-Free Mini Pumpkin Pie Cups
Ingredients
Method
- Preheat your oven to 350°F (177°C). Line a cupcake tin with liners and set aside. In a small bowl, combine the almond meal, coconut flour, melted coconut oil, and maple syrup (measured as 2 tablespoons). Mix thoroughly to form a crumbly dough. Scoop out about 1 tablespoon of the mixture for each cupcake liner, roll into balls, and press each one into the bottom of a liner to form a crust. Bake the crusts for 12 minutes, or until the edges begin to brown lightly. Let the crusts cool completely before proceeding. I always make sure the crust is fully cooled so it doesn't melt the pumpkin layer when added later.
- In a separate bowl, add the cashew butter, coconut oil, canned pumpkin puree, maple syrup (measured as 1/4 cup), pure vanilla extract, pumpkin pie spice, and fine sea salt. Microwave the mixture for 15-30 seconds or use a stovetop to gently warm until the coconut oil has melted. Stir thoroughly until everything is fully combined and smooth.
- Pour the prepared pumpkin mixture (from Step 2) evenly over the cooled crusts (from Step 1) in each cupcake liner. Transfer the tray to the freezer and let the pumpkin cups set for at least two hours, or until firm. For extra indulgence, I sometimes sprinkle a bit more pumpkin spice on top before freezing.
- Once the pumpkin cups are set, remove them from the freezer. Optionally, top each with a dollop of whipped cream just before serving. Let them soften at room temperature for a few minutes for the best texture. Enjoy!